Purchase: Orders: Request for Quotations
Purpose
The purpose of this documentation is to review the Requests for Quotation (RFQ) workflow in the Purchase application of Odoo 15.
Process
To get started, navigate to the Purchase application
Request for Quotation (RFQ)
An RFQ is a draft form of a purchase order that has not yet been confirmed or sent to the vendor(s). While in the draft stage, it is possible to change the vendor you would like to purchase from, add or delete products, adjust quantities, and change the destination warehouse.
You can view the list of RFQs by clicking Orders > Requests for quotation. This is also the default view of the Purchase app upon opening.
Some RFQs are generated automatically by the scheduler, based on your reordering rules per product. Odoo will compare the product’s Quantity on Hand against the Minimum Quantity on Reordering Rules to create an RFQ based on the difference (if the product uses the Buy route). Automatically-generated RFQs from reordering rules will reflect the quantity you need to purchase to fulfill outbound transfers for this product that are waiting for availability and bring you back up to your Maximum Quantity.
Creating a Request for Quotation
To make a new RFQ manually, click Create.
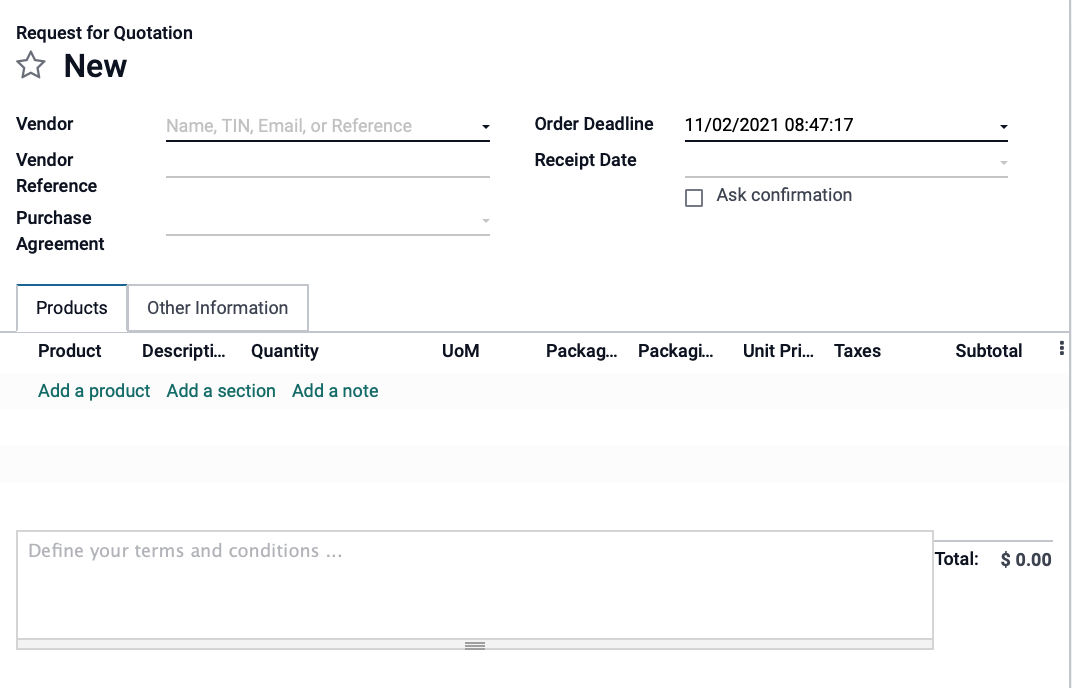
You'll then be presented with options for your New RFQ:
Vendor: Enter the vendor you wish to purchase from.
Vendor Reference: Reference the sales number or bid sent by the vendor. This field is optional and is used to match purchase orders with the corresponding delivery.
Purchase Agreement: If this RFQ is part of a Purchase Agreement, select that agreement here.
Order Deadline: Select the date that the Quotation should be confirmed or converted into a Purchase Order.
Receipt Date: Enter the preferred delivery date that should be promised by the vendor. This date is used to determine the exact date of arrival for products on the order.
Ask Confirmation: Automatically sends a confirmation email to the vendor X days before the expected receipt date, asking them to confirm the exact date.
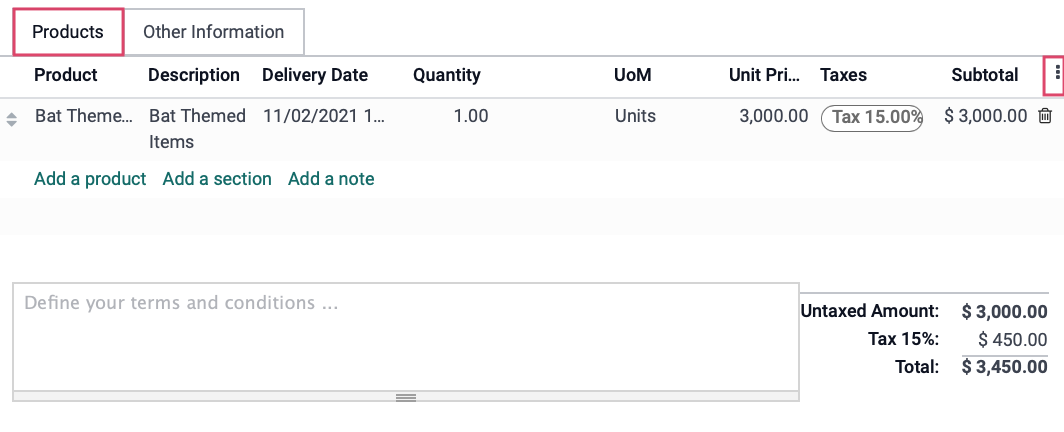
Under the Products tab:
Product: Click Add a Product to add all the products you wish to receive a quotation for. If the product you select has variants, you'll see a modal window prompting you to add quantities per configuration.
Description: This field will auto-populate based on the product you've selected.
Delivery Date: This is the expected date that the product will be delivered. It is determined using the information from the Order Deadline and Receipt Date fields above.
Quantity: Enter the quantity you'd like a quotation for.
UoM (Unit of Measure): This field will auto-populate based on the product you've selected.
Unit Price: Enter the price you'd like to pay for this product. You can also leave this blank if you're unsure. The field is blank by default unless you've purchased this product from this vendor in the past.
Taxes: This field will auto-populate with the applicable taxes for the product, adjusting for Fiscal Positions if set.
Subtotal: This field will auto-calculate.
Note: You can select other fields to display on this line by clicking the vertical ellipsis on the right.
Good to Know!
Different Vendor than Usual? Check the Price!
You can purchase products from any vendor even if the vendor has not been set up on the product. However, if they have not been set up as a vendor for the product, the Unit Price will be set to the product Cost and will need to be entered manually.
Other Information Tab
Purchase Representative: Select the contact responsible for this purchase.
Deliver To: Determines the operation type of incoming shipment.
Source Document: Reference to the document that generated this RFQ, like a Sales Order number.
Incoterm: Select these terms only for international transactions.
Payment Terms: Enter the payment terms for this RFQ. This field will auto-populate based on the Vendor's existing payment terms on their contact in Odoo.
Fiscal Position: Enter the Fiscal Position for this RFQ, if applicable.

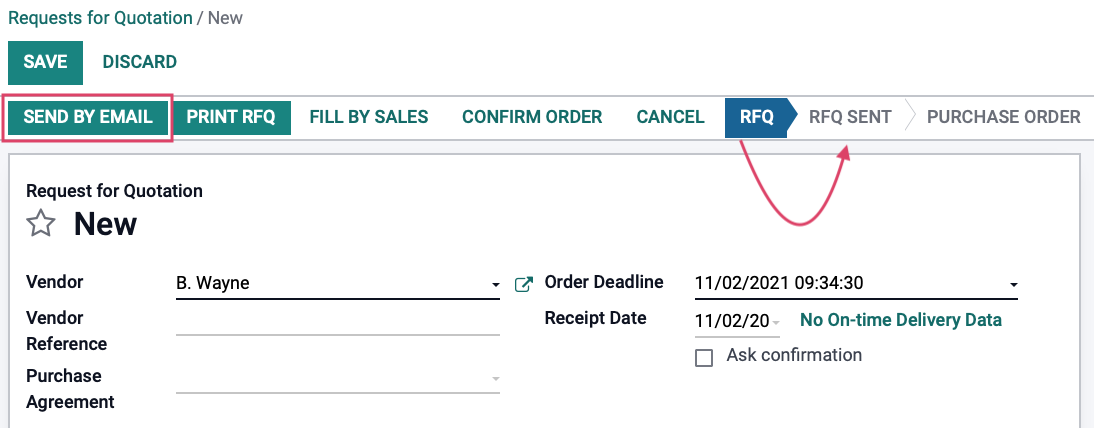
Once the products are added, you can adjust the quantities and prices as needed. If your information is complete, click Save. Then, when you're ready to send this to the vendor, click SEND BY EMAIL. This moves your RFQ to the next stage of RFQ Sent.
After you've received the quote from the vendor, you can choose to accept and CONFIRM ORDER, or decline it and click Cancel.
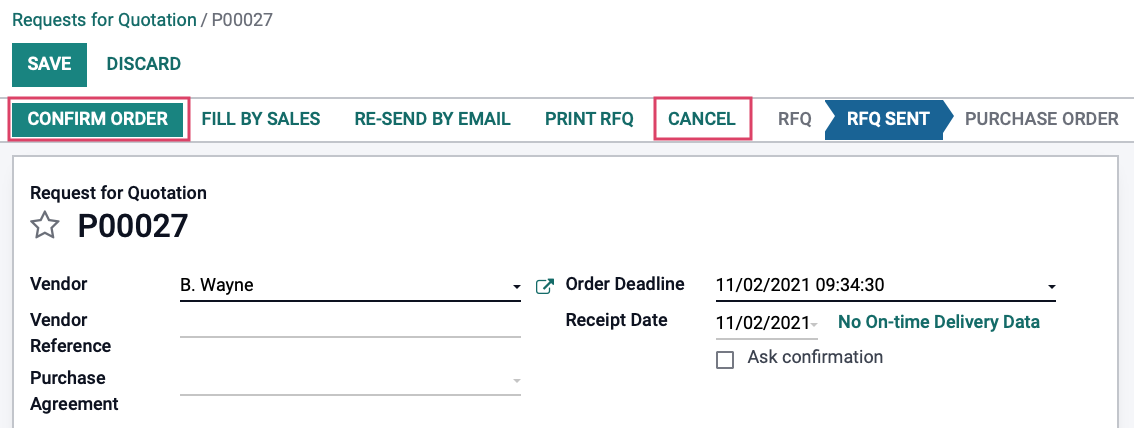
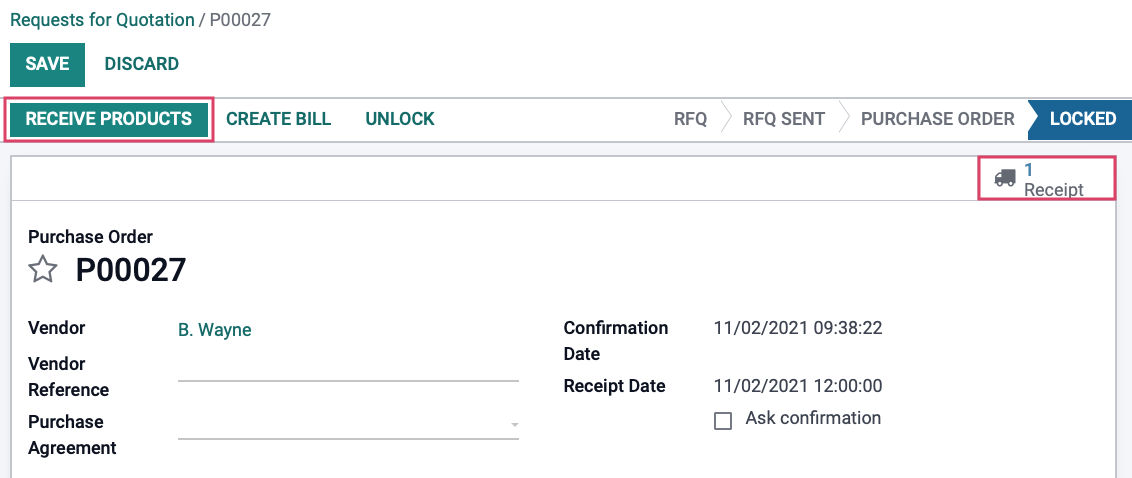
Confirming the RFQ turns it into a Purchase Order. Here you will see the Receipts smart button appear in the top right. When you receive the products in this order, click Receipts, or Receive Products to validate that the products have been received by your company. See the Receiving Products documentation to continue this workflow.
