Website + eCommerce: Configuration: Pages
Purpose
This document covers the Pages submenu within the Configuration menu of the Websites application in Odoo 15. This menu is where you'll create and manage the pages of your website.
Process
To get started, navigate to the Website app.

Once there, go to Configuration > Pages. This brings you to a list of all existing website pages.

To add a new page, click Create.
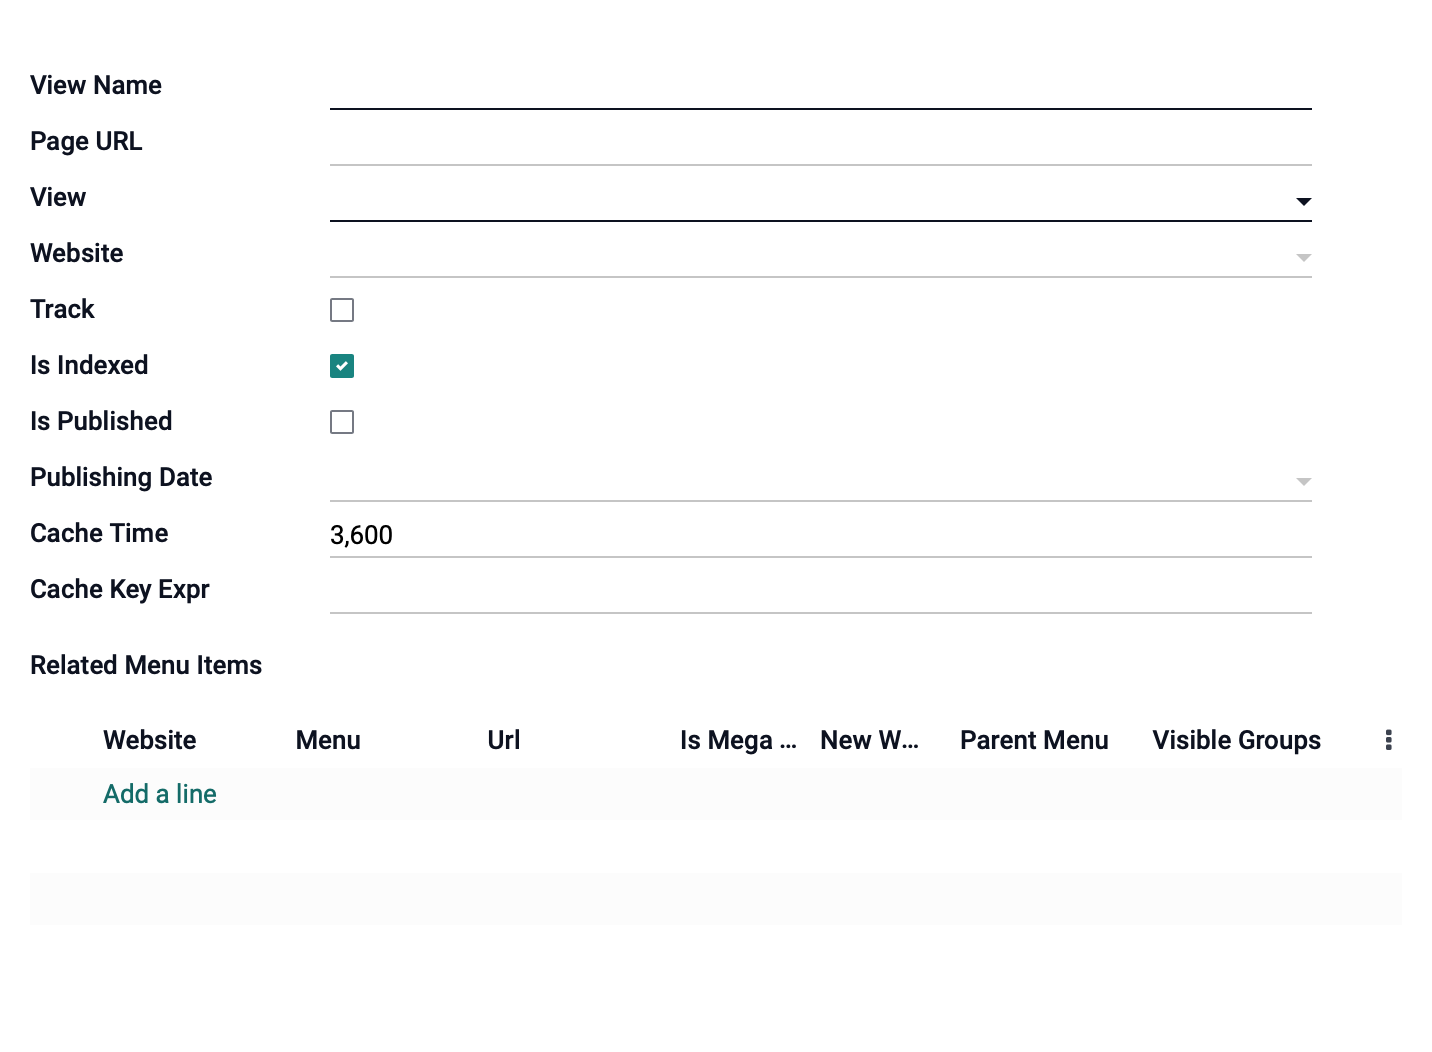
View Name: Enter the name of your page.
Page URL: Enter a unique URL for your page. It's good practice to separate words by a dash and keep everything in lowercase. It should be preceded by a forward slash (/).
View: Select or create the view to associate with this page. If you select an existing view, the View Name will be automatically updated to match.
Website: Select the website in which to display this page.
Track: If selected, this page can be tracked.
Is Indexed: If selected, this page can be indexed.
Is Published: If selected, this page will be published and visible to your website visitors.
Publishing Date: If desired, enter a publishing date.

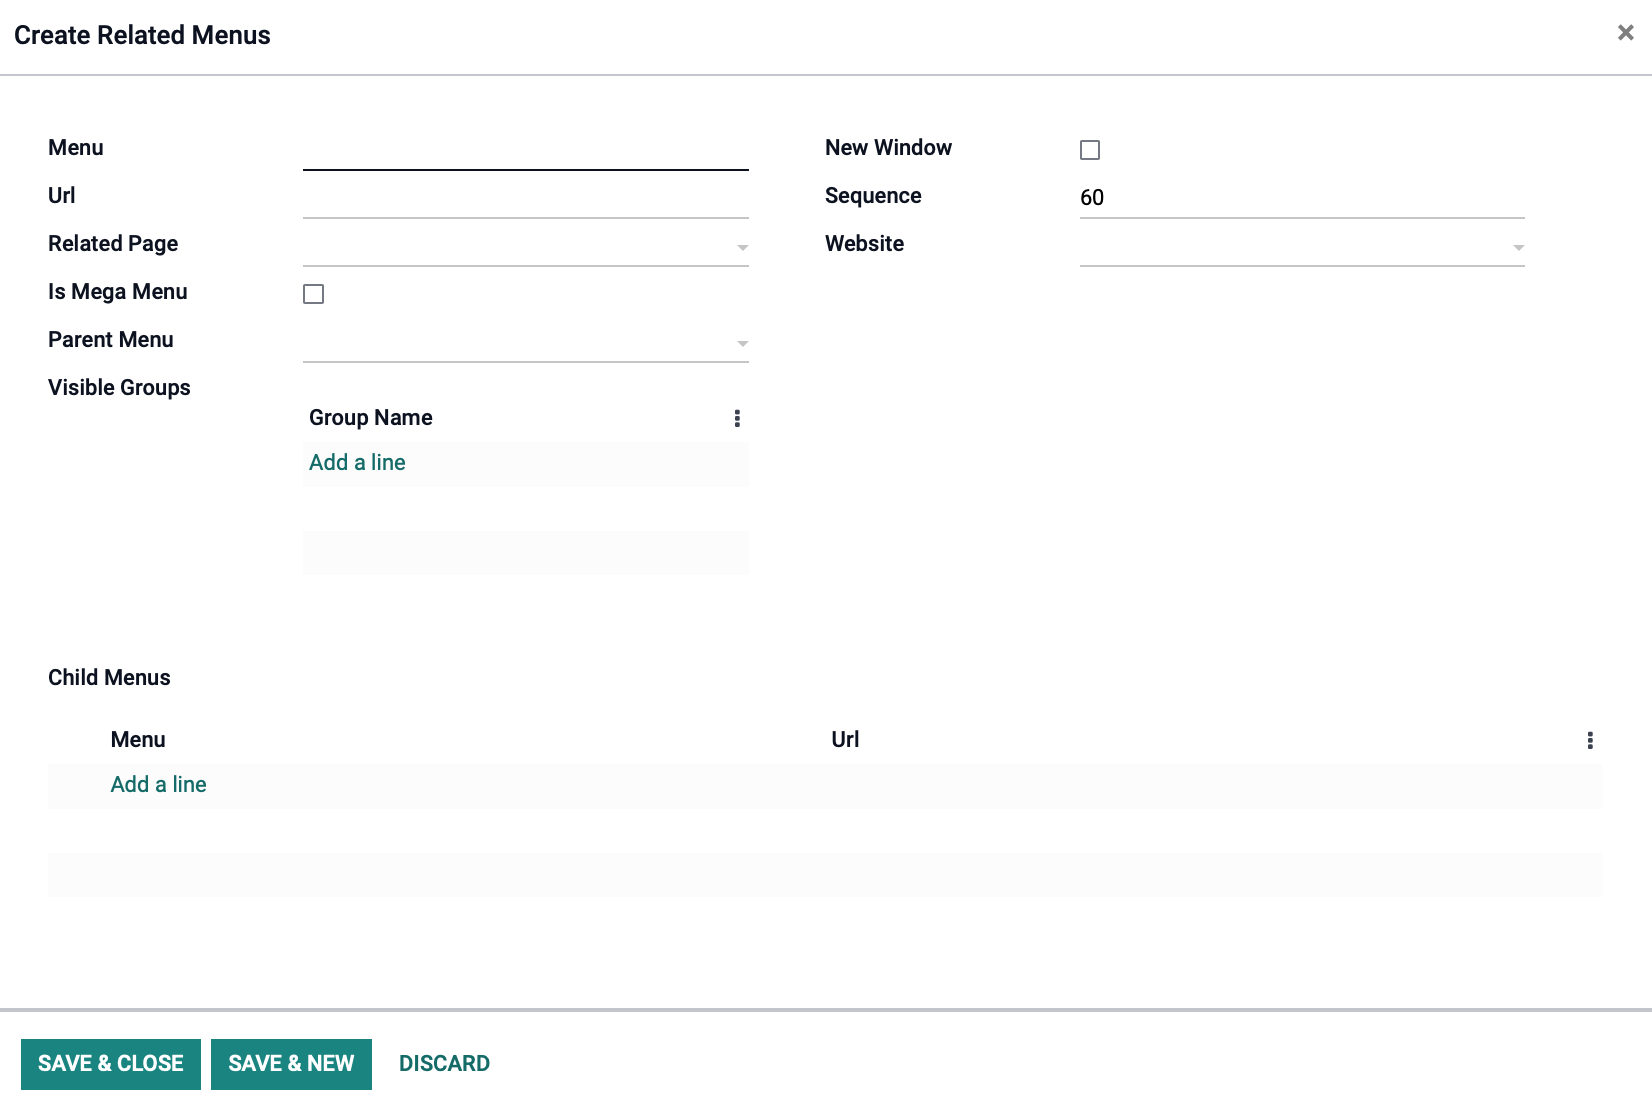
Related Menu Items: This section allows you to directly add this page to one or more front-end menu(s). Click ADD A LINE to create a new link.
Menu: Select the menu to which this new page will be added.
URL: Enter the custom URL for this page (https://yoursite.com/this-is-the-url) if it differs from the Page URL, above.
Related Pages: Enter any related pages to this menu.
Is Mega Menu: Select if this should unfold into a mega-menu when clicked.
New Window: To open this new link in a new window, select this option.
Sequence: Enter the sequence you would like this to appear.
Website: Select the website of the menu where this new page will be displayed.
Parent Menu: If this is a child item of another menu, select its parent here.
Visible Groups: To only allow certain groups to see this menu item, select those here.

When you're ready, click Save & Close. Once back to the Pages form, click Save again.