Website + eCommerce: Website: Front End Menu: Pages
Purpose
This document covers how to set up your main menu items and create a mega menu in the Website application of Odoo 15. This also covers how and where you can manage your pages.
Process
To get started, navigate to the Website app.
From here, click Go To Website from the dashboard.

Edit Your Menu Options
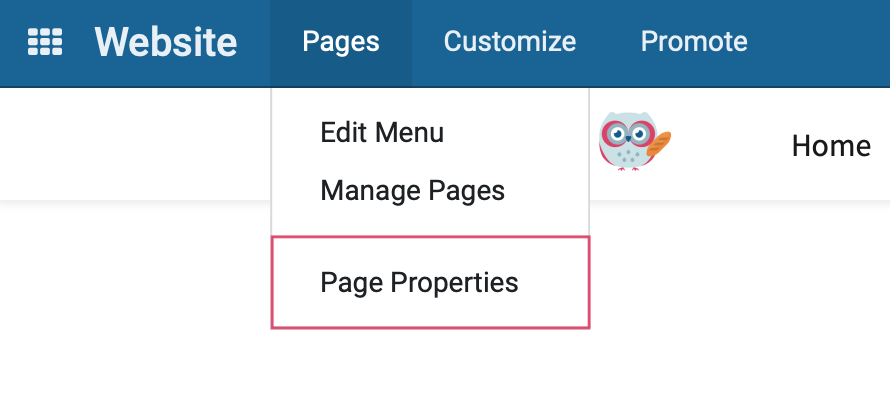
This will take you to the frontend of the website where we will see the menu options available to you. Click on Pages > Edit Menu.
You can organize your menus by clicking the icon and dragging it up or down to change the order of your menu items.
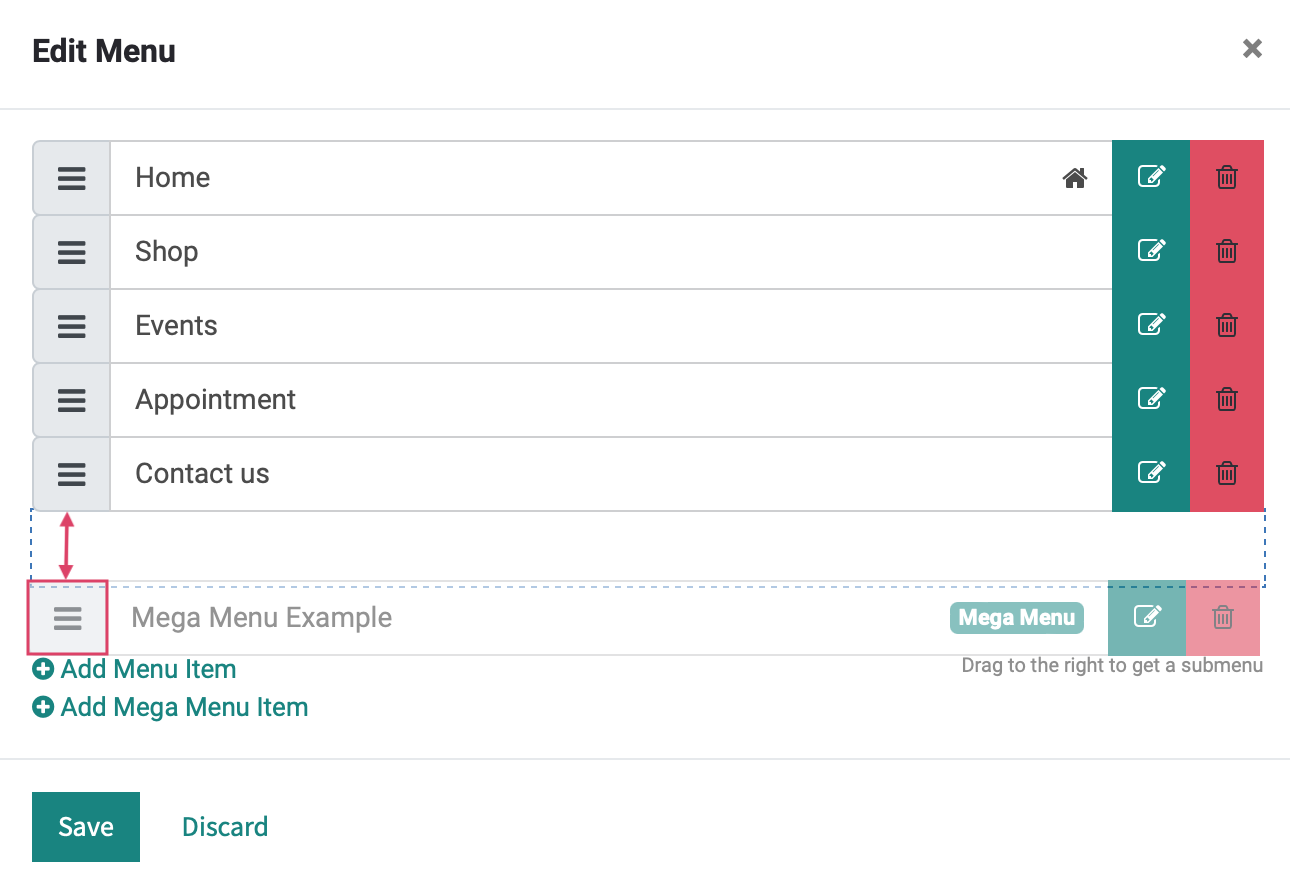
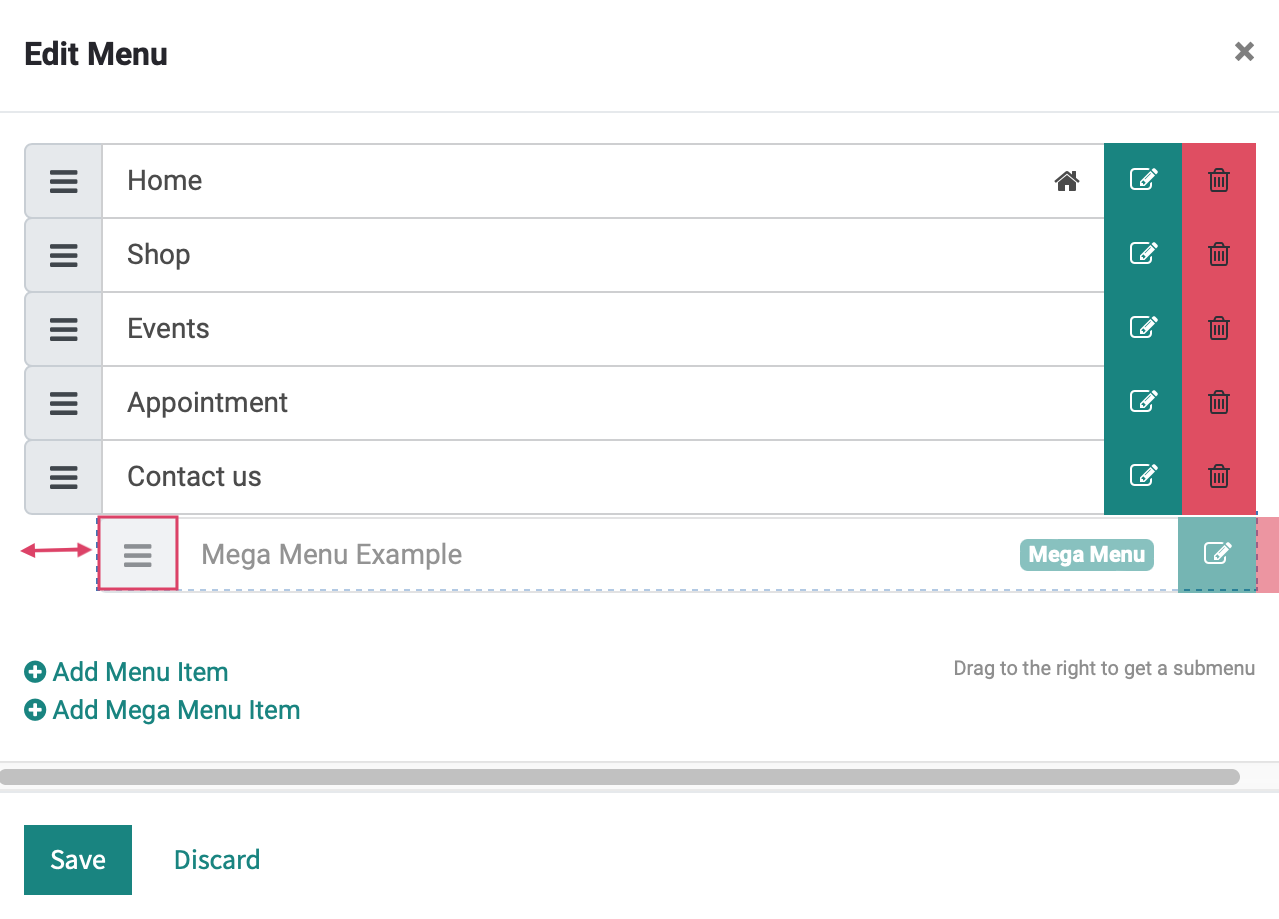
You can also nest a menu under another menu by dragging the icon to the right of the main item of your choice. To make it a main menu again, drag the icon to the left. You can also (edit) or (delete) these menu items as needed.
Add a Menu Item
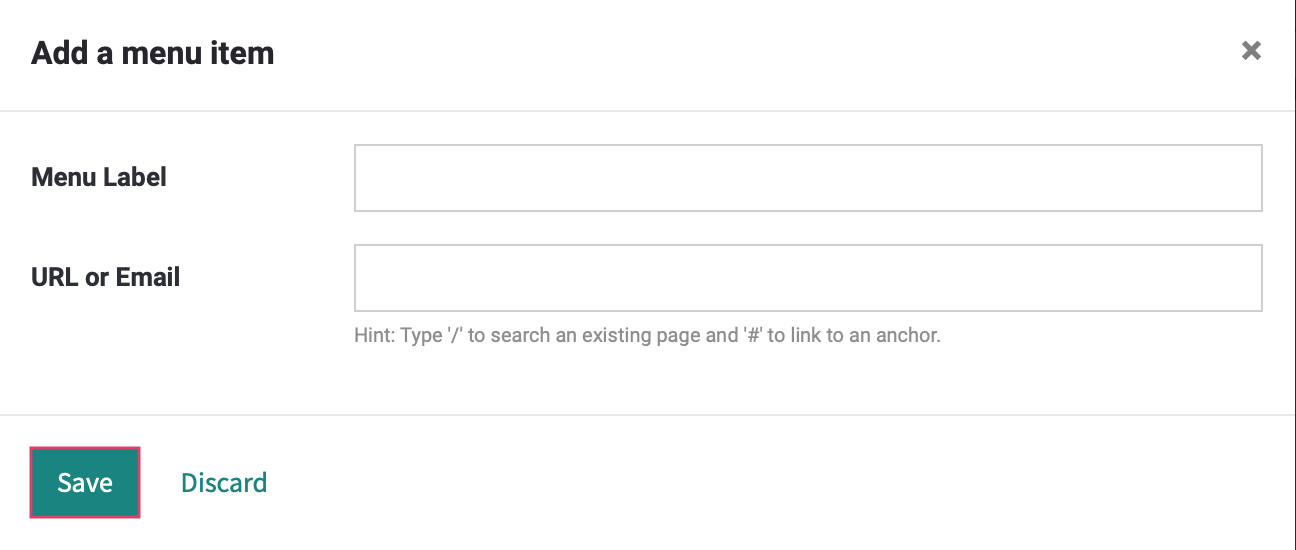
Click Add Menu Item to open the following modal window.
Menu Label: Enter the customer-facing menu item name.
URL or Email: Enter either a URL (website address) or email address that this menu item will open when clicked. This field will allow you to search for an existing page and/or anchor.
Click Save when finished, the main Edit Menu will refresh to show you your recently added menu item.
Add a Mega Menu Item
Select Add Mega Menu ItEm . This will open another modal window where you will fill in the Menu Label field. Select Save.

Click Save again on the Edit Menu modal.
To edit the contents of the Mega Menu, close out of all modal windows, then click Edit on the top-right of the page.

This opens the entire page in an editing view.
First, open the mega menu to expand it. To edit the Mega menu titles and sub menus, you need to click on the them. This will give you the ability to edit the names. To move the order of the menus using the or arrows or the grid button to move it manually. You can also delete the sections by using the (delete) button.
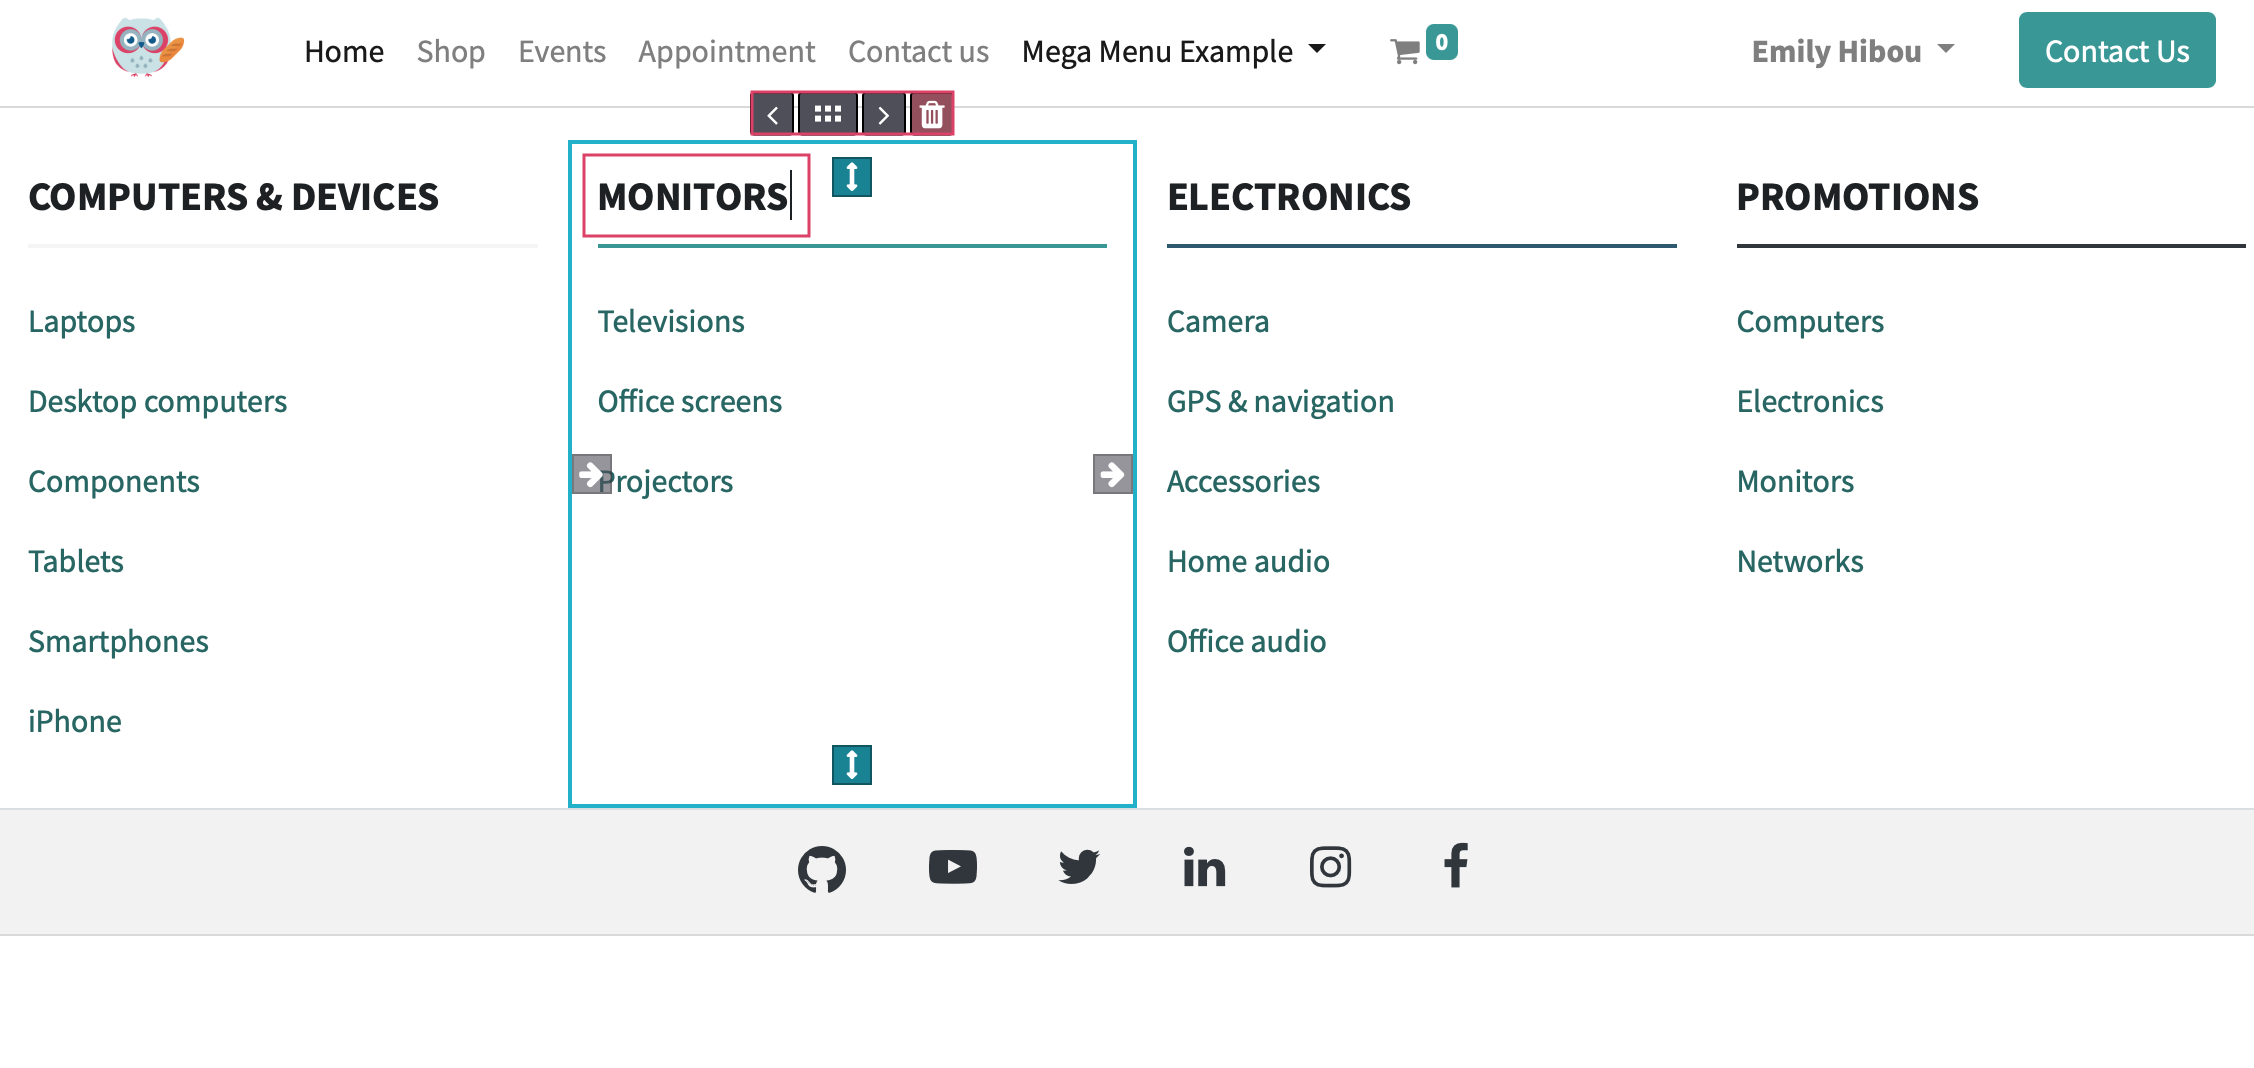
Now we need to link your menu item title to your page. First, highlight the title and click the link button on the right of your screen towards the bottom.
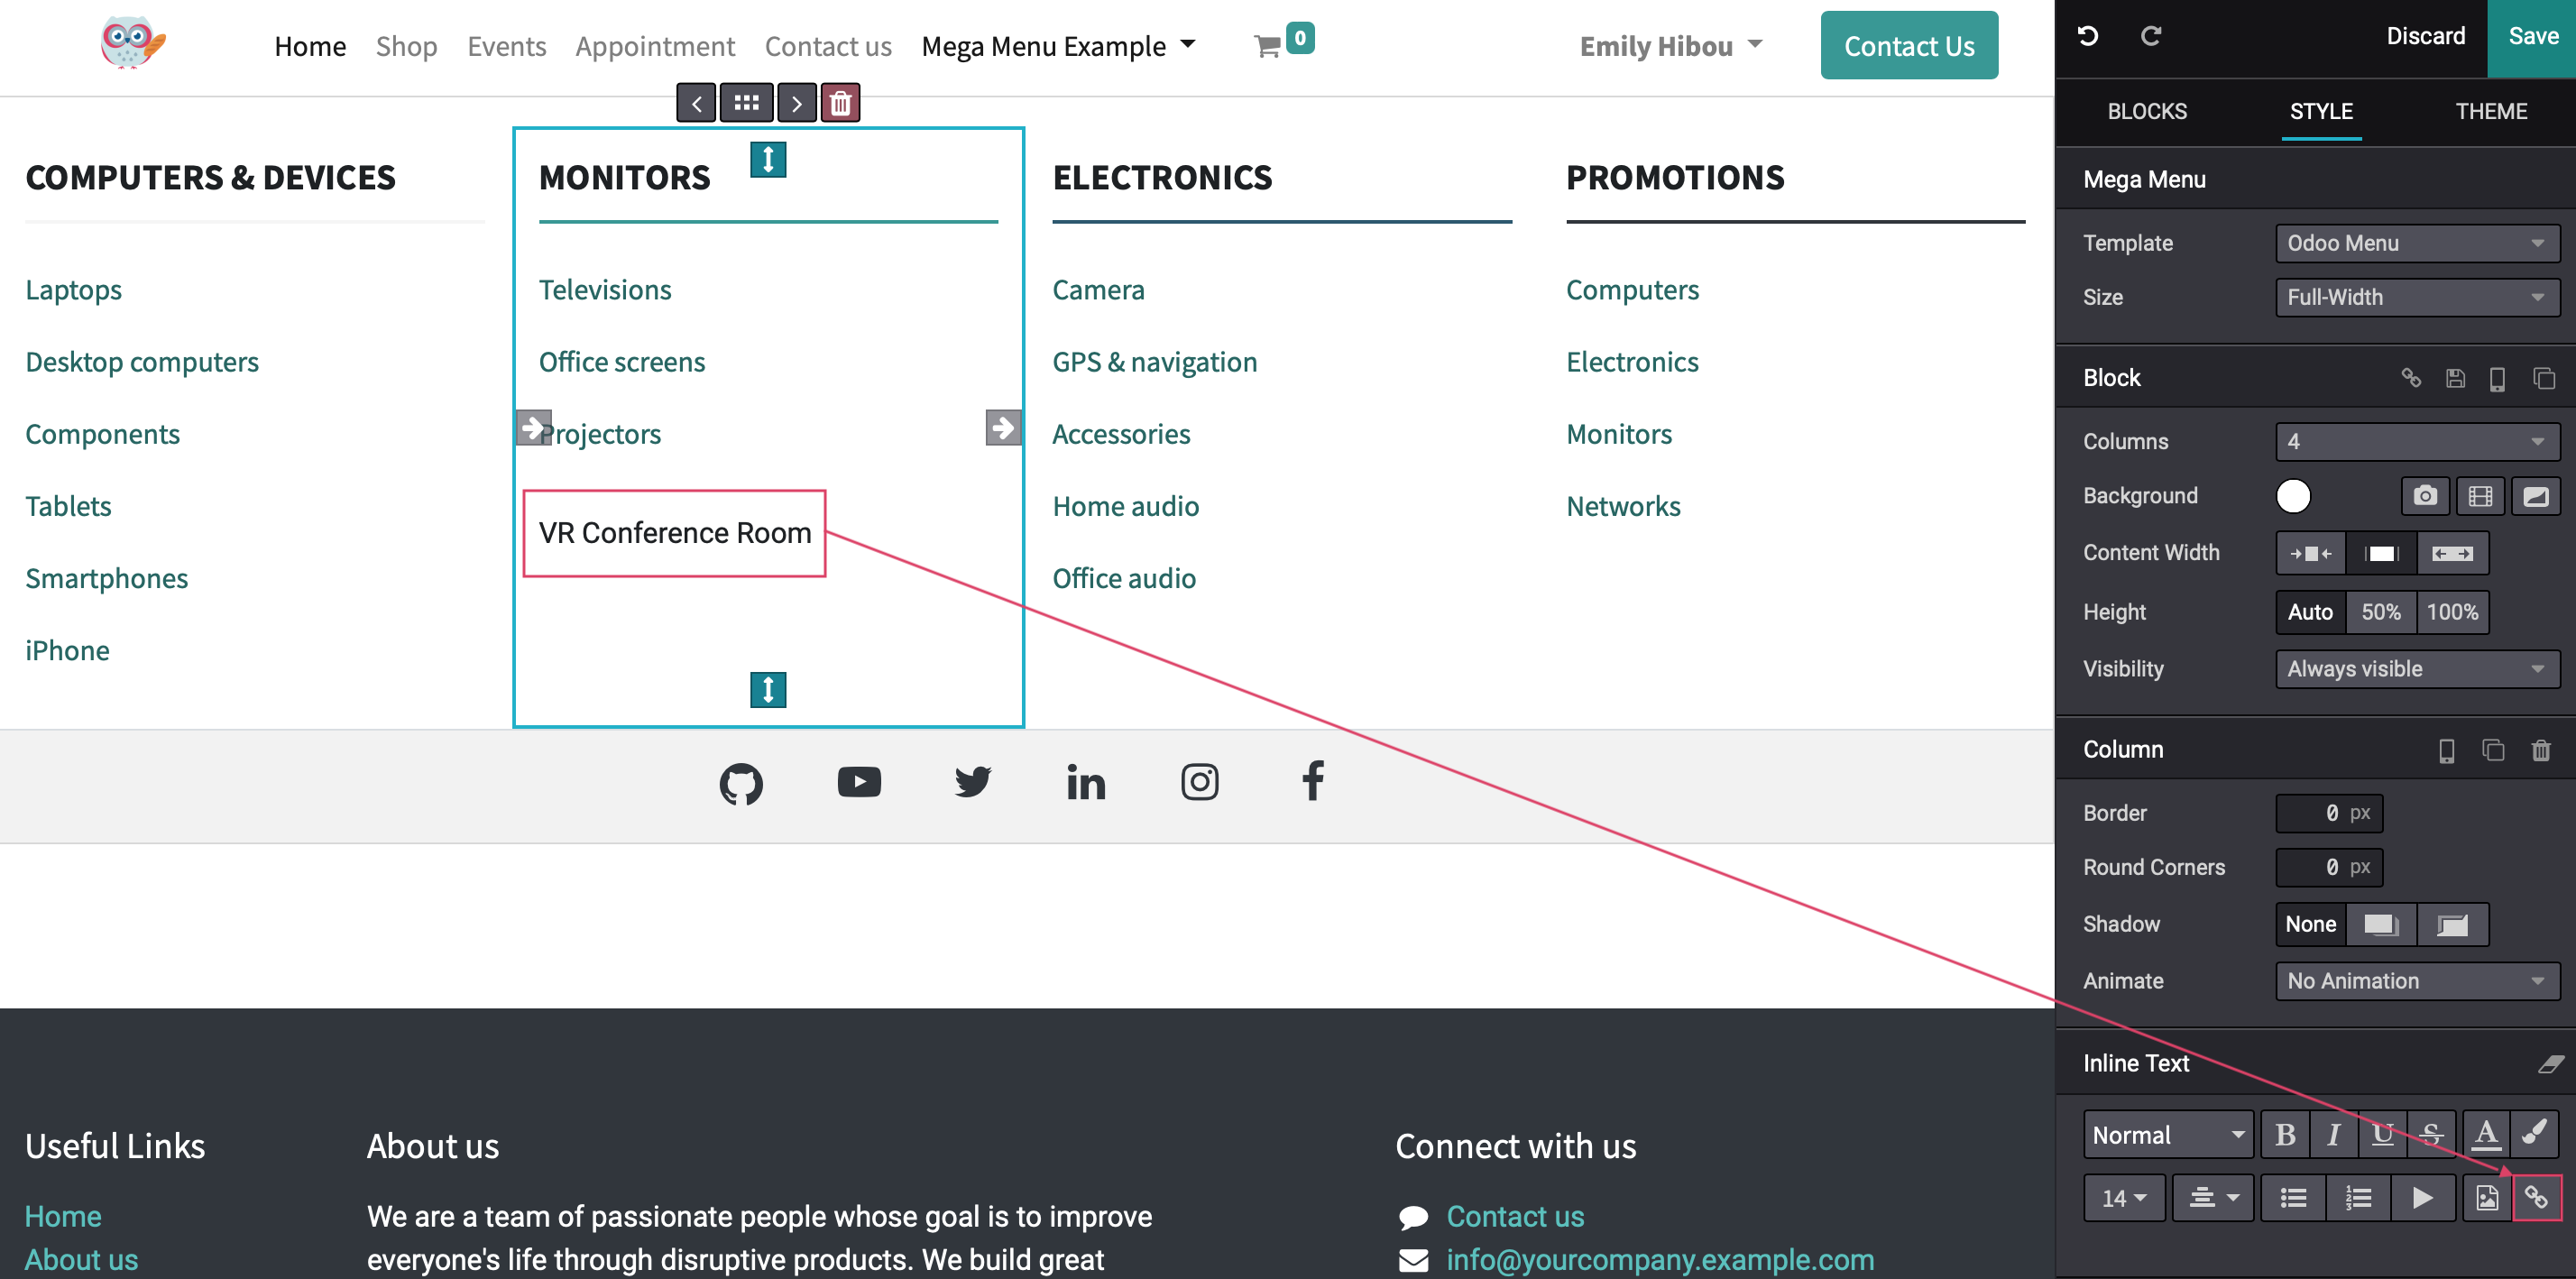
This will open a new field in the Inline Text section of the editing column. Here, you may enter the page or site URL you would like to like to link this menu option to:
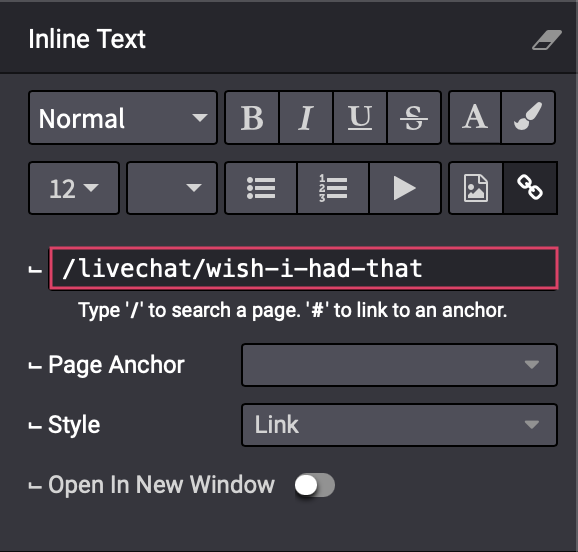
URL or Email: You can link your menu item now to a URL or email. You can also link this menu item to an existing anchor.
Style: Choose the format of your link. By selecting an option other than the default link type, you will be able to manually select the Size and Style
Open in new window: By enabling this option, this menu option will open in a new window when clicked on. If not, it will open in the same window.
Click Save when you are done. Repeat this for all mega menu items.
When you're done editing the menu, be sure to click Save on the top-right of the page.
Manage Pages
Click on Pages > Manage Pages. This will take you to a view that will show you your pages:

: This indicates the page is acting as the home page.
: Indicates if the page is included in the main menu.
: Indicates if this web page is published.
: Indicates if this page is indexed by search engines.
: Indicates if the page is SEO optimized. For more information, see our Promote documentation.
: This will take you to the page properties of that specific page.
: This will duplicate the selected page.
: This will delete the selected page.
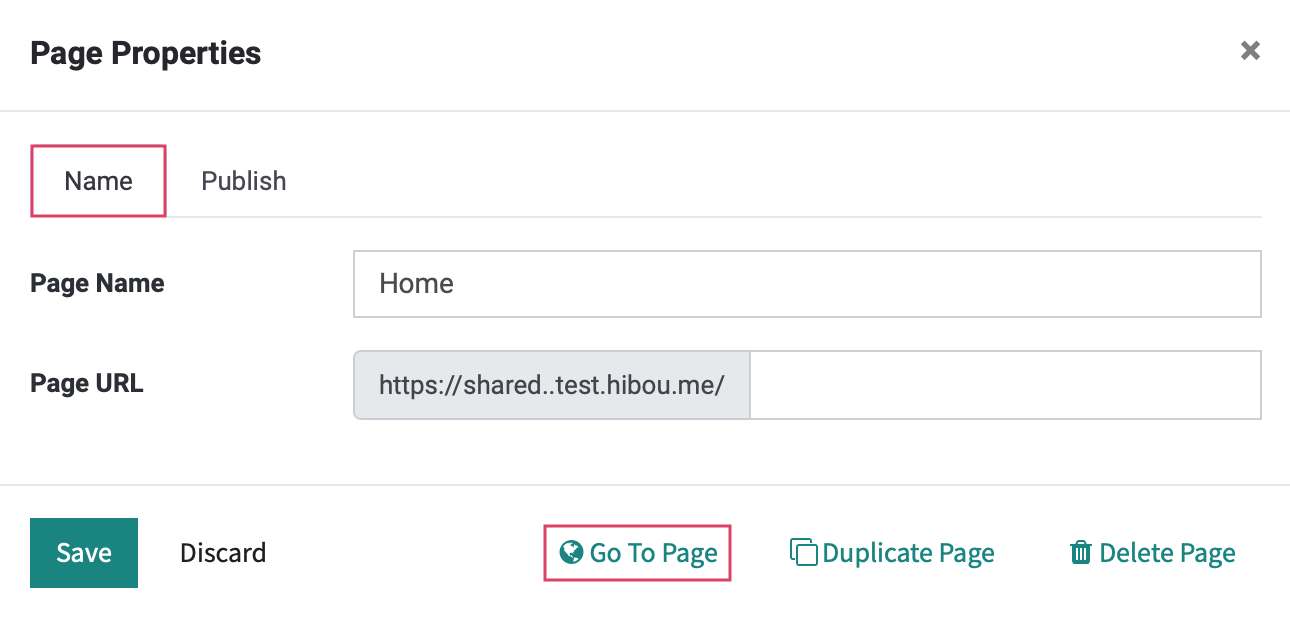
Let's go into detail on how the page configuration looks by clicking on the page properties button.
Under the Name tab you have the ability to change your page name and ending URL. If you look on the bottom right, you can use the Go to Page option to jump over to the actual page.
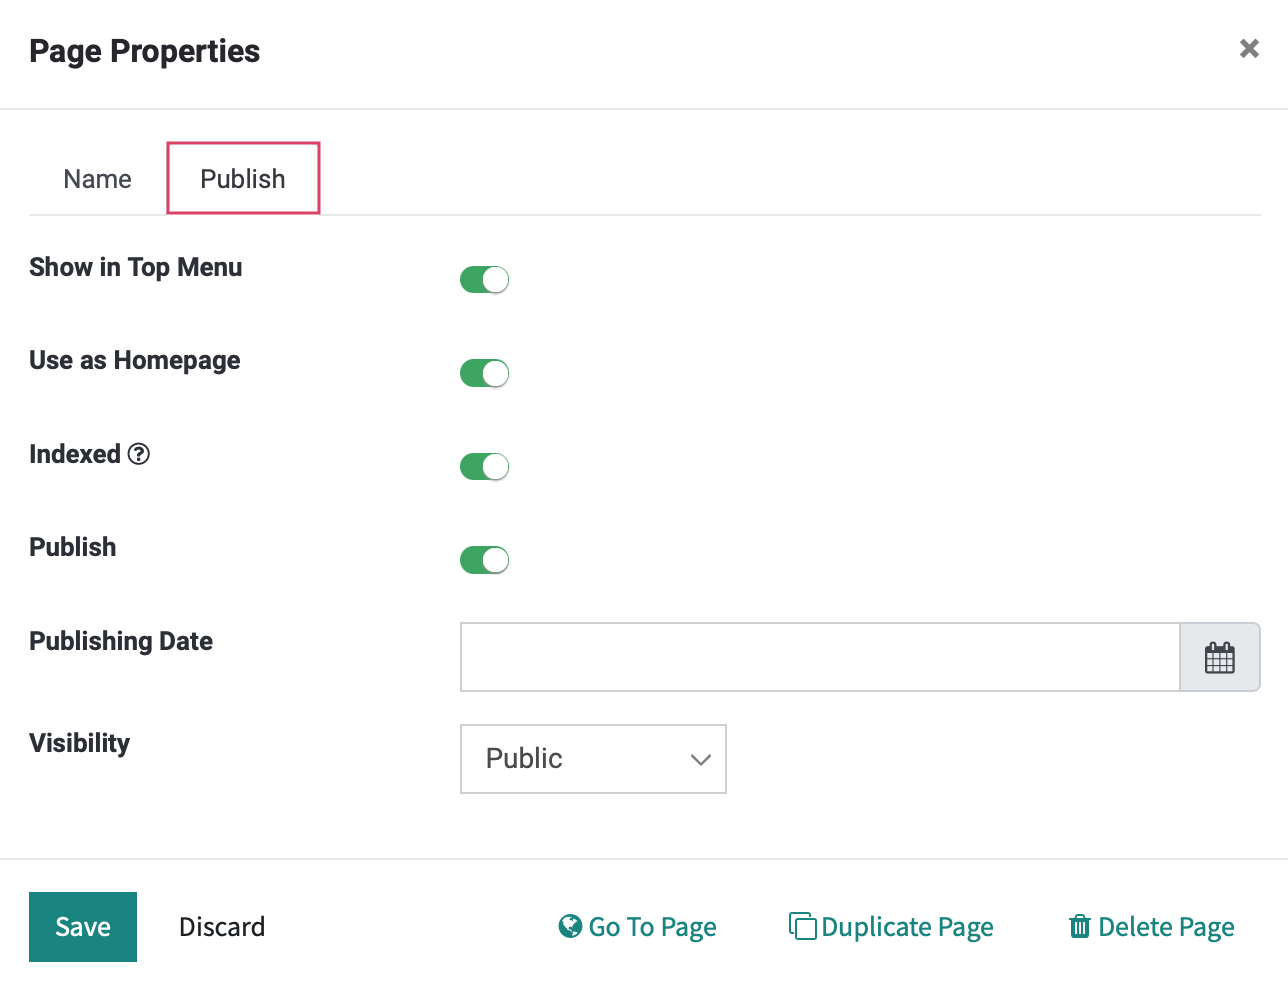
Under the Publish tab, these option are related to the check list seen previously.
Show in Top Menu: This is related to the icon and indicates if the page is in the main menu.
Use as Homepage: This is related to the icon and defines which page serves as the home page. There can only be one, so it will always end up being the last page to have been assigned as the home page.
Indexed: This is related to the icon and indicates if this page is indexed by search engines.
Publish: This is related to the icon and indicates if this web page is published.
Publishing date: Here you can select a date for your page to be automatically published. Leave this blank to publish immediately.
Visibility: This allows you to limit who can view your page:
Public: Visible to all website visitors.
Signed In: Visible to signed in visitors.
Some users: Visible to internal visitors.
Password: Webpage can only be accessed using a password. If selected, you'll be prompted to enter a password.
Page Properties
You can also reach the properties settings outlined above from your website's homepage via Pages > Page Properties.
