Sales: Sales Workflows: Creating Quotations + Sales Orders
Purpose
This document goes over the steps needed to create a new Quotation and the resultant steps to reach the Delivery stage within the Sales application in Odoo 14.
Quotations are the initial state of a Sale Order, meaning that every Sale Order begins as a Quotation. Depending on your business, you may immediately confirm Quotations into Sale Orders, or you may send the quotation to the customer for review, either in PDF format or online, before it becomes a confirmed Sale Order.
Process
To get started, navigate to the Sales App.
Creating the Quotation
After opening the Sales application, you will see a list of all quotations where you, as the logged-in user, are set as the Salesperson. To make a new quotation, click CREATE.

On the new Quotation, you will see the following fields that need to be filled in:
Customer: The name of the contact ordering the products. Depending on the information provided for the contact, the Invoice Address, Delivery Address, Payment Terms, and Delivery Method will populate from the database, but can still be manually edited if needed.
Invoice Address: Where the Invoice for this order will be billed to.
Delivery Address: Where the product will be delivered.
Quotation Template: A prebuilt Quotation that will automatically add specific products and optional products to the Quotation.
Expiration: The date when the terms and pricing in this quotation expire
Pricelist: Whether there is a custom pricelist assigned to this customer.
Payment Terms: The conditions and timelines that affect when payment must be completed for this order.

Good to Know!
Missing Invoice + Delivery Address Fields?
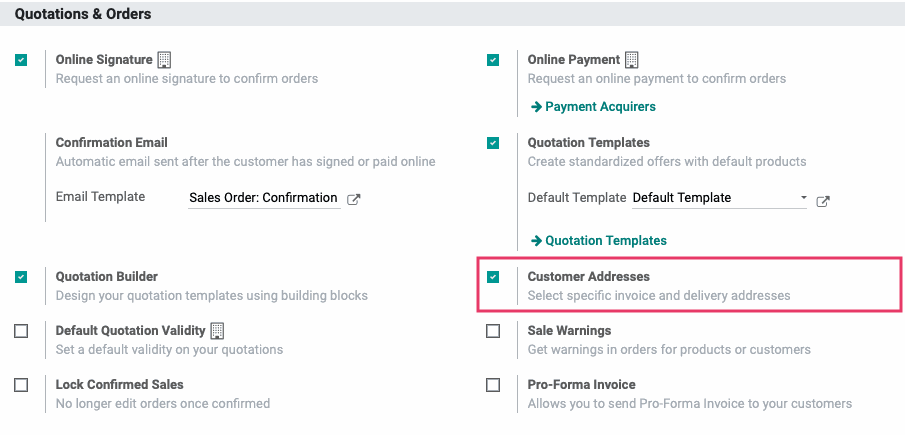
If you don't see the Invoice Address and Delivery Address fields, it means that Customer Addresses have not been activated. This setting allows you to set different contact details for these two fields.

To enable this, go to Configuration > Settings, enable Customer Addresses, then click Save.
Under the Order Lines tab:
Product: The item that will be sold to the customer. Fills in the Description, Unit of Measure, Unit Price, and Taxes depending on the product information. They can be manually edited.
Description: More detail about the product that is displayed on the website and the order to the customer, if the Description for Customers field on the product is filled in. Otherwise, will display the product name.
Quantity: The number of the product being requested by the customer.
Unit of Measure (UoM): How the product selected is measured in quantity.
Taxes: Allows you to apply the necessary taxes in conjunction with the Accounting app. Taxes will be automatically applied based on the product's Customer Taxes configuration and/or the Fiscal Position (compatible with TaxCloud), which can be set on the customer or order level. A tax can also be manually selected if needed.
Disc.%: The applied discount.
Subtotal: The Total untaxed amount based on the Ordered Qty.
To add a line, click add a product. If you'd like to see additional columns (Lead Time and/or Cost) in this view, click the icon on the far-right side of the header row and enable those. You can also disable columns as needed.
Good to Know!
Low or No Stock?
When selecting your Product(s), if you do not possess enough stock in your inventory you will see a red icon next to the quantity. Click this icon to forecasted and available stock.

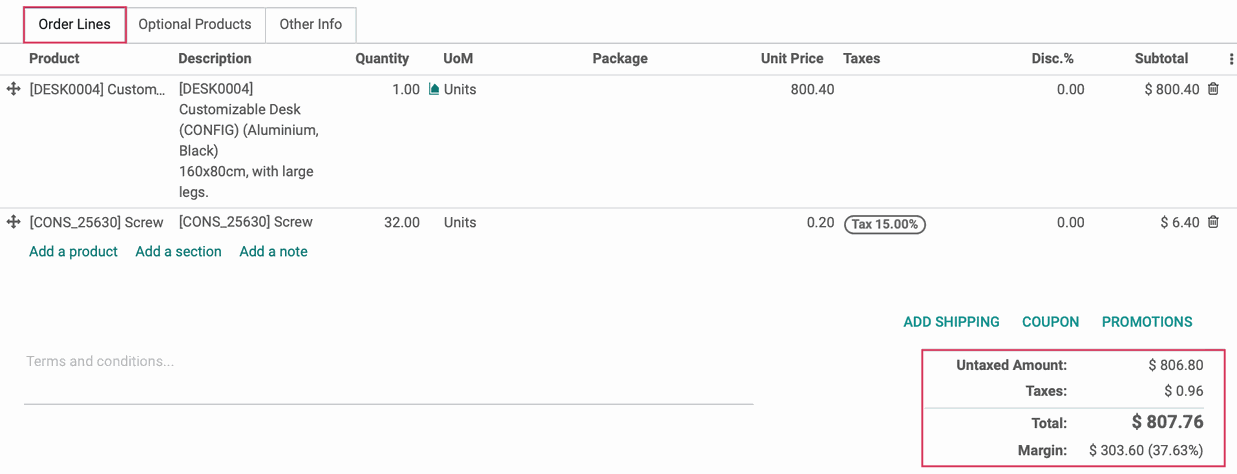
As items are added to the Quotation, at the bottom right you will see a summary of the Untaxed Amount, Taxes, Total (a combined total of both Subtotal and Taxes) and Margin, if enabled. In order to customize the Terms and Conditions section, see the Sales Configuration Document.
Good to Know!
Sections + Notes
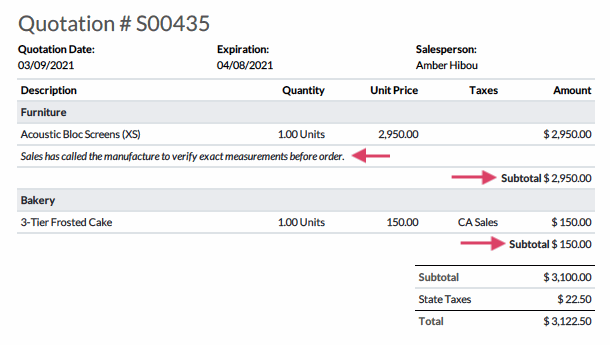
Odoo gives you the option to separate order lines into sections. This keeps things organized on the backend view, but on the front-end view (customer preview) it also displays subtotals for each section. To do this, click ADD A SECTION.
This opens a text line where you'll enter a section title. Click out of the field to save, then use the icon to move the section header where you'd like it to display.

You can also add notes for each order line by clicking Add a note.

This opens a new line where you'll enter a note about a specific product line or section. Click out of the field to save, then use the icon to move the note where you'd like it to display.

Once the Quotation/Sale Order is saved, both the Customer Preview and the PDF version will display this information.
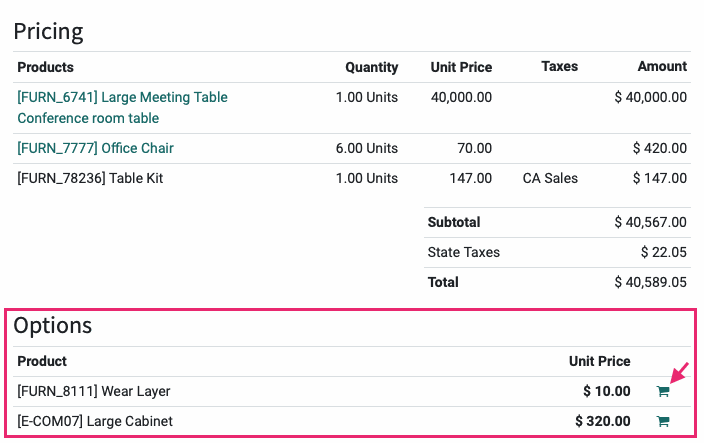
Next, move to the the OPTIONAL PRODUCTS tab. You may wish to add Optional Products when the main product being sold has a relationship to another item. For instance, when purchasing a desk an optional product would be a chair to go with the desk. All optional products will appear in green. This gives the Customer the option of adding these items onto their order if they are interested in doing so.

When the customer is viewing the Quotation online they will see the Optional Products and can add them with the Icon. Items added to Optional Products will not be included in the Total for the order until the customer adds them from the online Quotation.
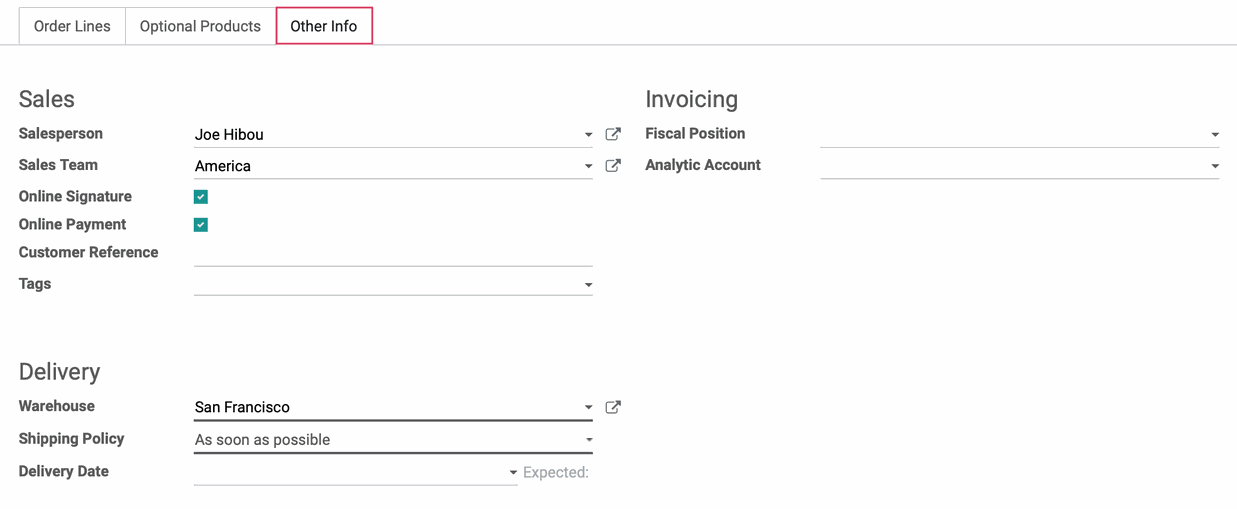
Under the Other Info tab:
Sales Information
Salesperson: The User responsible for finalizing and keeping track of this Quotation.
Sales Team: The sales team of the Salesperson on the order.
Online Signature: Enable this option to request an online signature from the customer to confirm orders automatically.
Online Payment: Enable this option to allow customers to pay online automatically for confirmed orders
Customer Reference: How the customer refers to this Order, allowing for easier communication between the Salesperson and Customer. For instance, this could be SOXXX to the user, while being POXXX for the customer.
Tags: Select any applicable tags for sorting and reporting purposes.
Invoicing
Fiscal Position: Fiscal Positions provide tax mappings and can be configured for use with TaxCloud for automatic tax calculations based on state, county, and city-specific tax rates.
Analytic Account: Choose the analytic account associated with the Sales Order.
Delivery
Warehouse: Select the warehouse that will process this order.
Shipping Policy: Allows you to indicate if products should ship as stock becomes available or if the order should be held until all products on the order are ready for delivery.
Delivery Date: The date the delivery was promised to the customer.
Final Steps
The final step before sending your quotation out to the customer for confirmation is getting the delivery charges based on the Delivery Method chosen and the weight of the product.
Important!
Make sure that the Customer has added all the desired optional products before calculating the delivery charge or the delivery charge will not be accurate. If anything changes on the Sale Order, be sure to recalculate shipping.
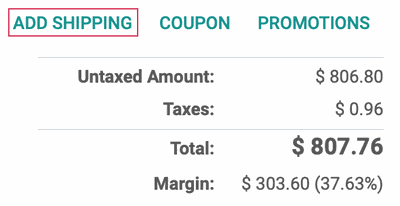
From the Order Lines tab, click the Add Shipping button just above the order totals.
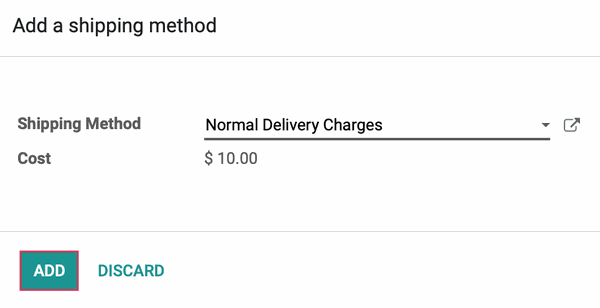
This will present you with the Add a shipping method modal window.
Shipping Method: Select the desired shipping method or carrier. Other fields may change or update depending on this selection.
Get Rate: This button displays when you select a Shipping Method that uses an API to fetch rates, such as UPS or FedEx. Click this button to retrieve actual shipping costs from the carrier.
When you're satisfied with the shipping rate selected, click ADD to add the charge to your Quotation.
The shipping cost will then be added to your invoice as a line item.

Once the Quotation is ready, click save then click SEND BY EMAIL. A modal window will display the email that will send and, after hitting Send, an email will be sent to all followers of the Quotation. The status will also change from Quotation to Quotation Sent.
When the customer accepts the Quotation online, it will move to the final stage and become a Sales Order. Alternatively, if online quotations are not a part of your business workflow, you can click CONFIRM.
 Once confirmed, you may see one or more smart buttons on the Sale Order.
Delivery: This indicates the items in the Sale Order are physical products to be delivered.

