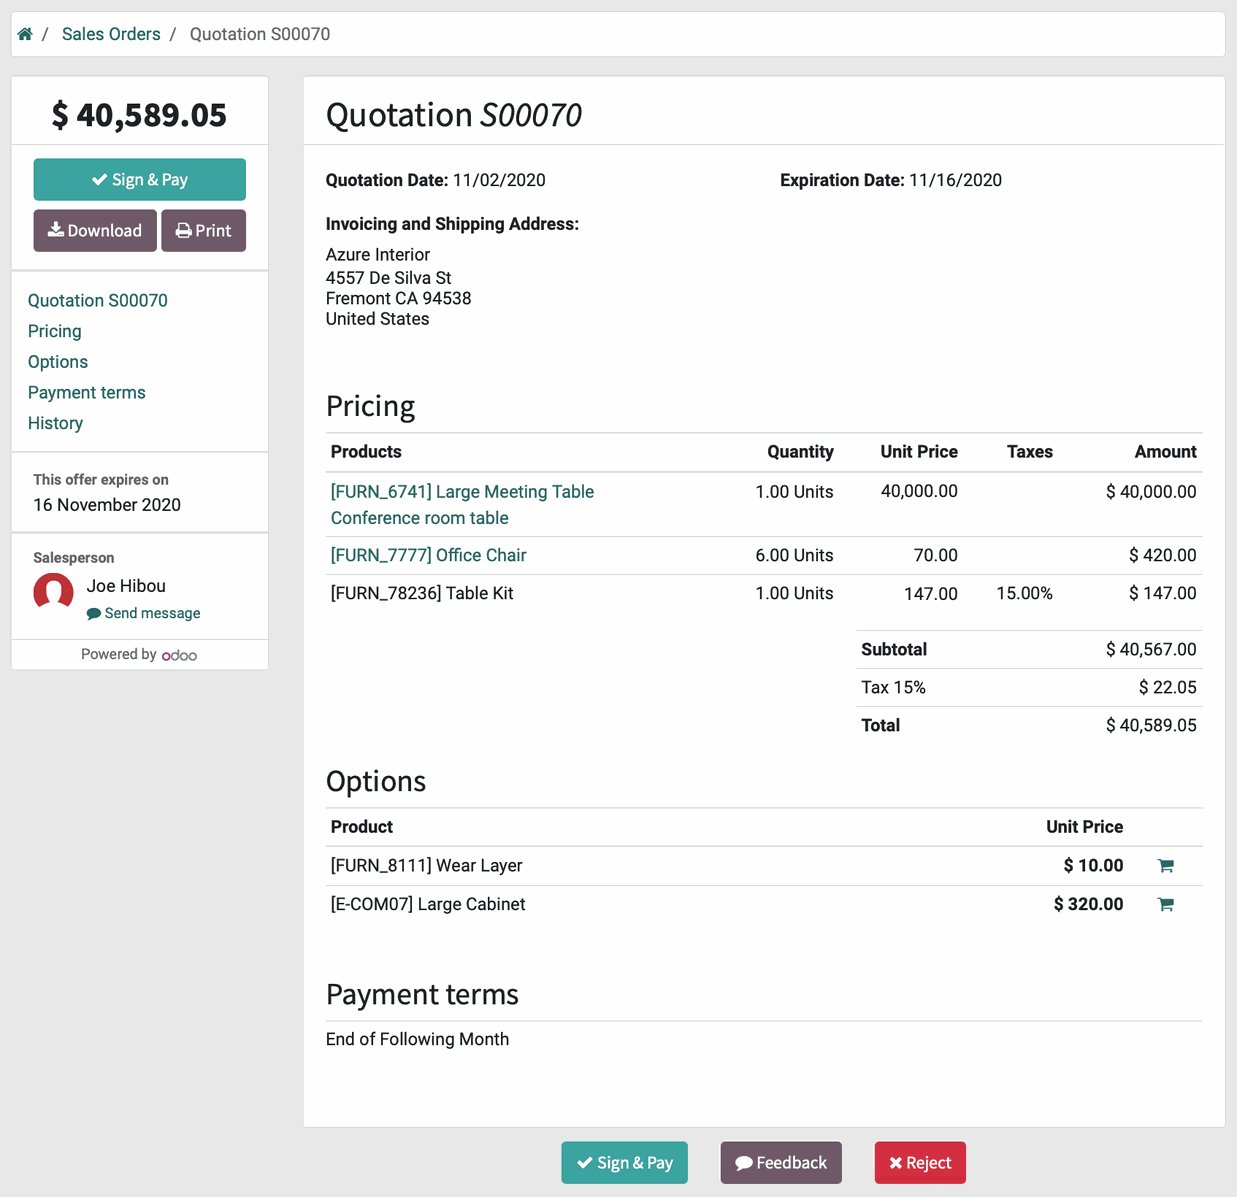
Sales: Configuration: Sales Orders Config: Quotation Templates
Purpose
The purpose of this documentation is to outline the use case and processes for using quotation templates in Odoo 14.
Quotation templates serve the purpose of providing specific behavior for orders that are created with the quotation template selected. They also reduce the time spent manually entering sale order lines for common product combinations/bundles.
Process
To get started, navigate to the Sales application.
To enable quotation templates, navigate to Configuration > Settings. Scroll down to the Quotations & Orders section and check the Quotation Templates option.
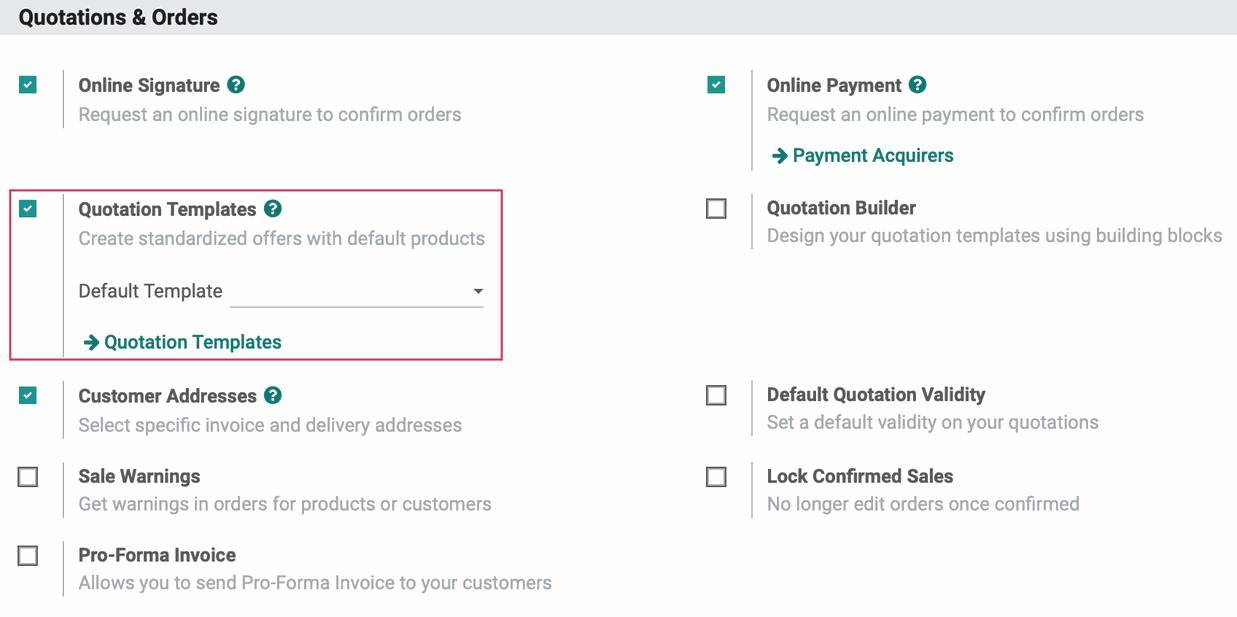
When you're done, click SAVE.
Creating Quotation Templates
Next, let's go to the Quotation Templates. To do this you can either click Quotation Templates on the settings page from the previous step, or navigate to CONFIGURATION > Sales Orders > QUOTATION TEMPLATES.
Here you will see a list of all existing Quotation Templates. To edit or modify an existing template, select it from the list and click Edit.
To add a new template, click CREATE. On the quotation template creation form, you will be presented with the following fields:
Quotation Template: Enter a name for the template that describes its contents for easy reference later.
Quotation expires after: Enter the number of days the customer has to accept quotations based on this template.

Good to Know!
Even if the quotation has reached its expiration date and the customer cannot confirm it, a salesperson on the back end of the system can still confirm the quotation and move it on to its next stage, if desired.
Under the Lines tab, click Add a Product.
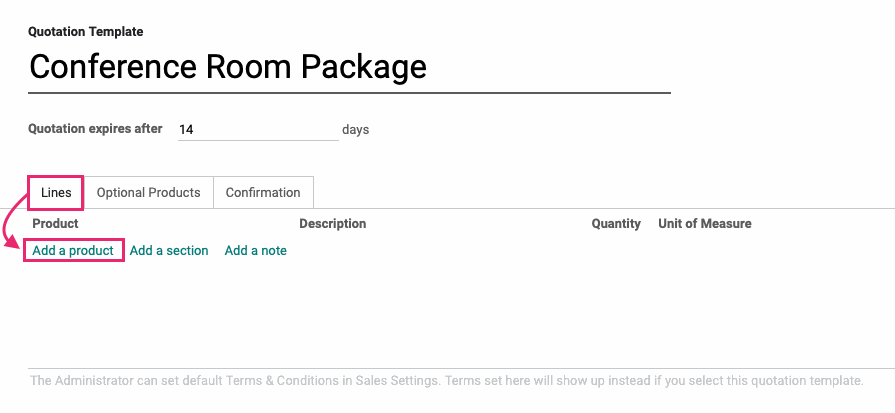
Complete the fields as follows:
Product: Select a product from the drop-down menu.
Description: This field will auto-populate based on the product template, but you can override with your own text.
Quantity: Enter the quantity of this product to be ordered.
Unit of Measure: This field will auto-populate based on the product template.
Terms: The empty lines on the bottom of this tab allow you to enter any Terms & Conditions to display on the quotation when the template is used. This will override the default Terms & Conditions.
Repeat this for all products you'd like to include on the template.

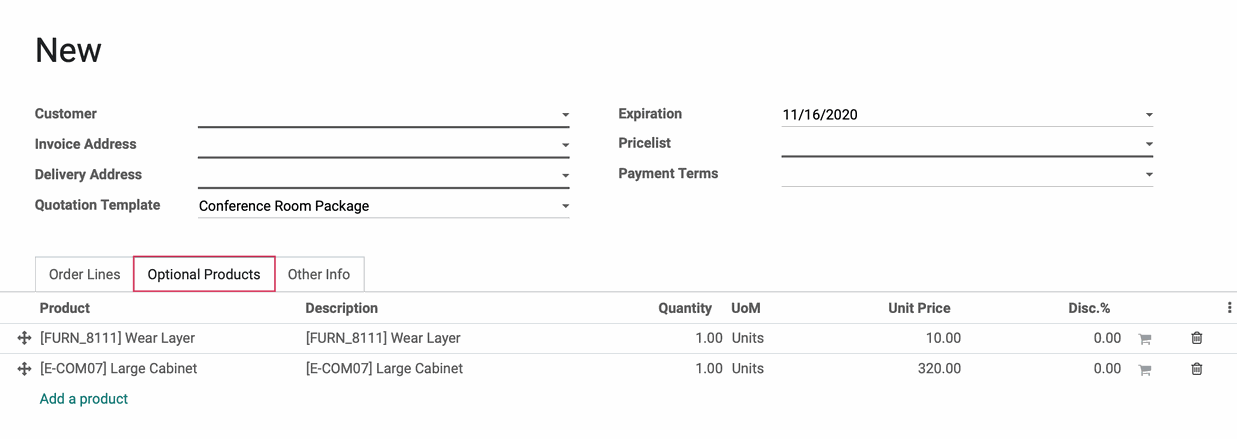
The Optional Products tab allows you to suggest products to customers, which they can choose to add to their order. Think of this as an upsell; it's something related to the product they are ordering but they may or may not choose to purchase it.
To add an Optional Product, click add a line.
Product: Select a product from the drop-down menu.
Description: This field will auto-populate based on the product template, but you can override with your own text.
Quantity: Enter the quantity of this product to be ordered.
Unit of Measure: This field will auto-populate based on the product template.
Terms: The empty lines on the bottom of this tab allow you to enter any Terms & Conditions to display on the quotation when the template is used. This will override the default Terms & Conditions.

The options under the Confirmation tab are used to configure what will happen when a customer accepts the quotation.
Online Signature: When selected, the customer will be required to add their signature upon accepting the quotation.
Online Payment: When selected, payment will be requested from the customer upon their acceptance of the quotation.
Confirmation Email: You can select or create an email template that will be sent upon the customer accepting the quotation.
Terms: The empty lines on the bottom of this tab allow you to enter any Terms & Conditions to display on the quotation when this template is used. This will override the default Terms & Conditions.

When you're done, click Save.
Good to Know!
Portal Access Management
To utilize the online signature and online payment options, you will need to have the online portal access set up for your customers. You can read more about this in our Portal Access Management documentation.
Design Template
You also have the ability to design the Quotation Template. To do so, click Design Template. This will open a new window.
Important!
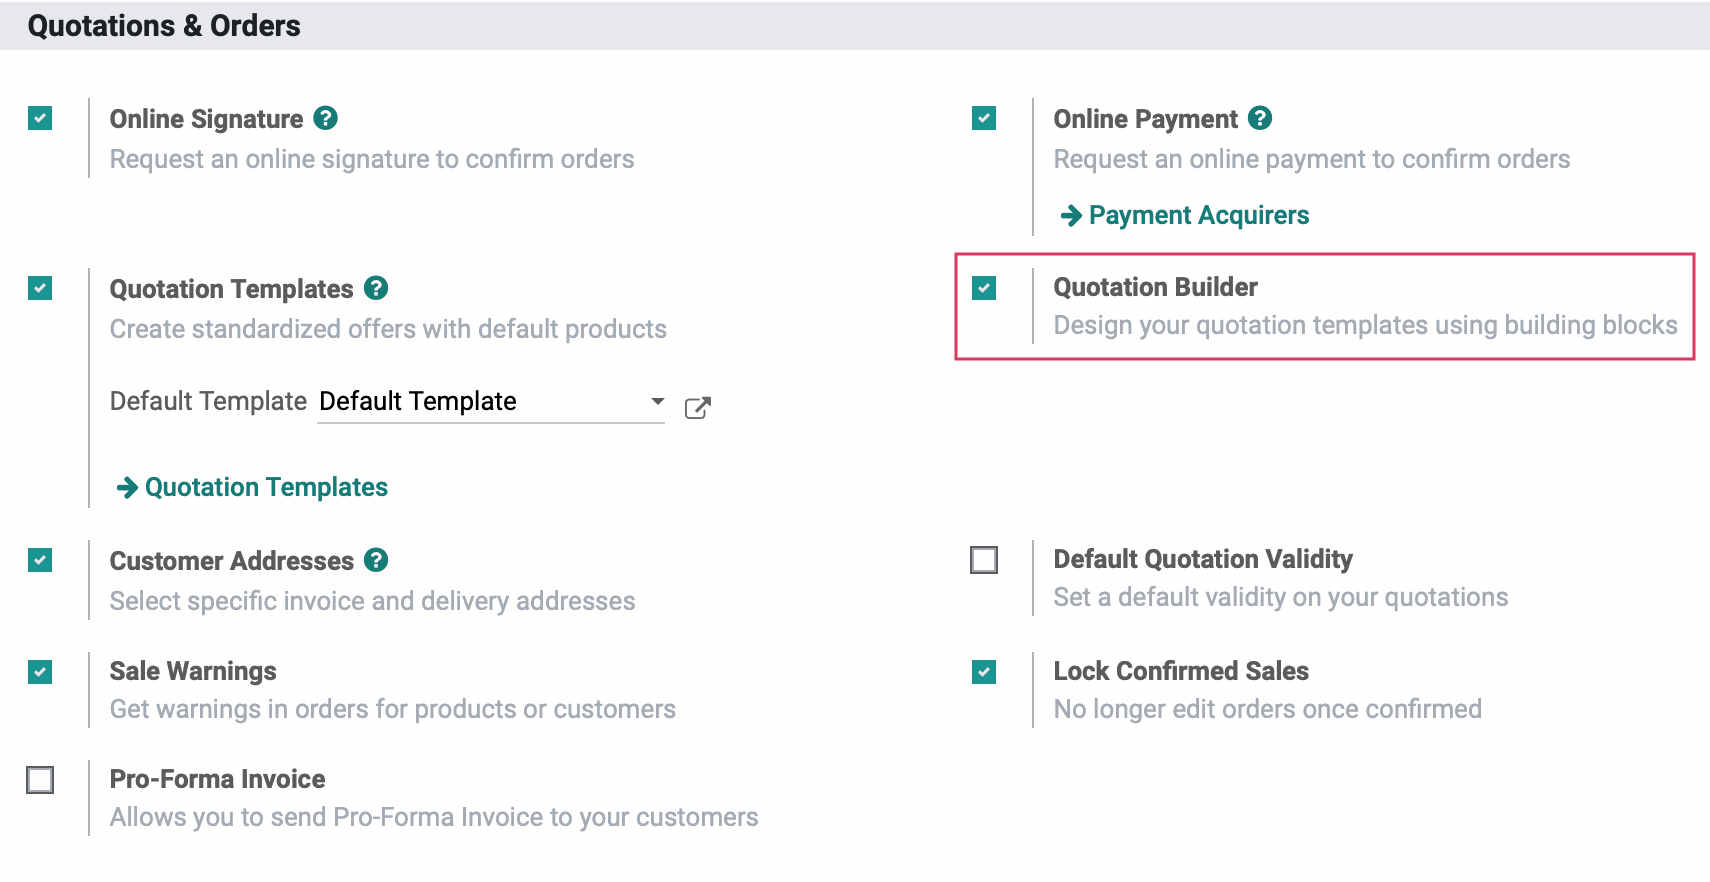
You will need to make sure the Quotation Builder setting is enabled to follow the next steps in this document. Navigate to Configuration > settings, then scroll down to the Quotations and Orders section. Once there, check the Quotation Builder option to enable this feature

From within the design view, click Edit on the top-right.

Upon doing so, you'll see the WYSIWYG editor with Blocks and Options on the right-hand side of the page and a formatting menu on the top.
Note that all of the light blue-green areas represent the data that must be displayed from the invoice. Those areas cannot be edited on the template.
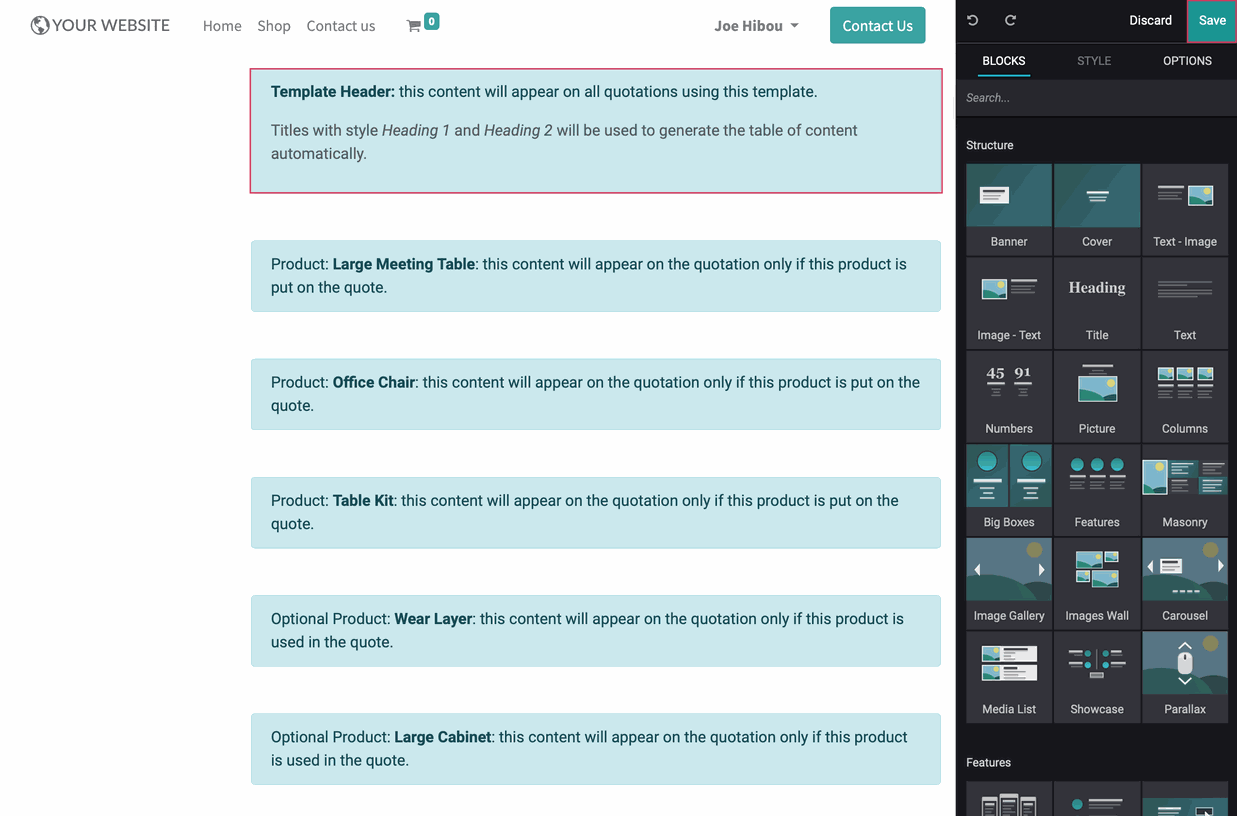
If you choose to make changes here, be sure to click SAVE on the top-right.
Using Quotation Templates
If you create a new quote you'll see how the quotation template works. Navigate back to the Sales app.
![]()
This brings you to the Quotations page. Click CREATE.
Complete this as you would any Quotation, but in the Quotation Template field, select the template you just created. After doing so, the products and pricing will populate into the form.
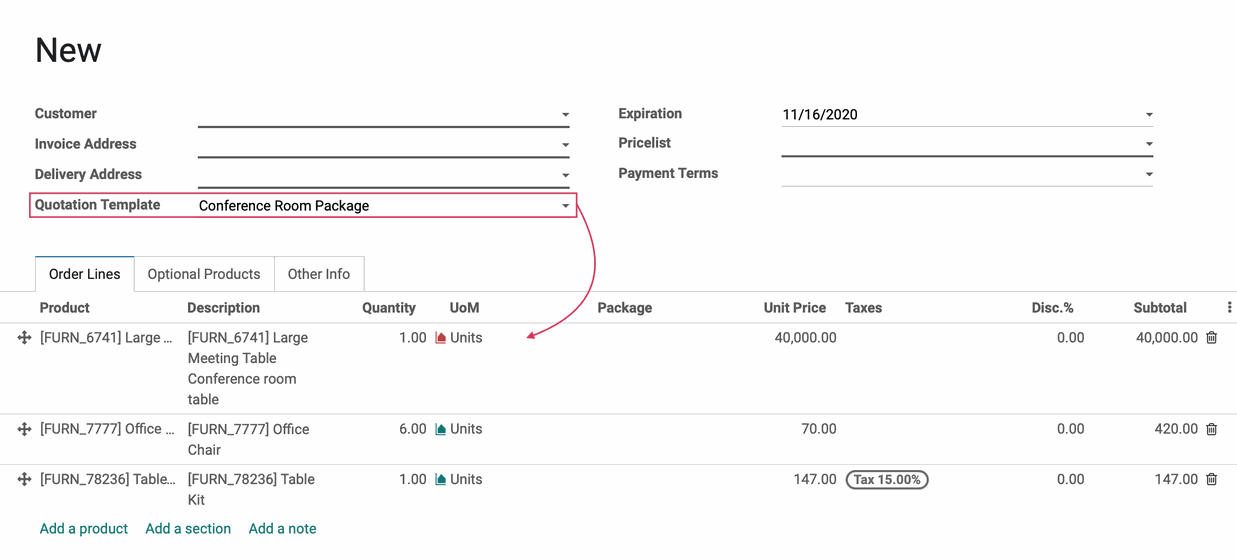
Click the Optional Products tab and you'll see those were added as well.
When finished, Save the Quotation.
To see what the customer will see, click the Customer Preview smart button.

Any edits you made when designing your Quotation Template can be seen here.
