- Accounting Modules
- Account Payment Electronic
- Boxes
- Forte Payment Acquirer
- Helpdesk Modules
- Hibou Commissions
- Hibou Fedex Shipping
- HR Employee Activity
- HR Holidays Accrual
- HR Holidays Partial
- HR Payroll Input Report
- Human Resources (HR) Modules
- Inventory Modules
- Maintenance Modules
- Manufacturing Modules
- Payment Analytic
- Payroll Batch Work Entry Error SKIP
- Payroll Input Name Report
- Payroll Modules
- Point of Sale Modules
- PrintBox
- Project Modules
- Purchase by Sale History MRP
- Purchase Modules
- Sale Section Subtotal
- Sales Modules
- ShipBox
- Stock Delivery Planner
- Tools + Settings Modules
- US ZIP Code to City/State
- Web Auto Paginate
- Website Modules
Hibou Odoo Suite: Human Resources (HR) Modules: HR Payroll Attendance Holidays
Repository Versions:
Modules:
AGPL-3
Purpose
This documentation outlines the use case for Hibou's Payroll Attendance Holidays module. The Payroll Attendance Holidays module simplifies adding approved holiday leaves onto employee payslips.
Getting Started
To get started, navigate to the Apps application.

Once there, remove 'Apps' filter from the search bar and search for 'Payroll Attendance Holidays'. When you're ready, click INSTALL on the module.

You will be ported back to your Odoo homescreen.
Good to Know!
The HR Payroll Attendance Holidays module requires both the HR Payroll Attendance module and the Leaves application. However, if you do not already have these installed, Odoo will install them for you during this module's installation.
Process
To see how this module works, we will create a leave for an employee, which will then appear in that employee's payslip. We will create a Leave from the perspective of a manager and an employee.
Creating a Leave - Manager Perspective
If you are an administrator, you can create a Leave for an employee. To do so, navigate to the Leaves application.

Once there, navigate to Managers > All > Leaves. Then click create to create a new Leave. Things opens the Leaves form where you'll fill in the following information:
Leave Type: Select the Leave Type for this employee.
Duration: This field will populate with the number of days based on what you input in the From and To fields.
From/To: Select the start and end dates of this Leave.
Half Day: Check this box if this is a half-day Leave. If you check it, the To field above will be replaced by a field where you can select either "Morning" or "Afternoon."
Description: Enter a description for this Leave. This field is not required.
Mode: Select if you would like to assign this Leave by "Employee," "Company," "Department," or "Employee Tag." For our purposes, we will select "By Employee."
Employee: Select the employee whose Leave this is. Select this field first.
Department: Select the department to which the employee belongs. This field is only required if you selected "By Department" as the Mode.
Reported in last payslips: Click the grey circle to change its color to green and indicate that this Leave was reported in the last payslip.
Comment by Manager: Optionally, add a comment to this Leave.
When ready, click save. Then, click approve.

Jump to the Creating a Payslip section to complete this process.
Creating a Leave - Employee Perspective
If you are an employee, you can submit a Leave request. To to do, navigate to the Leaves application. 
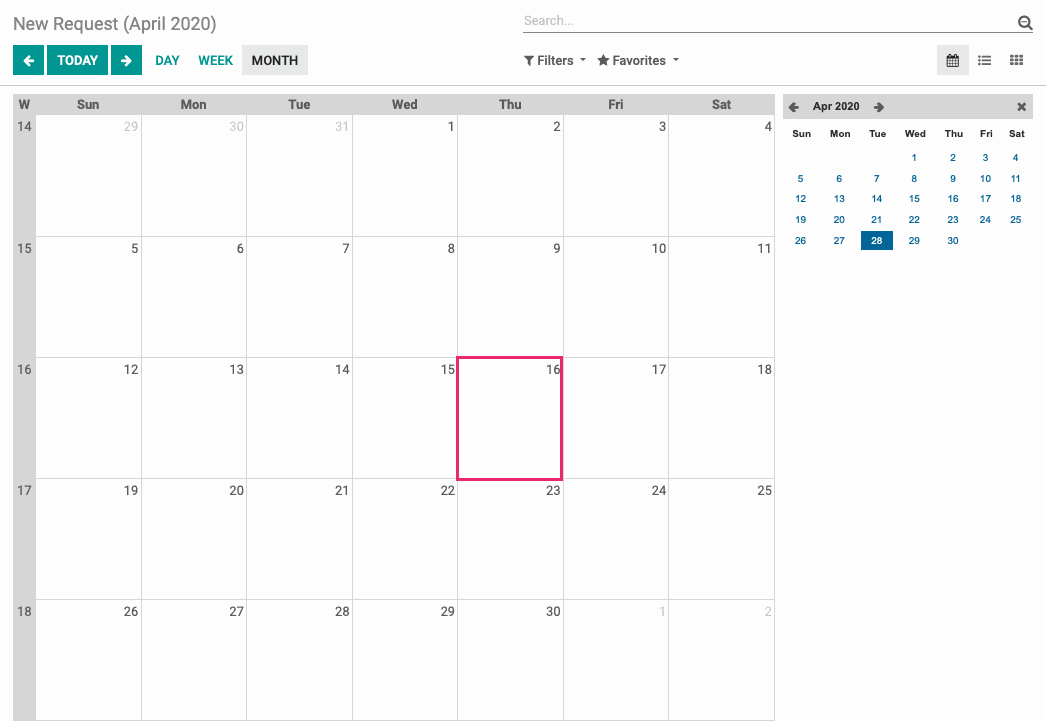
Once there, navigate to My Leaves > New Request.
This will bring up a calendar view. To create a new Leave, click the date on the calendar you are requesting off.

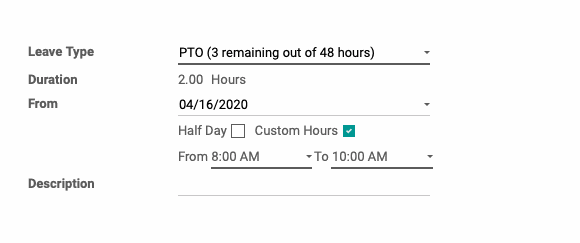
This opens the New Reqeust form where you'll complete the following fields:
Leave Type: Select the Leave Type.
Duration: This field will auto-populate based on the dates you enter in the From and To fields.
From/To: Enter the start date of your Leave request and the end date.
Half Day: If you are seeking a Leave for a half day, check this box. The To field above will be replaced by a drop-down menu where you can select either "Morning" or "Afternoon."
Custom Hours: If you are seeking a Leave for specific hours in the day, select this option and provide the From/To times.
Description: Enter a description for your Leave. This field is optional.

When ready, click SAVE. This submits your Leave to your manager, who will either approve or refuse it.
Creating a Payslip
To create a payslip, navigate to the Payroll app.

Once there, make a new payslip by clicking Create. This will open the Employee Payslips form where you'll complete the following fields:
Important!
Enter the Pay Period First
You must enter dates in both Period fields before selecting an employee because the hours worked will be entered immediately when the employee is selected, and changing dates will not alter the hours worked after that point.

Employee: Select the employee to run a payslip for.
Period: Select the start and end date of the pay period.
Workers Comp. Code: If the Workers Compensation Class module is installed and configured, the employee's Workers' Comp Code will populate here. It cannot be changed from this form.
Structure: This field will populate with the selected employee's structure, based on their contract.
Credit Note: This checkbox indicates the payslip is a refund of another payslip.
Contract: This field will populate with the selected employee's contract.
Reference: Odoo will generate a reference when the record is saved, but you can create your own here.
Payslip Name: Odoo will generate a Payslip Name when an employee is selected. You can modify this if you wish.
Has been Paid: This checkbox indicates the payslip has already been paid.
Once this information has been entered, click save. Then click compute sheet.

Under the worked days & inputs tab, you will see that a line for the Leave has appeared under Worked Days. It indicates the Number of Days and the Number of Hours the employee will be absent.
