- Accounting Modules
- Account Payment Electronic
- Boxes
- Forte Payment Acquirer
- Helpdesk Modules
- Hibou Commissions
- Hibou Fedex Shipping
- HR Employee Activity
- HR Holidays Accrual
- HR Holidays Partial
- HR Payroll Input Report
- Human Resources (HR) Modules
- Inventory Modules
- Maintenance Modules
- Manufacturing Modules
- Payment Analytic
- Payroll Batch Work Entry Error SKIP
- Payroll Input Name Report
- Payroll Modules
- Point of Sale Modules
- PrintBox
- Project Modules
- Purchase by Sale History MRP
- Purchase Modules
- Sale Section Subtotal
- Sales Modules
- ShipBox
- Stock Delivery Planner
- Tools + Settings Modules
- US ZIP Code to City/State
- Web Auto Paginate
- Website Modules
Hibou Odoo Suite: Inventory Modules: Landed Costs Average
Repository Versions:
Purpose
This documentation covers the installation, configuration, and functionality of Hibou's Landed Costs Average module for Odoo.
Getting Started
The first step is to install the module. To do so, navigate to the Apps application..

Once there, remove the 'Apps' filter, then search for 'Landed Costs Average'. When you're ready, click install.

Good to Know!
The Landed Costs Average module requires the WMS Landed Costs module. However, if you do not already have this module installed, Odoo will install it for you during this module's installation.
Process
To get started, navigate to the Inventory app.

Product Category + Product Configuration
Once there, go to Configuration > Products > Product Categories. You can edit an existing category, or click Create to add a new one.
Under the Inventory Valuation section:
Costing Method: Average Cost (AVCO)
Inventory Valuation : Automated
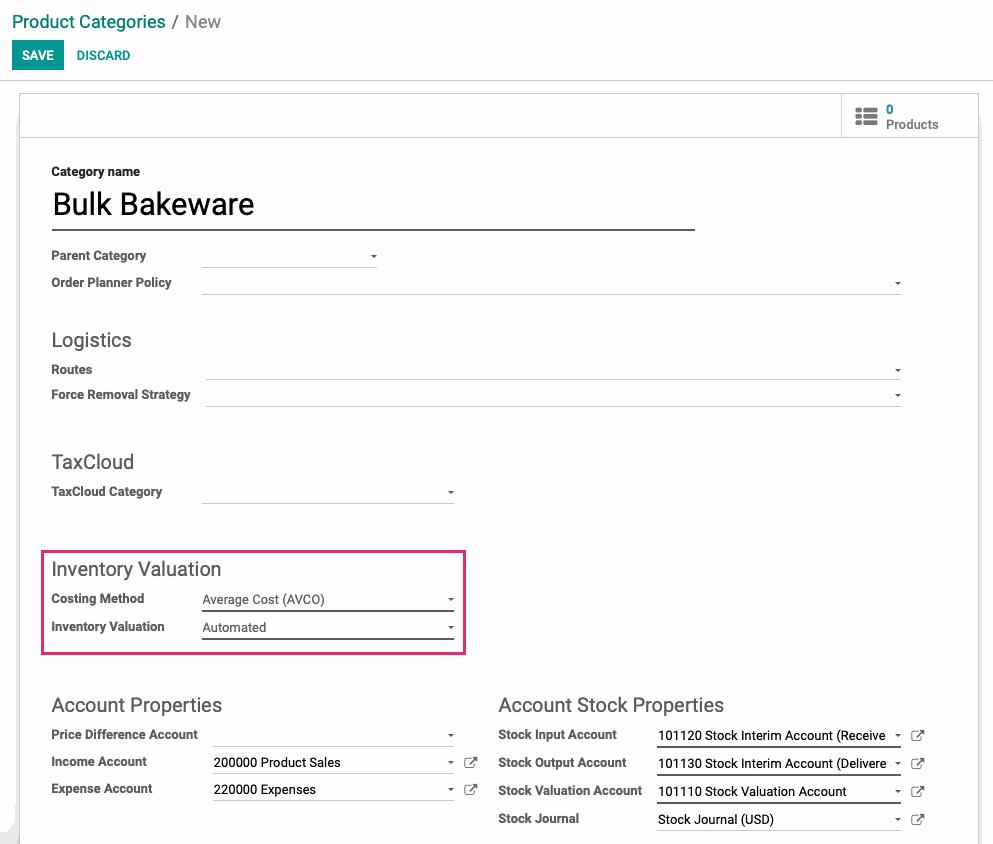
When you're ready, click Save.
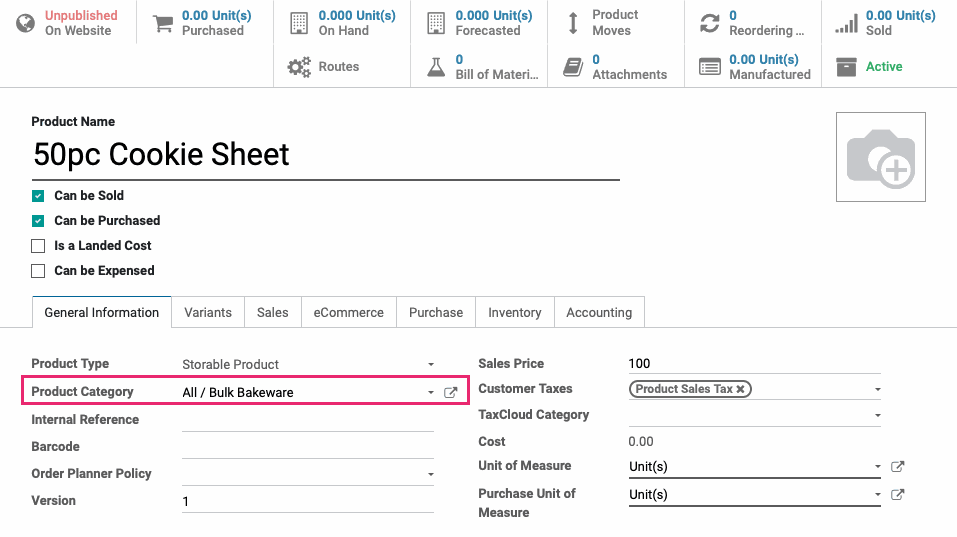
Next, click the Products smart button and add a product to this category.

Be sure you add a vendor for purchasing the product.
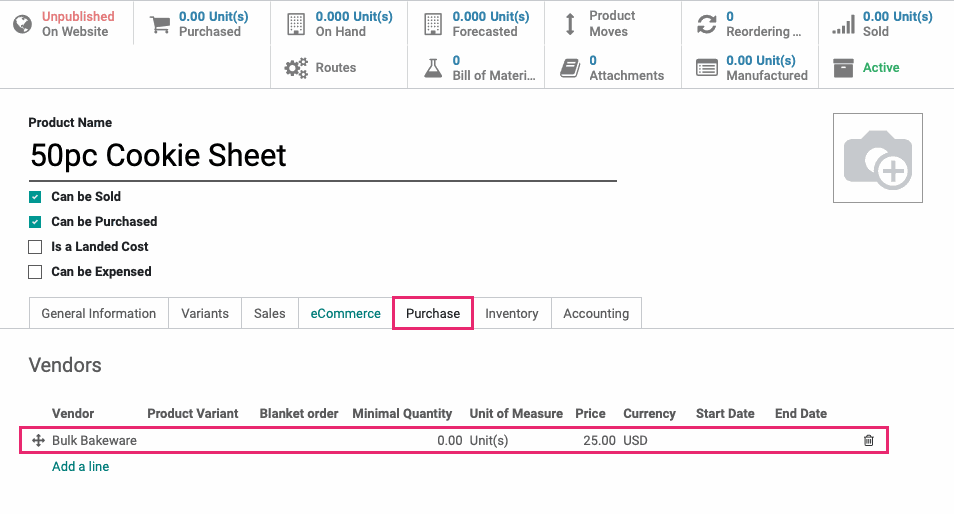
Save the product when you're ready.
Create Landed Cost Type
From within the Inventory app, go to Configuration > Products > Landed Cost Types. Click Create to create a new Landed Cost Type.
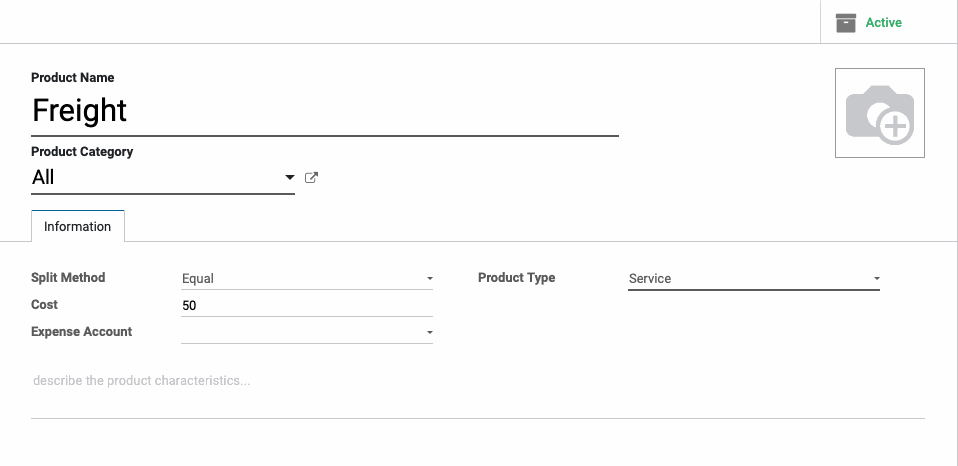
When ready, click SAVE.
Purchase the Product
Now that your category, product, and landed cost type is configured, navigate to the Purchases app.

Once there, click create and purchase the product you added in the previous steps. Confirm the order.
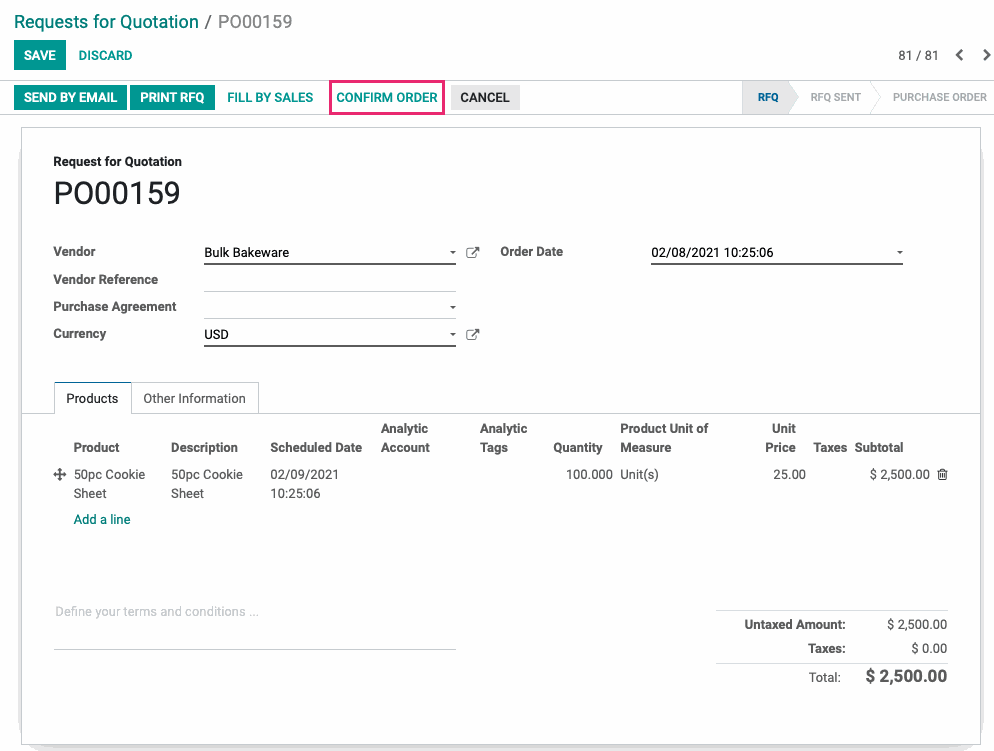
Click Recieve Products.

Click Validate.

Then, click Apply.

Create the Landed Cost
Navigate back to the Inventory app.

Once there, go to Operations > Landed Costs and click Create. On the Landed Costs form, enter the following details:
Date: This should auto-populate with today's date, but you can adjust it to the date the landed costs should be calculated.
Transfers: Select the warehouse transfer you recieved in the previous step.
Account Journal: Select the Account Journal where you wish to record these Landed Costs.
Under the Cost Lines section, click Add an Item, then select the Landed Cost type you created.
When all information is added, click Compute.
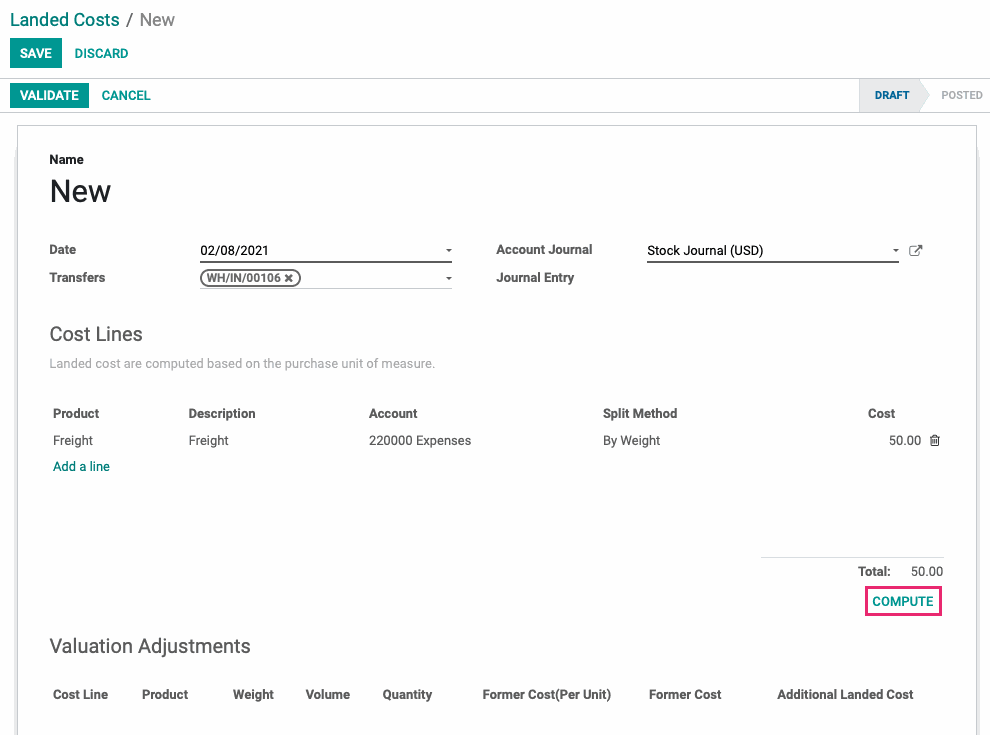
You'll now see the Landed Costs added to the Valuation Adjustments section.

Review the Product Cost
Next, go to Master Data > Products and select the product you created and purchased.
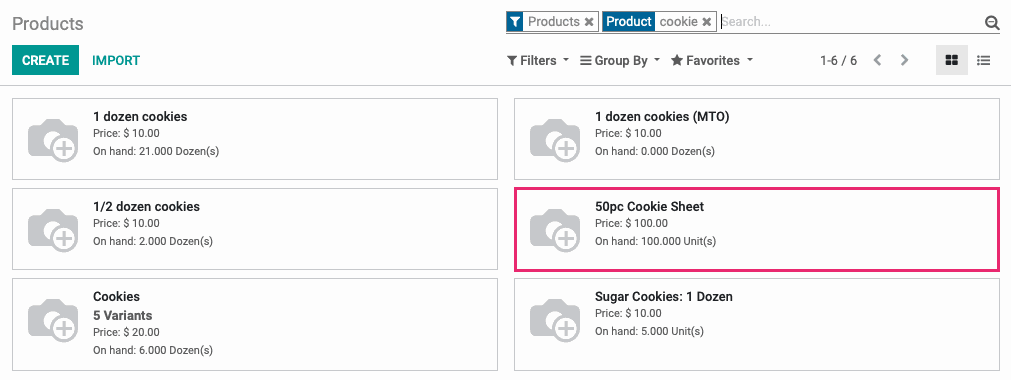
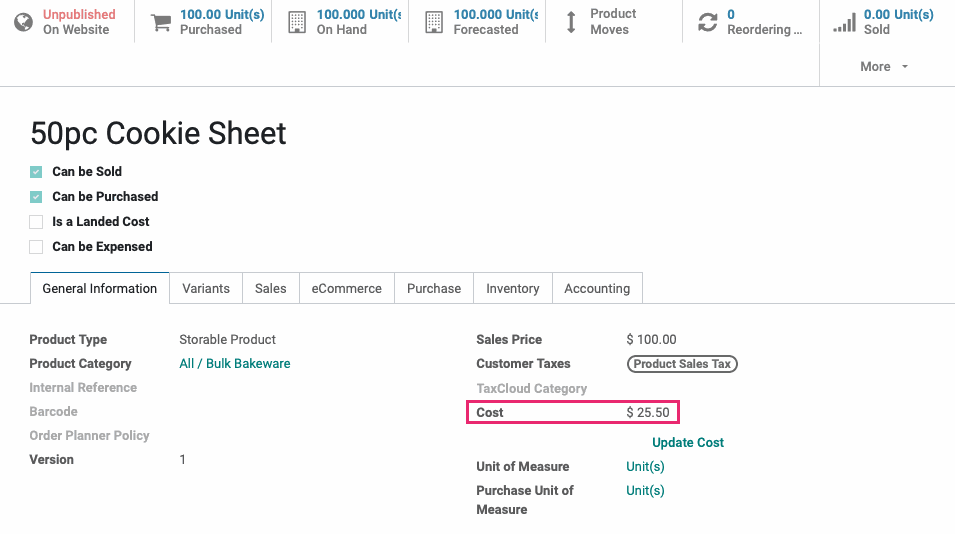
The Cost will now reflect the average cost based on your Landed Costs configuration.
