- Stock Delivery Planner
- HR Holidays Accrual
- HR Payroll Input Report
- HR Employee Activity
- HR Holidays Partial
- Human Resources (HR) Modules
- Boxes
- Payroll Modules
- ShipBox
- Sales Modules
- Sale Section Subtotal
- PrintBox
- Hibou Fedex Shipping
- Inventory Modules
- Maintenance Modules
- Accounting Modules
- Helpdesk Modules
- Forte Payment Acquirer
- Account Payment Electronic
- US ZIP Code to City/State
- Purchase by Sale History MRP
- Payroll Batch Work Entry Error SKIP
- Web Auto Paginate
- Payment Analytic
- Payroll Input Name Report
- Purchase Modules
- Project Modules
- Website Modules
- Tools + Settings Modules
- Point of Sale Modules
- Manufacturing Modules
- Hibou Commissions
Hibou Odoo Suite: Sales Modules: Sale Credit Limit
Repository Versions:
Modules:
OPL-1
Debug Mode
One or more fields outlined in this document will not display unless you’re in Debug Mode.
Purpose
This documentation covers the installation, configuration, and functionality of Hibou's Sale Credit Limit module for Odoo.

Getting Started
The first step is to install the module. To do so, navigate to the Apps application..

Once there, remove the 'Apps' filter, then search for 'Sale Credit Limit'. When you're ready, click install.
Good to Know!
The Sale Credit Limit module requires the Sales and Accounting applications, as well as the Sale Exception module. However, if you do not already have these installed, Odoo will install them for you during this module's installation.
Grant User Access
Navigate to the Settings app.

Once there, go to Users & Companies > Users and select the user from the list which should have permissions to set sales exceptions.
From within the user's record, click Edit, then scroll to the bottom of the page and enable Exception Manager.

When you're ready, click Save.
Process
We've outlined this process both in the following video, as well as in the documentation below.
To get started, navigate to the Contacts app.

Credit Limit settings are applied to a company as a whole, not on its individual contacts. For this reason, you'll want to select a company contact for this walkthrough.
Configuring Credit Limit + Credit Hold

Once there, click Edit and open the Accounting tab. Here you'll see newly added fields:
Total Receivable: This is the total outstanding due for this company (including its contacts).
Credit Limit: The allowed credit limit for this company contact.
Credit Remaining: A computed field showing the difference between the Total Receivable and the Credit Limit.
Credit Hold: Allows you to manually place a customer on credit hold, meaning they cannot use credit on purchases.
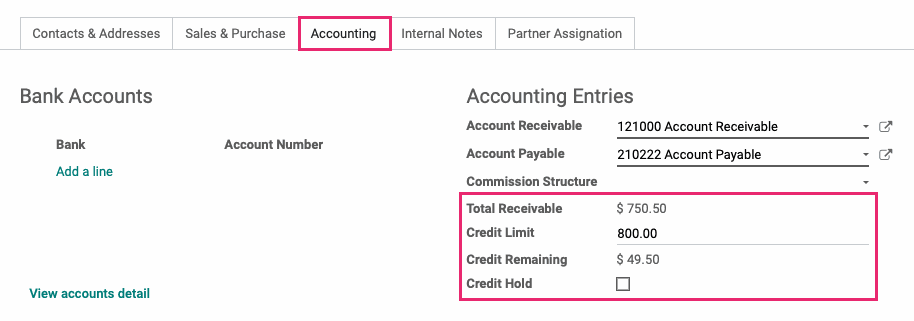
Once you've set these values, click Save.
Sale Exception Rules
Navigate to the Sales app.
![]()
Once there, go to Configuration > Sales Orders > Sale Exception Rules. Here you'll see three new exceptions related to credit functionality.
Customer has Overdue Invoices: This is triggered if the customer has overdue invoices.
Customer on Credit Hold: This is triggered if the customer is put on a manual credit hold.
Invoice Partner credit limit exceeded: This is triggered if confirming a sale order, combined with their current receivables, would go over their credit limit.
To enable or disable any of these exceptions, click the Active toggle on the far right.

Sale Exception Website
If Sale Exception Website is installed, you'll see warnings when exceptions are triggered in the Odoo admin area. To do so, navigate to the Sales app.
![]()
Once there, click Create.
In the Customer field, we'll select the company in which we configured credit details for. Under the Order Lines tab, we'll click Add a Product and add just enough product to push us over our $800 credit limit, when combined with Total Receivables, then we'll click Save.
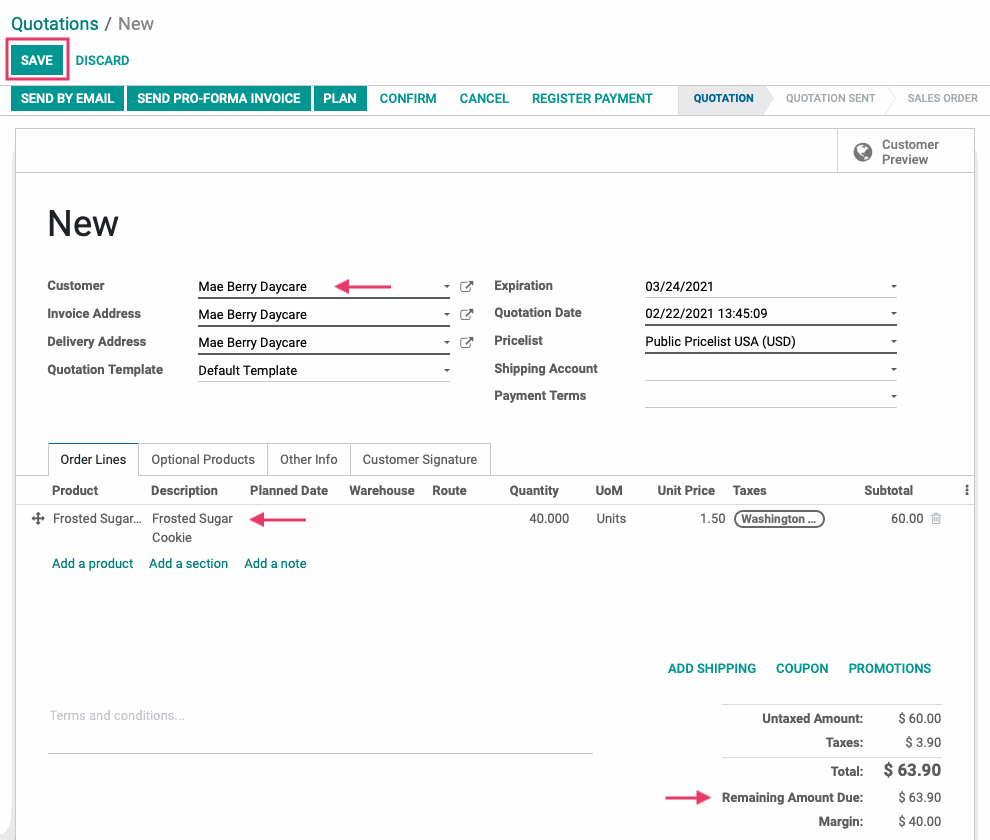
Next, we'll click Confirm. This is when we'll see the exception(s) displayed on a modal window. In this case, two exceptions were triggered because the customer has overdue invoices, and because this invoice would push them past their allowed credit limit.
If you have the Exception Manager permissions, shown in the beginning of this document, you'll be able to select Ignore Exceptions to enable the confirmation of this Sale Order.
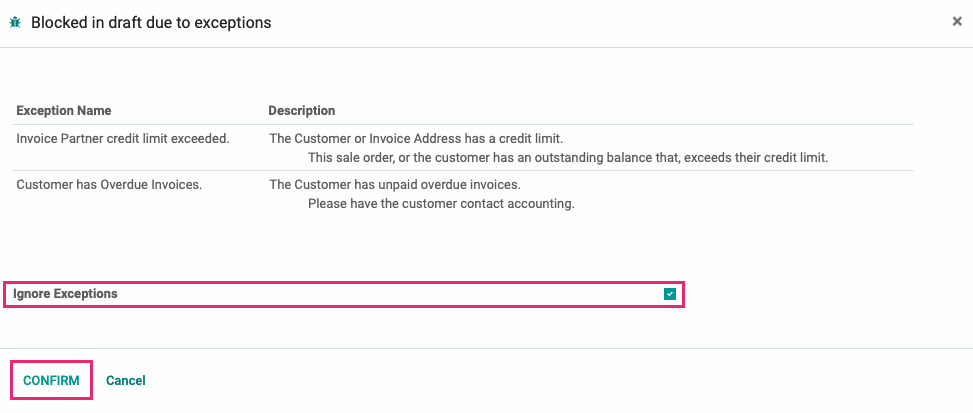
If you've chosen to Ignore Exceptions, click Confirm. This action does not confirm the Sale Order; it only confirms the Ignore Exceptions selection.
Click Confirm again to confirm the Sale Order.

Good to Know!
Confirm Without Ignoring Exceptions
If you choose to click Confirm on the modal window without Ignore Exceptions checked, you'll see a pink exceptions banner at the top of the Sale Order.
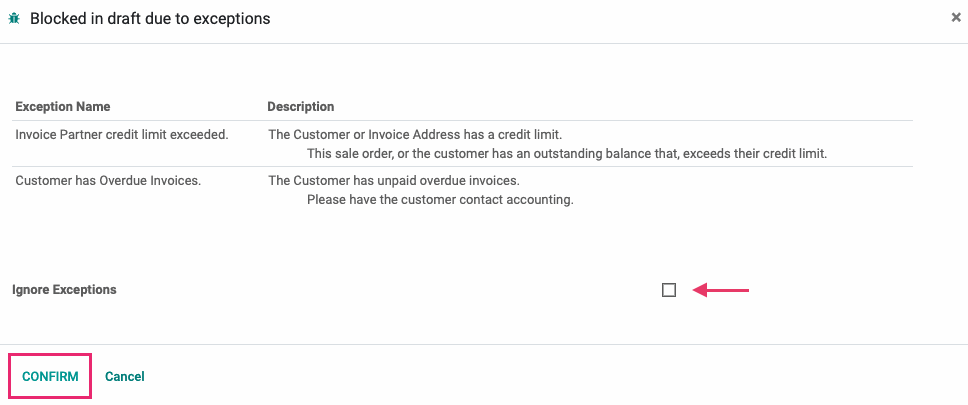

Click Ignore Exceptions to perform the same action from this page.
Sale Exception Portal
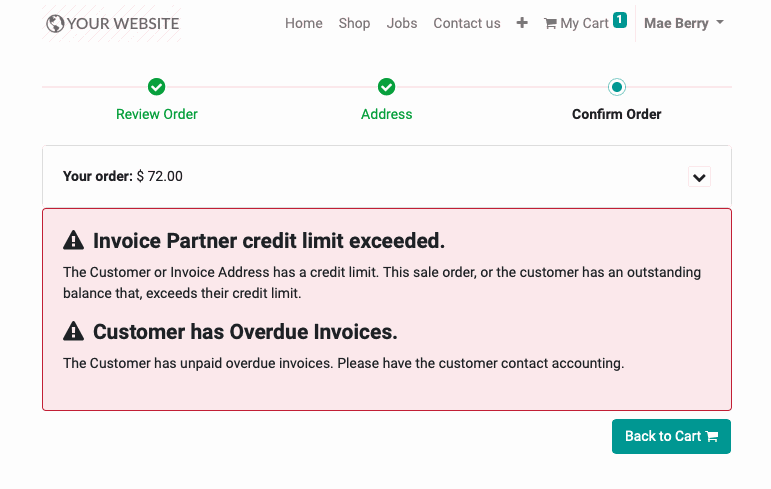
When Sale Exception Portal is installed, the customer will also see those exceptions when they attempt to create a new Sale Order (purchase a website product).
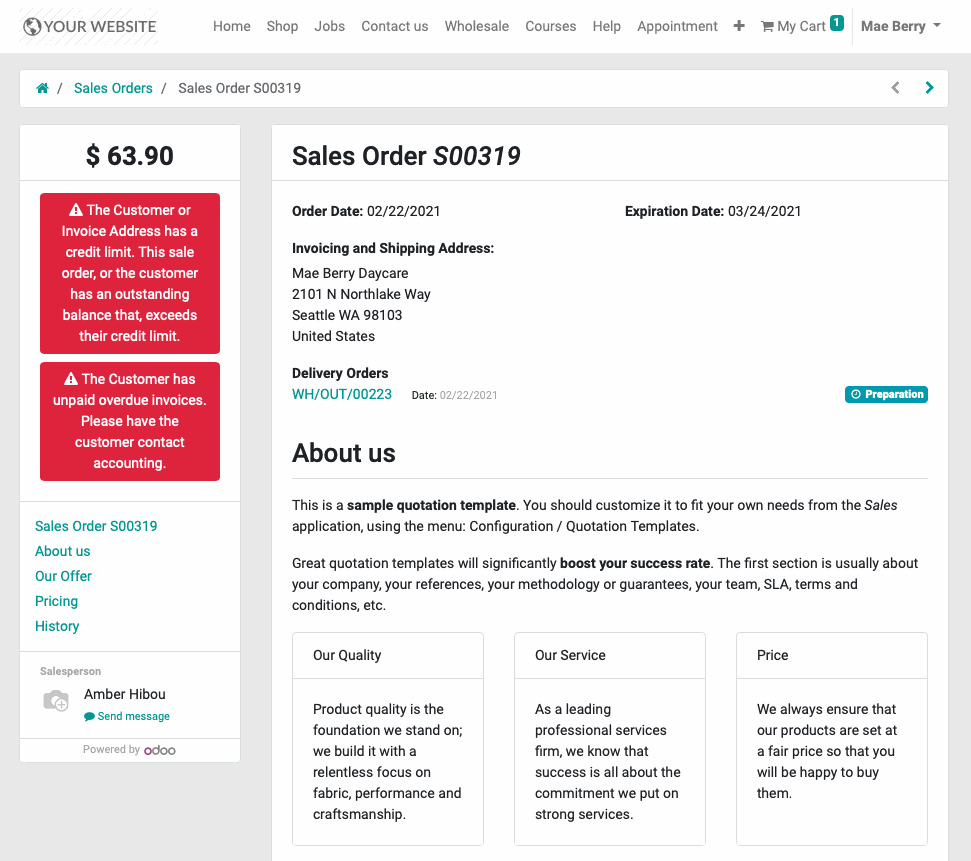
They'll also see these message on existing Sale Orders.
Good to Know!
Parent + Child Contacts
Credit details are entered on the parent contact, but they will also affect any company contact. For example, if there's a credit hold on ACME and Jesse from ACME uses their customer account to place an order, they won't be able to do so because there's a hold on their associated parent company.