- Stock Delivery Planner
- HR Holidays Accrual
- HR Payroll Input Report
- HR Employee Activity
- HR Holidays Partial
- Human Resources (HR) Modules
- Boxes
- Payroll Modules
- ShipBox
- Sales Modules
- Sale Section Subtotal
- PrintBox
- Hibou Fedex Shipping
- Inventory Modules
- Maintenance Modules
- Accounting Modules
- Helpdesk Modules
- Forte Payment Acquirer
- Account Payment Electronic
- US ZIP Code to City/State
- Purchase by Sale History MRP
- Payroll Batch Work Entry Error SKIP
- Web Auto Paginate
- Payment Analytic
- Payroll Input Name Report
- Purchase Modules
- Project Modules
- Website Modules
- Tools + Settings Modules
- Point of Sale Modules
- Manufacturing Modules
- Hibou Commissions
Hibou Odoo Suite: Sales Modules: Sale Order Planner - Delivery Route
Repository Versions:
Modules:
LGPL-3
Purpose
This documentation covers the installation, configuration, and functionality of Hibou's Warehouse Delivery Route module for Odoo. Delivery Routes are automatically derived on a sales order based on the delivery address for a sales order.
Getting Started
The first step is to install the module. To do so, navigate to the Apps application..

Once there, remove the 'Apps' filter, then search for 'Sale Order Planning - Delivery Route'. When you're ready, click install.

Good to Know!
The Sale Order Planning - Delivery Route module requires the Hibou Sale Order Planner and Warehouse Delivery Routes modules. However, if you do not already have these installed, Odoo will install them for you during this module's installation.
Process
To get started, navigate to the Inventory app.

Configuring Warehouse Settings
Once there, click on CONFIGURATION > SETTINGS. In the Warehouse section, check the box for "Multi Step Routes". Enabling this setting will also enable the "Storage Locations" setting. When finished, click SAVE .

Create a Delivery Route
Next, go to CONFIGURATION > Warehouse Management > WAREHOUSES. This brings you to a list of all of warehouses. Select the warehouse you'd like to add a Delivery Route to.

Click Edit.
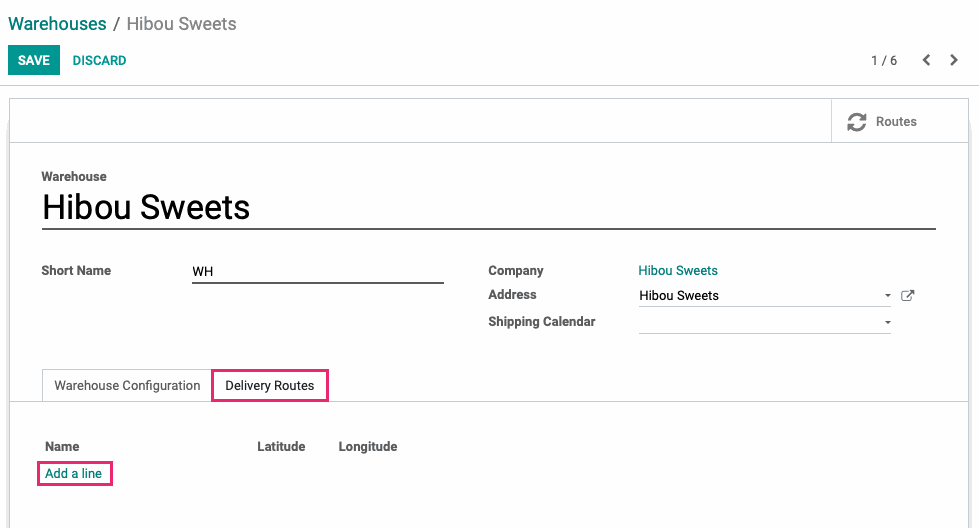
On this form, you'll see a new Delivery Routes tab. This is the list of all of the delivery routes for this Warehouse.
Under the DELIVERY ROUTES, click ADD A line to create a new delivery route.

You will be presented with a the Create Delivery Routes modal window. Fill in the following information:
Name: The name of this delivery route.
Warehouse: The warehouse for this delivery route.
Latitude: The Latitude coordinate for the center of this delivery route.
Longitude: The Longitude coordinate for the center of this delivery route.
Note: Any internal notes for this delivery route. This is an optional field.
When finished, click SAVE & CLOSE or SAVE & NEW to repeat the process and create another delivery route.

When you're finished added all routes to the warehouse, click Save.
Good to Know!
Finding Latitude and Longitude
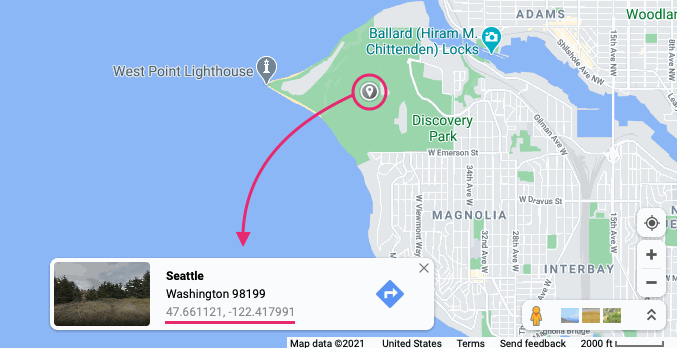
To find the latitude and longitude for the delivery route, open Google Maps. Find the rough center of the delivery route and right click on that location. You'll see pop-up at the bottom of the screen displaying the latitude and longitude for that point on the map.

Default Delivery Routes for Contacts
Navigate to the Contacts app.

Once there, select the contact for which you'd like to set a default delivery route.

Click Edit.
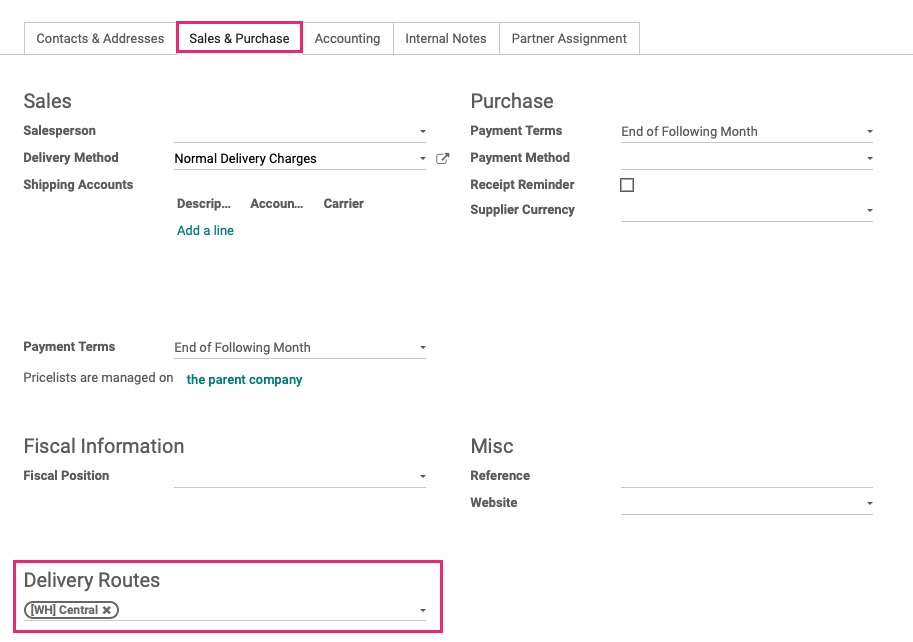
Under the Sales & Purchases tab, select the appropriate route from the Delivery Routes dropdown.

When you're ready, click SAVE. Orders for this contact will now be defaulted to the selected delivery route.
Assigning a Delivery Route to Orders
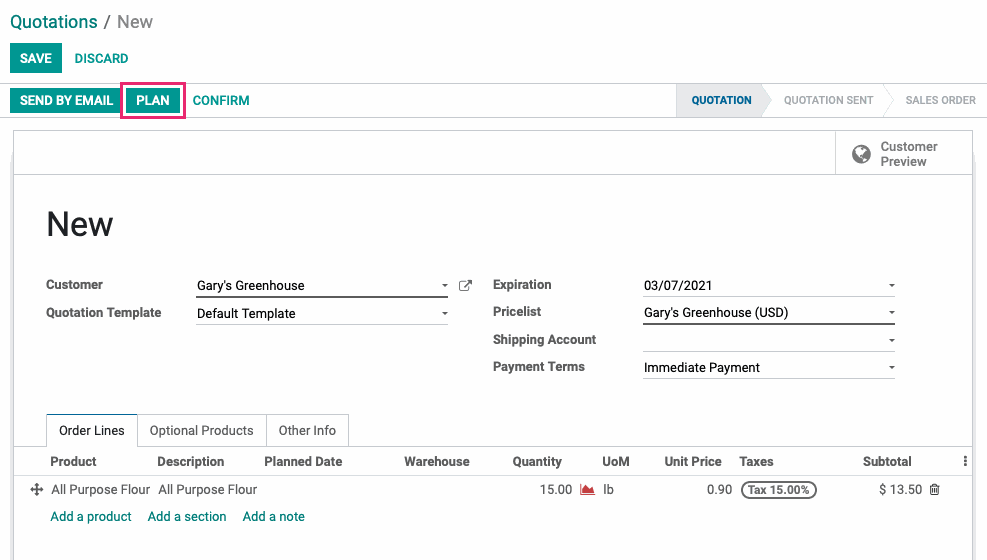
When a quotation is created, you can detect and assign the appropriate delivery route for the order based on the customer's address by clicking Plan.
