- Accounting Modules
- Account Payment Electronic
- Boxes
- Forte Payment Acquirer
- Helpdesk Modules
- Hibou Commissions
- Hibou Fedex Shipping
- HR Employee Activity
- HR Holidays Accrual
- HR Holidays Partial
- HR Payroll Input Report
- Human Resources (HR) Modules
- Inventory Modules
- Maintenance Modules
- Manufacturing Modules
- Payment Analytic
- Payroll Batch Work Entry Error SKIP
- Payroll Input Name Report
- Payroll Modules
- Point of Sale Modules
- PrintBox
- Project Modules
- Purchase by Sale History MRP
- Purchase Modules
- Sale Section Subtotal
- Sales Modules
- ShipBox
- Stock Delivery Planner
- Tools + Settings Modules
- US ZIP Code to City/State
- Web Auto Paginate
- Website Modules
Hibou Odoo Suite: Inventory Modules: Stock Delivery Planner
Repository Versions:
Modules:
OPL-1
Purpose
This document outlines the processes associated with the Hibou Stock Delivery Planner for Odoo 14. This module will help you deliver products as efficiently as possible leading to potential cost savings on shipping while meeting delivery requirements from the original sale order. This is accomplished by gathering rates at the time of delivery through the respective carrier API's, with the information gathered neatly in one easy-to-read selection menu, showing each rate per package from each carrier's different available plans based on the methods that you offer.
Getting Started
To get started, navigate to the Apps application.

Once there, remove the 'Apps' filter, and search for 'Stock Delivery Planner'. When you're ready, click INSTALL.

Good to Know!
This module requires the Delivery Hibou, Sale Planner, and Inventory. If you do not already have these apps installed, Odoo will install them for you during this module's installation.
Per-package rating is provided by Hibou's carrier-specific modules and should be installed as needed to utilize this behavior.
Hibou FedEx Shipping
Hibou UPS Shipping
Good to Know!
Calendar Configuration
Please refer to Sale Order Planner for Warehouse and Delivery Method calendar Configuration instructions, as these are important to the operation of this module.
Process
To get started, navigate to the Settings application.

Then click the Sales app on the left side, and scroll down to Delivery Planner.
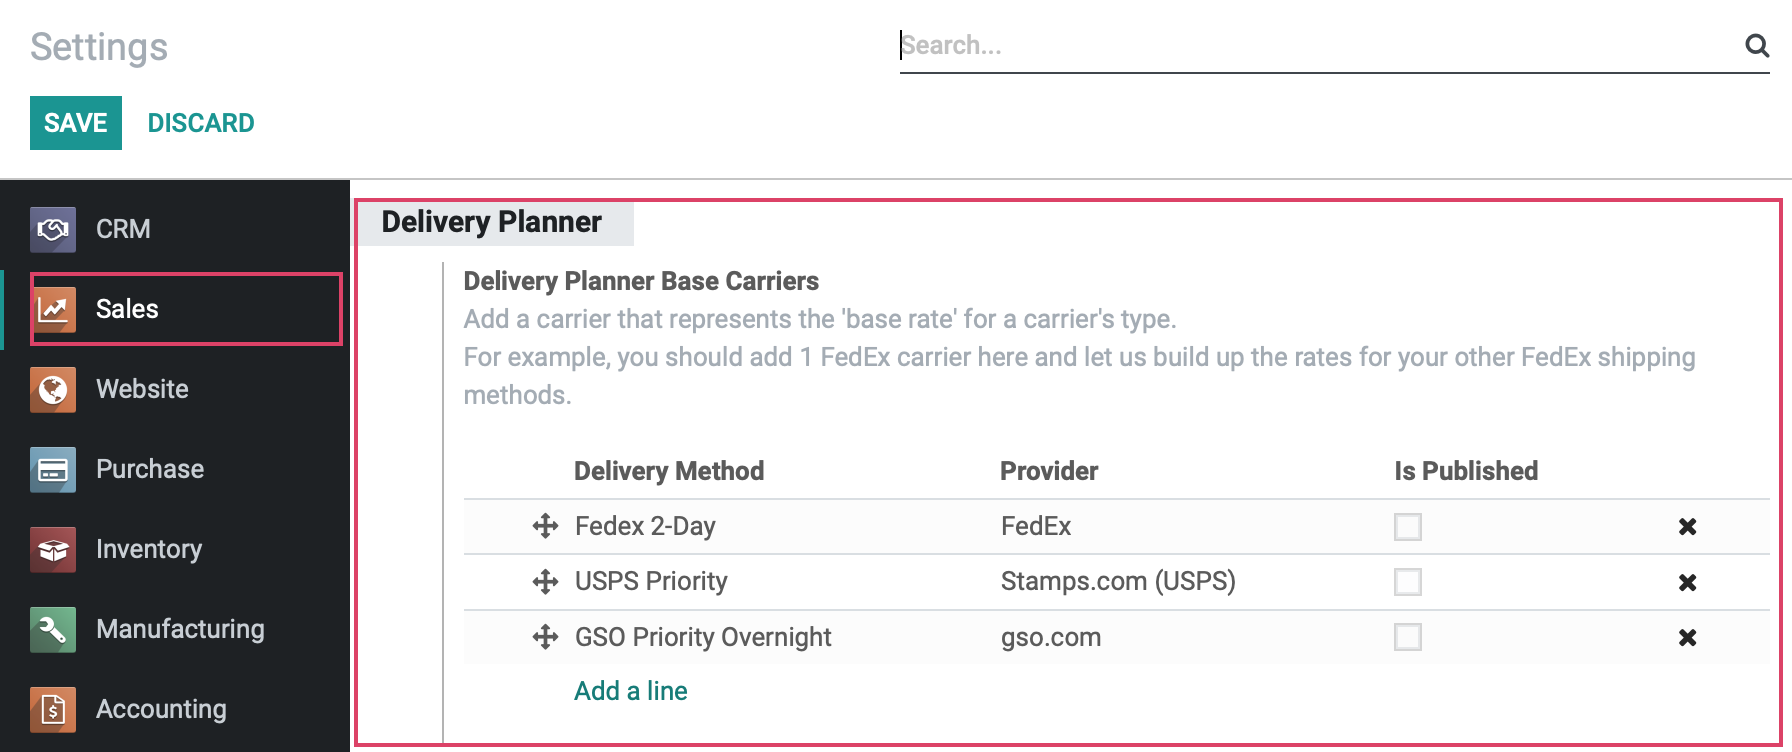
Select, publish, and/or add any carriers you require. When finished, click SAVE.
Next, navigate to the Inventory app.

Single/Non-Packaged Shipment
Within the Inventory app, go to operations > transfers. Here we see a list of all of our transfers in their various states. Select a transfer that is in the ready state and has a delivery stemming from a Sales Order.
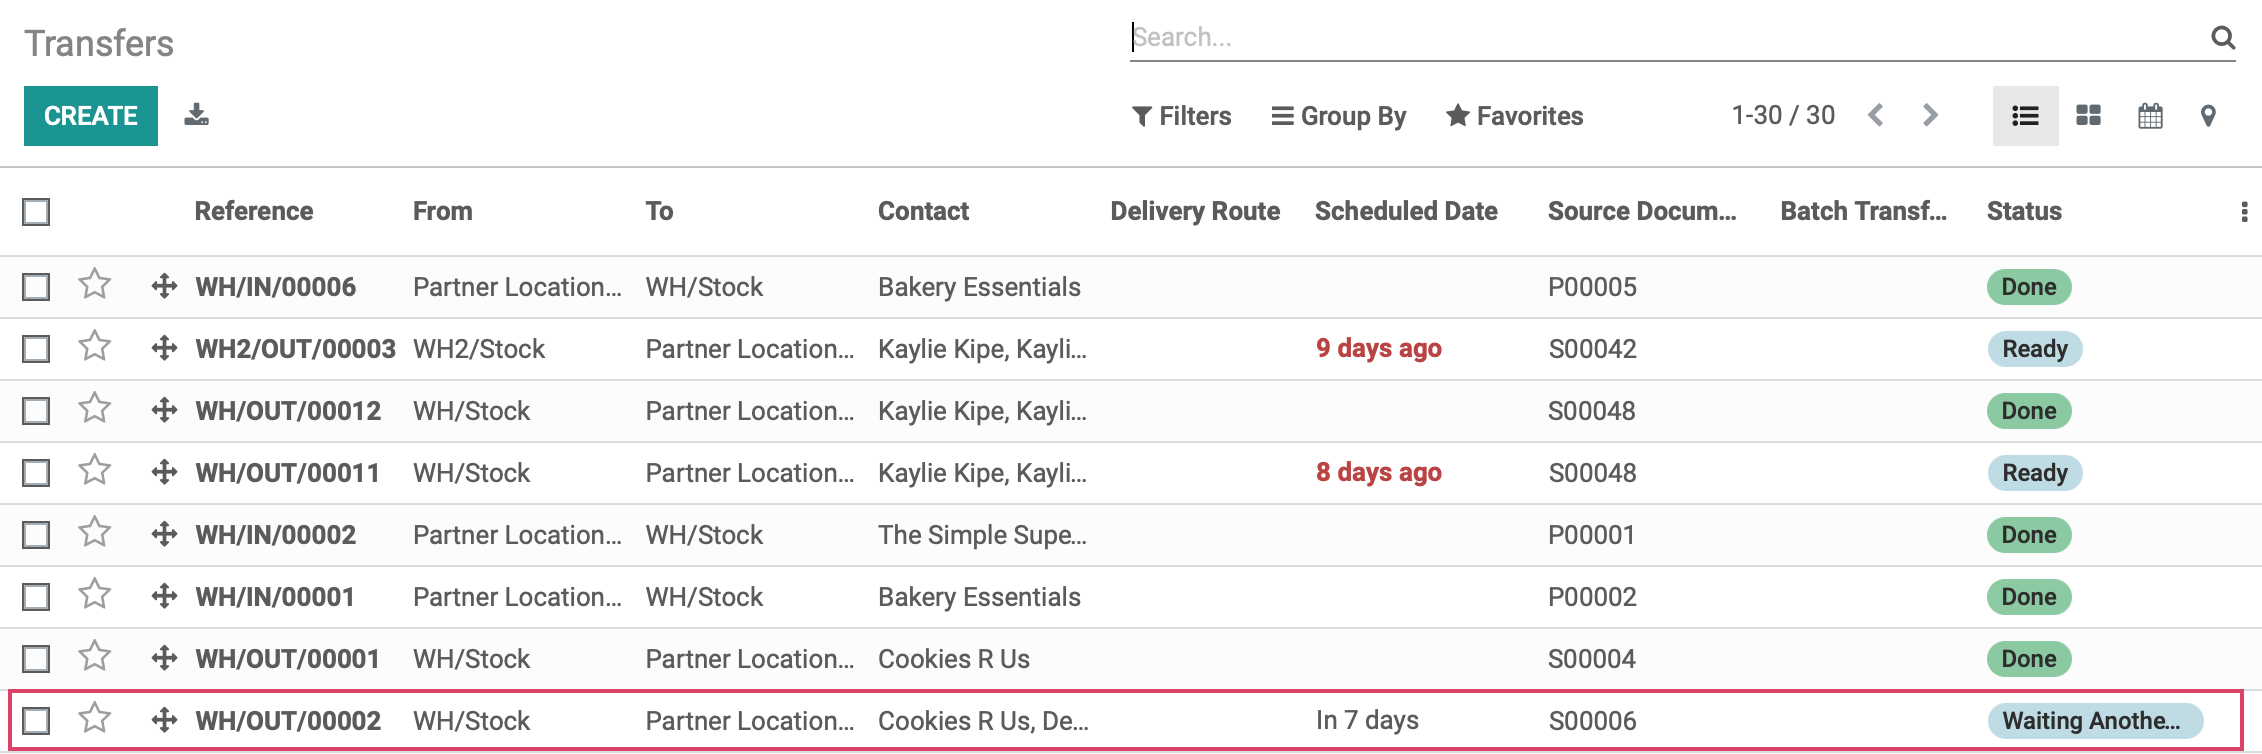
We will see that our new module has added a new button. If you don't use packaging or everything would ship in one box, you can click PLAN SHIPMENT to see and select an appropriate plan.

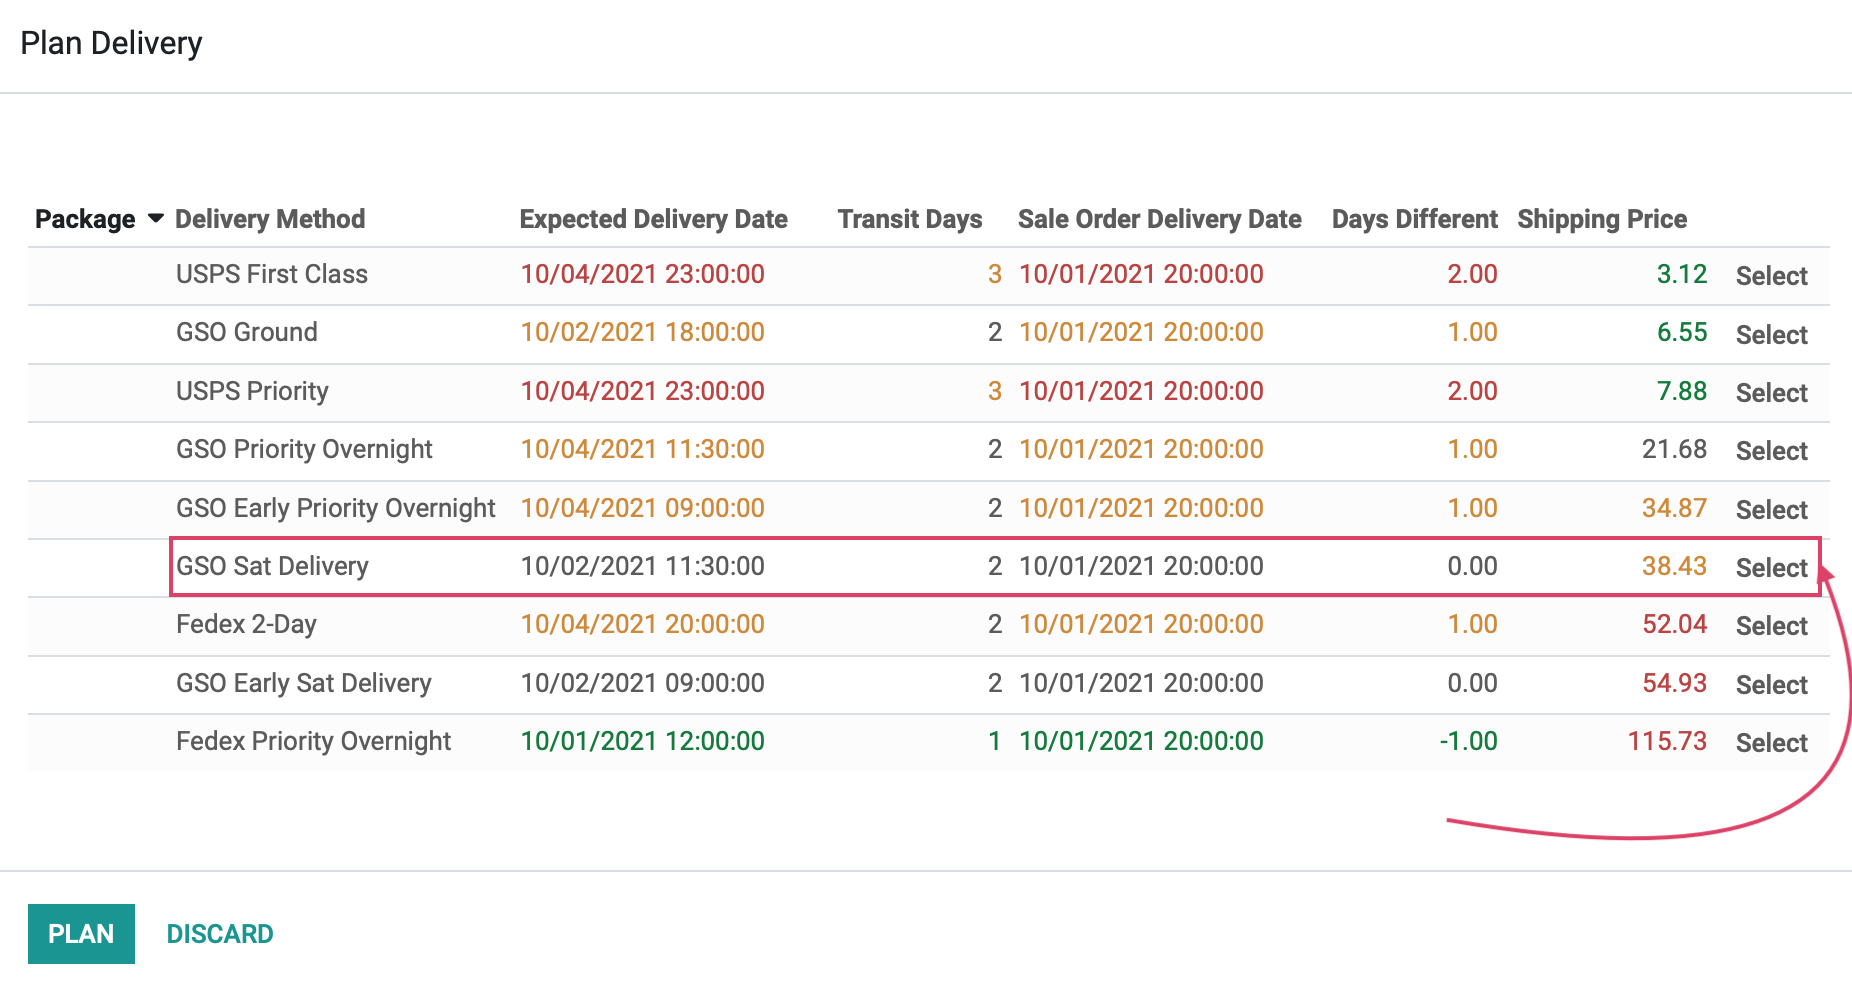
A window will open titled "Plan Delivery."
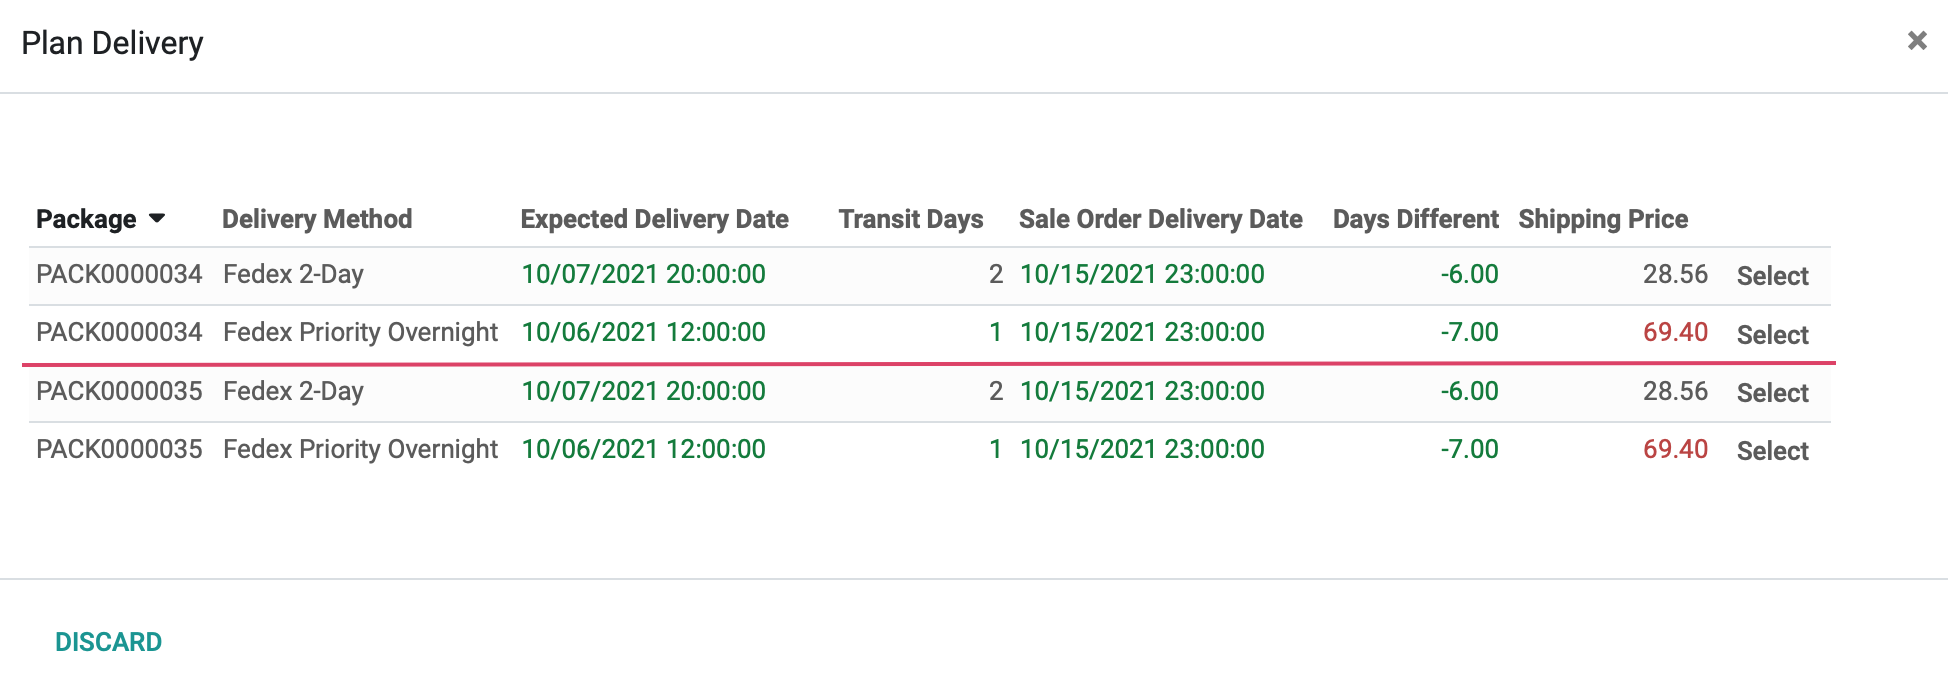
Here we can see all of our available delivery methods, expected delivery dates, number of transit days, the sale order delivery date, how many days different the expected and the sale order delivery dates are, and the price.
To meet our delivery commitment, we will choose GSO Sat Delivery. Click Select to the right of your preferred method.
Once we have chosen our method, if we click on the Additional Info tab, we will see our details. If the plan selected is for a different delivery method than what was originally set as the Carrier on the delivery order, the Carrier will be replaced with the delivery method selected.
![]()
Click VALIDATE.

If we again look at the Additional Info tab, we will see that our Tracking Reference has now populated.
![]()
If you are using another of our Hibou Suite Modules, Shipbox, you can set up a scale and printer to have your labels printed with the related information appearing in the chatter.

Multi-Package Shipments
Important!
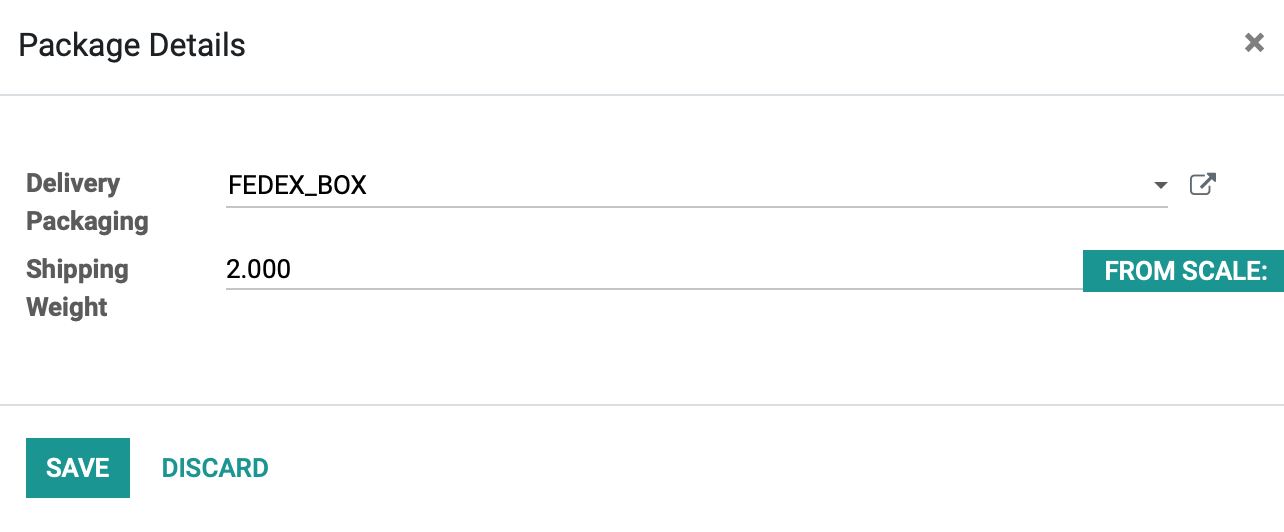
Delivery Packages Configuration
Hibou Delivery Planner supports generic packaging (Carrier selection of "No Carrier Integration" and no data in Package Code). Generic packaging should be used when you wish to rate across carriers. When delivering back rates for packages that use generic packaging, this is done by adding the carrier specific packaging code (02, for UPS for example) to the packaging code (which is blank) to get a carrier-recognized code for the shipment.
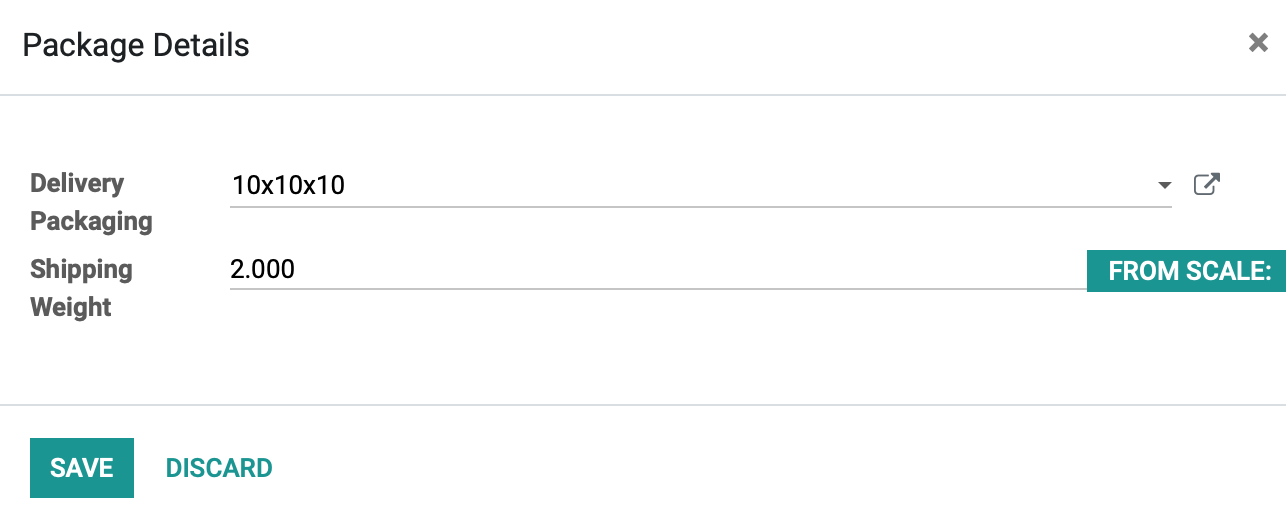
If you select carrier-specific packaging during packing that has a code, you will only receive back rates that are eligible for that code during planning. If you select carrier-specific packaging during packing that does not have a code, you will only receive back rates for that carrier during planning.
When put goods being shipped into packages as part of your workflow and then click Plan Shipment, you will see eligible plans for each package.
To choose the plan you would like to use for a package, click Select. Doing so will highlight the plan blue and grey out other available plans for this package.
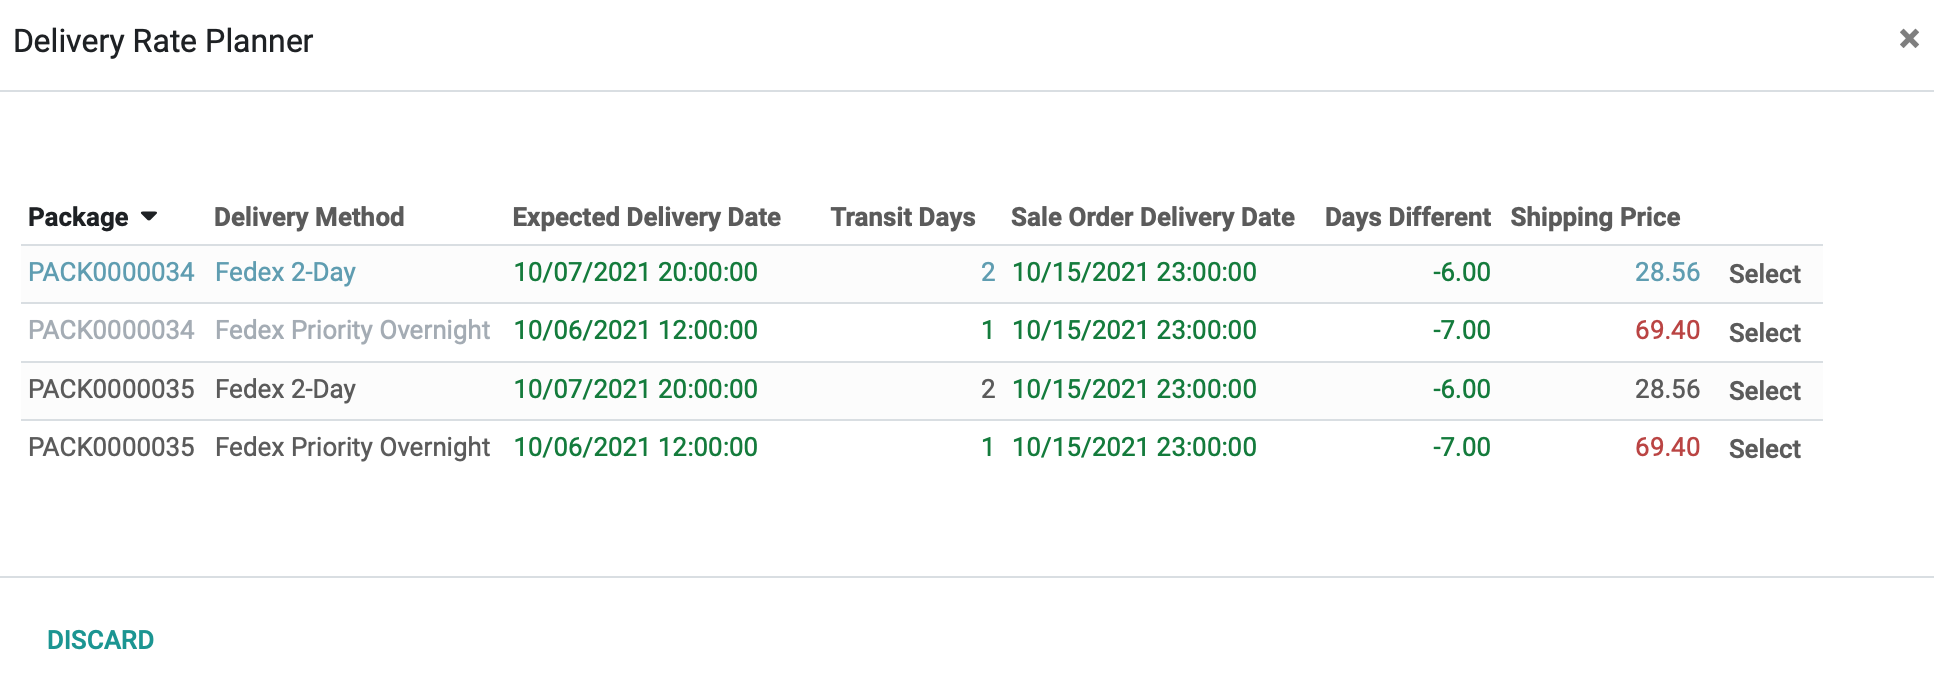
When you have selected a plan for each package, click Plan. Then click Validate.
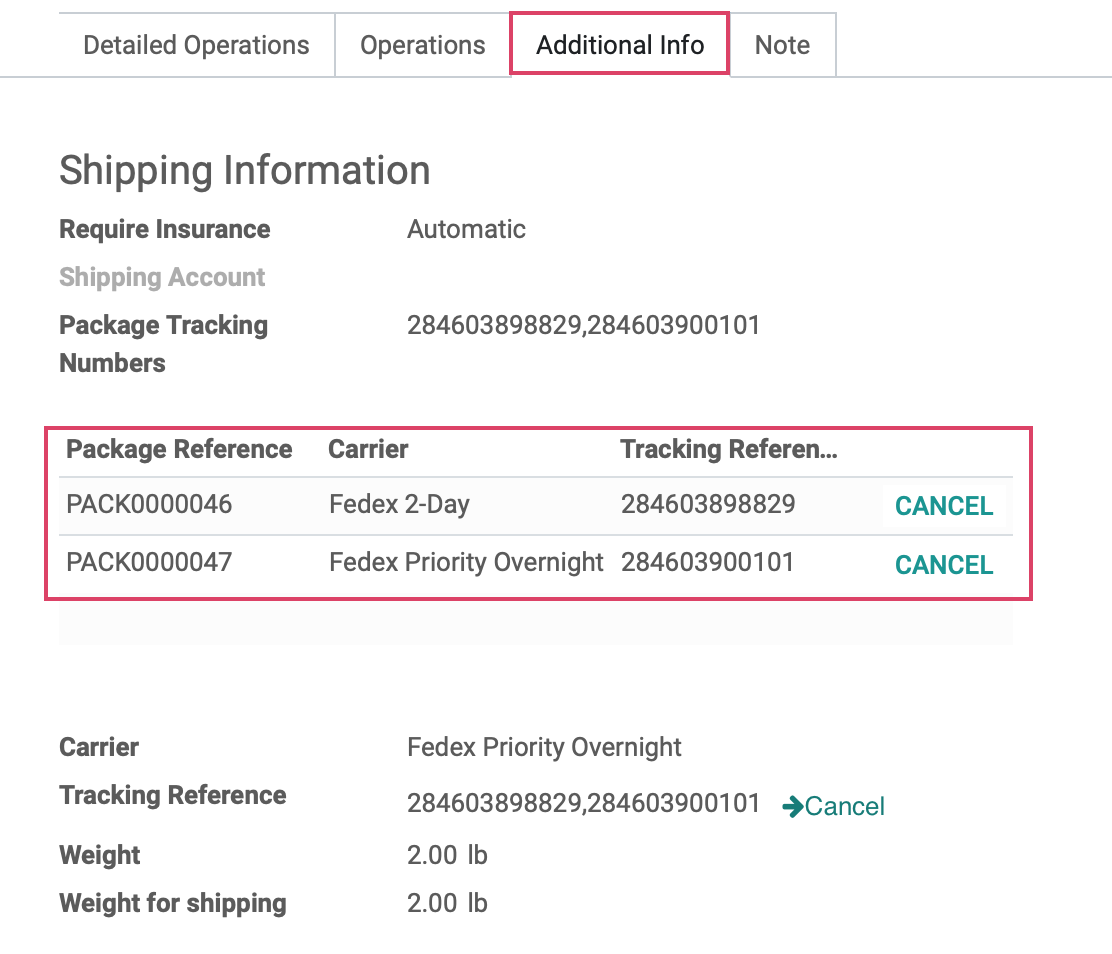
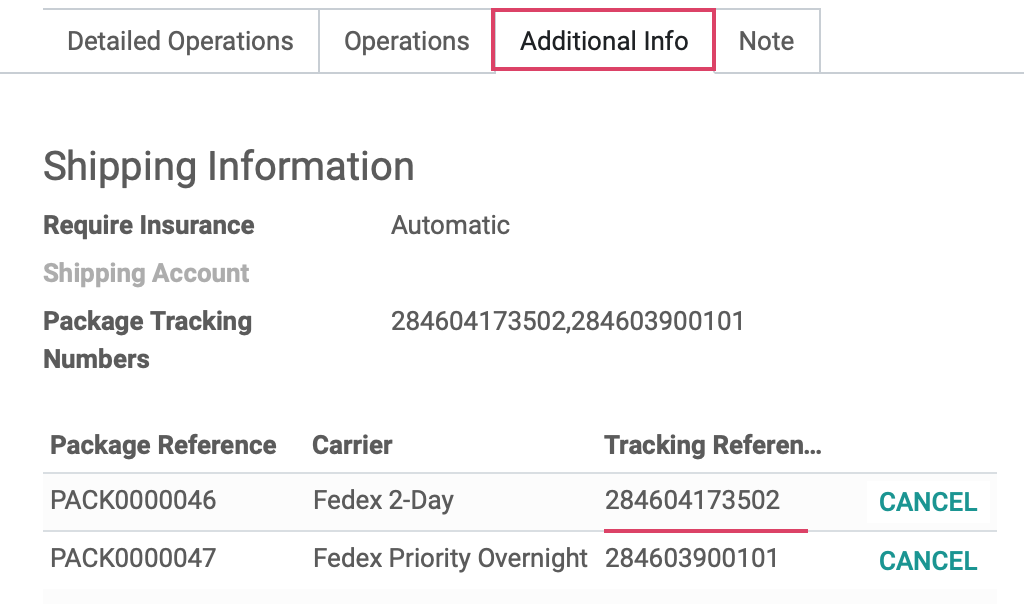
Under the Additional Info tab, you will see Package Tracking Numbers, which is a comma separated list of tracking numbers from all packages, and a list of the package shipments themselves. In the package shipments, you will see the following for each package:
Package
Carrier/Delivery Method
Tracking Reference
You will also see the ability to Cancel the shipment for each package.
If needed, you can navigate to Packages and select the appropriate package that was cancelled for re-shipment. To do so, click on the package and select the desired Carrier then click Ship.
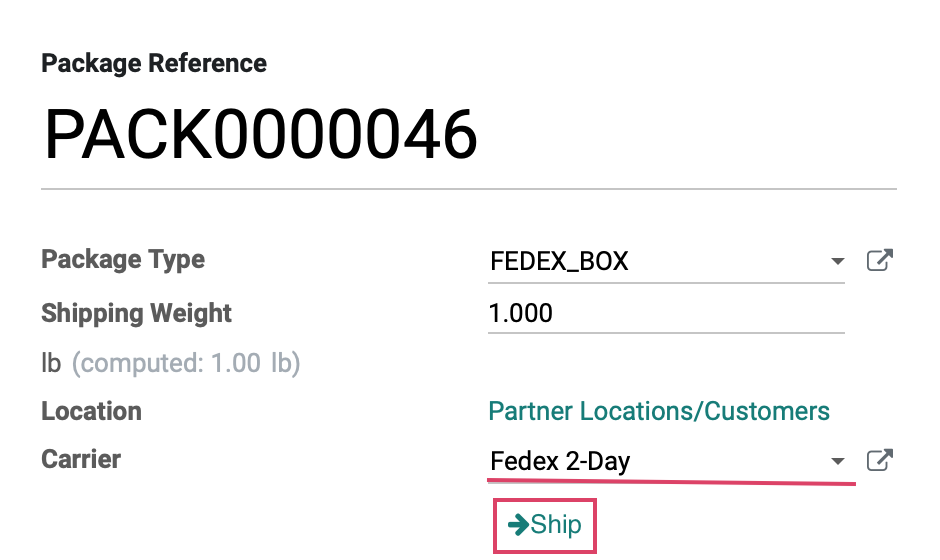
The tracking number will be populated and under the Additional Info tab you will see the new shipment details for the package.
Good to Know!
Note that, if possible, the Package Tracking Numbers is also copied to the default Tracking Reference field.
Additionally, the Carrier on the delivery order will be set to one of the carriers used in the set of package shipments (if it was not already set to an eligible carrier at the time of shipment).