- Stock Delivery Planner
- ShipBox
- PrintBox
- Boxes
- US ZIP Code to City/State
- Point of Sale Modules
- Purchase by Sale History MRP
- Payroll Batch Work Entry Error SKIP
- Web Auto Paginate
- Website Modules
- Hibou Fedex Shipping
- Hibou Commissions
- Sale Section Subtotal
- Forte Payment Acquirer
- Helpdesk Modules
- Account Payment Electronic
- Tools + Settings Modules
- Sales Modules
- Inventory Modules
- Accounting Modules
- Manufacturing Modules
- Purchase Modules
- Project Modules
- Payment Analytic
- Payroll Modules
- Human Resources (HR) Modules
- HR Holidays Partial
- Payroll Input Name Report
- HR Payroll Input Report
- HR Holidays Accrual
- Maintenance Modules
- HR Employee Activity
Hibou Odoo Suite: Project Modules: Timesheet Description
Purpose
The purpose of this documentation it to outline the utilization of the Timesheet Description module.
The Timesheet Description module enables the ability for timesheet entries to be made in a form view, allowing the user to enter more descriptive timesheet entries. Additionally, there is an option to display your timesheet entries in Markdown on the front end of your website.
Getting Started
To get started, navigate to the Apps application.

Once there, remove the 'Apps' filter and search for 'Timesheet Description'. When ready, click install.

Good to Know!
This module requires both the Timesheets and Project apps; however, if you do not already have these installed, Odoo will install them for you during this module's installation.
Process
Once the module is installed, navigate to the Project app.
The New Form View for Timesheet Entries
Once in the Project app, select a project, then select a task from within that project.
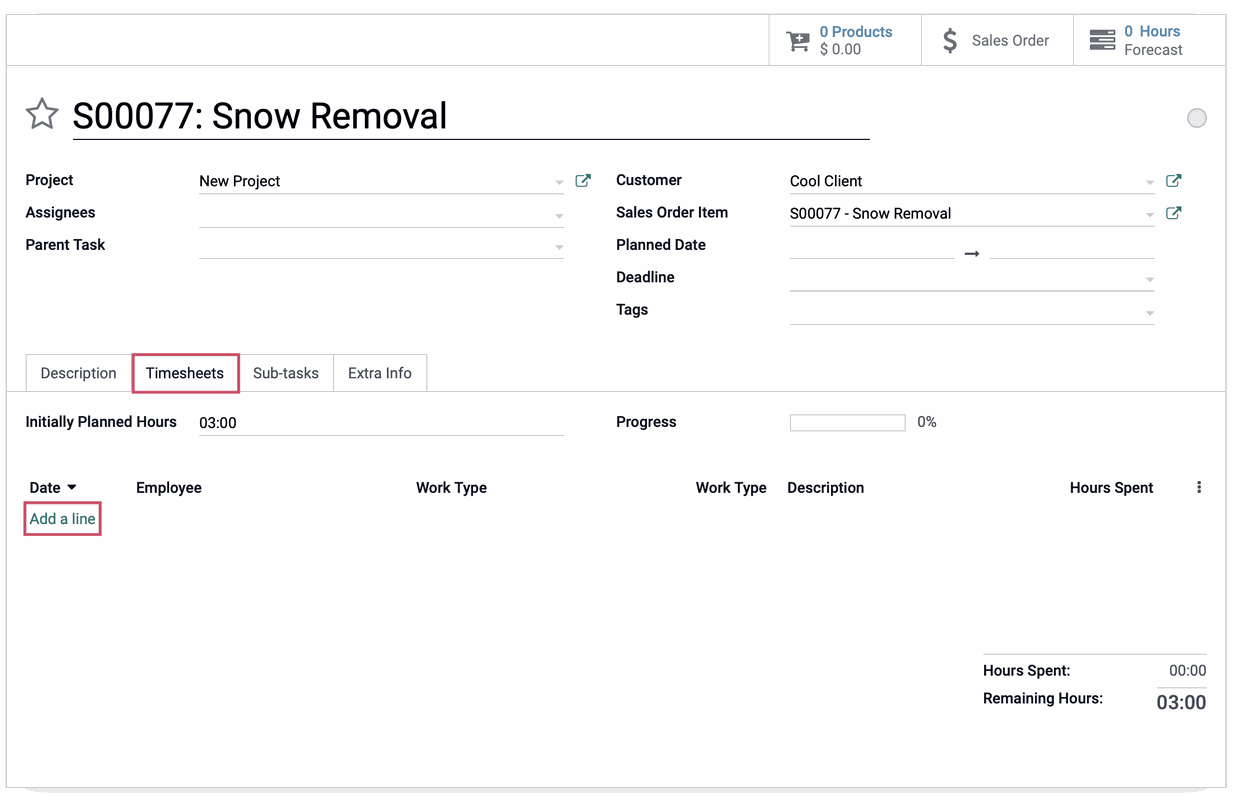
Click edit, then under the Timesheets tab click Add a line.

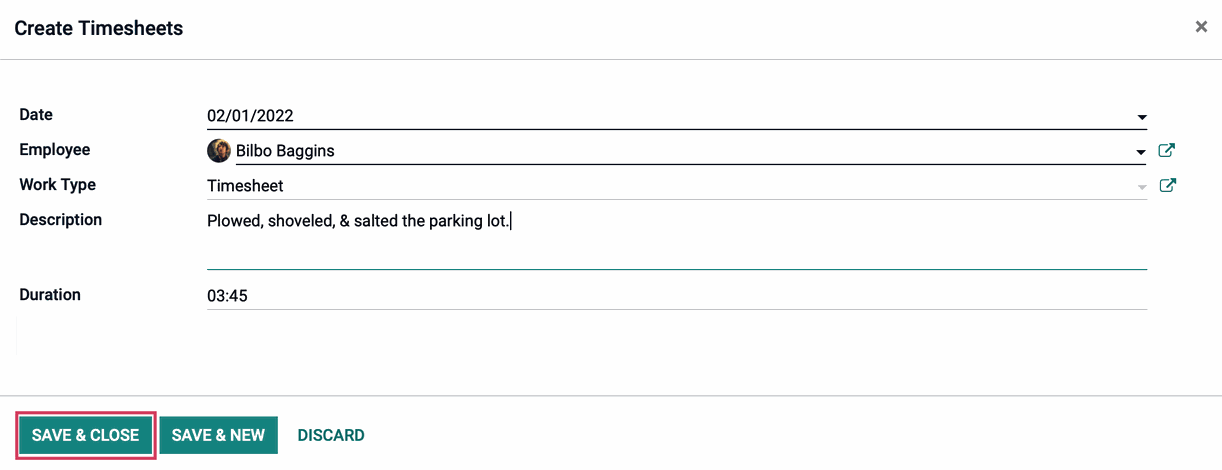
Instead of entering information inline, a new Create Timesheets modal window will pop up with extra space for more in-depth description. Complete the fields on this form.
Date: This will auto-populate with today's date. You can adjust it to reflect the actual date the work was completed, as needed.
Employee: This will auto-populate with your username. You can change it, but be careful about entering timesheets for other employees.
Work Type: Make the appropriate selection from the drop-down list.
Description: This is the new field that has been added. Here you can enter a description for the work done on this task.You may use standard markup language.
Duration: Enter the duration of the work that was done. You may enter this in hours:minute (3:45) or as an integer (3.75).

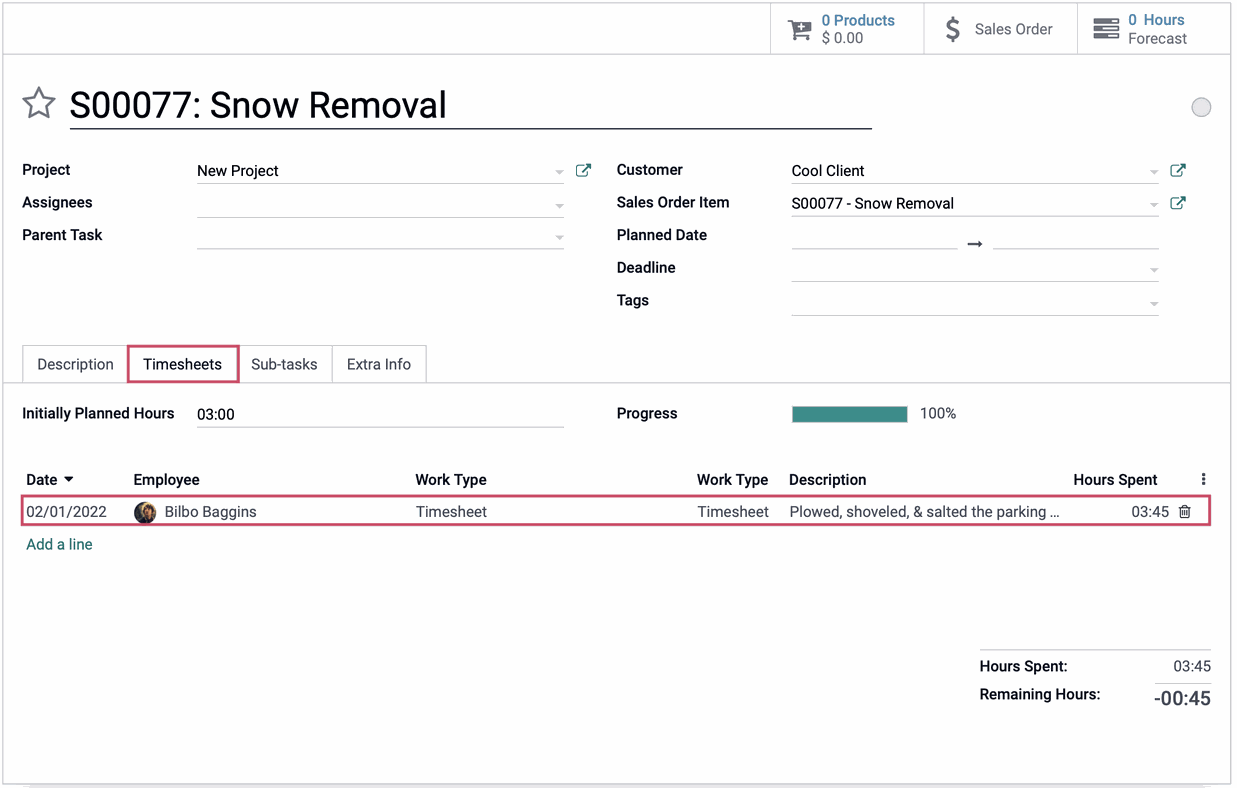
Click SAVE & CLOSE, or click SAVE & NEW to add another entry for this task. When you're done entering your timesheets, they'll now show on the Timesheets tab of the task.

Click Save on the task.
