- Stock Delivery Planner
- HR Holidays Accrual
- HR Payroll Input Report
- HR Employee Activity
- HR Holidays Partial
- Human Resources (HR) Modules
- Boxes
- Payroll Modules
- ShipBox
- Sales Modules
- Sale Section Subtotal
- PrintBox
- Hibou Fedex Shipping
- Inventory Modules
- Maintenance Modules
- Accounting Modules
- Helpdesk Modules
- Forte Payment Acquirer
- Account Payment Electronic
- US ZIP Code to City/State
- Purchase by Sale History MRP
- Payroll Batch Work Entry Error SKIP
- Web Auto Paginate
- Payment Analytic
- Payroll Input Name Report
- Purchase Modules
- Project Modules
- Website Modules
- Tools + Settings Modules
- Point of Sale Modules
- Manufacturing Modules
- Hibou Commissions
Hibou Odoo Suite: Accounting Modules: Timesheet Invoice
Repository Versions:
Modules:
AGPL-3
Purpose
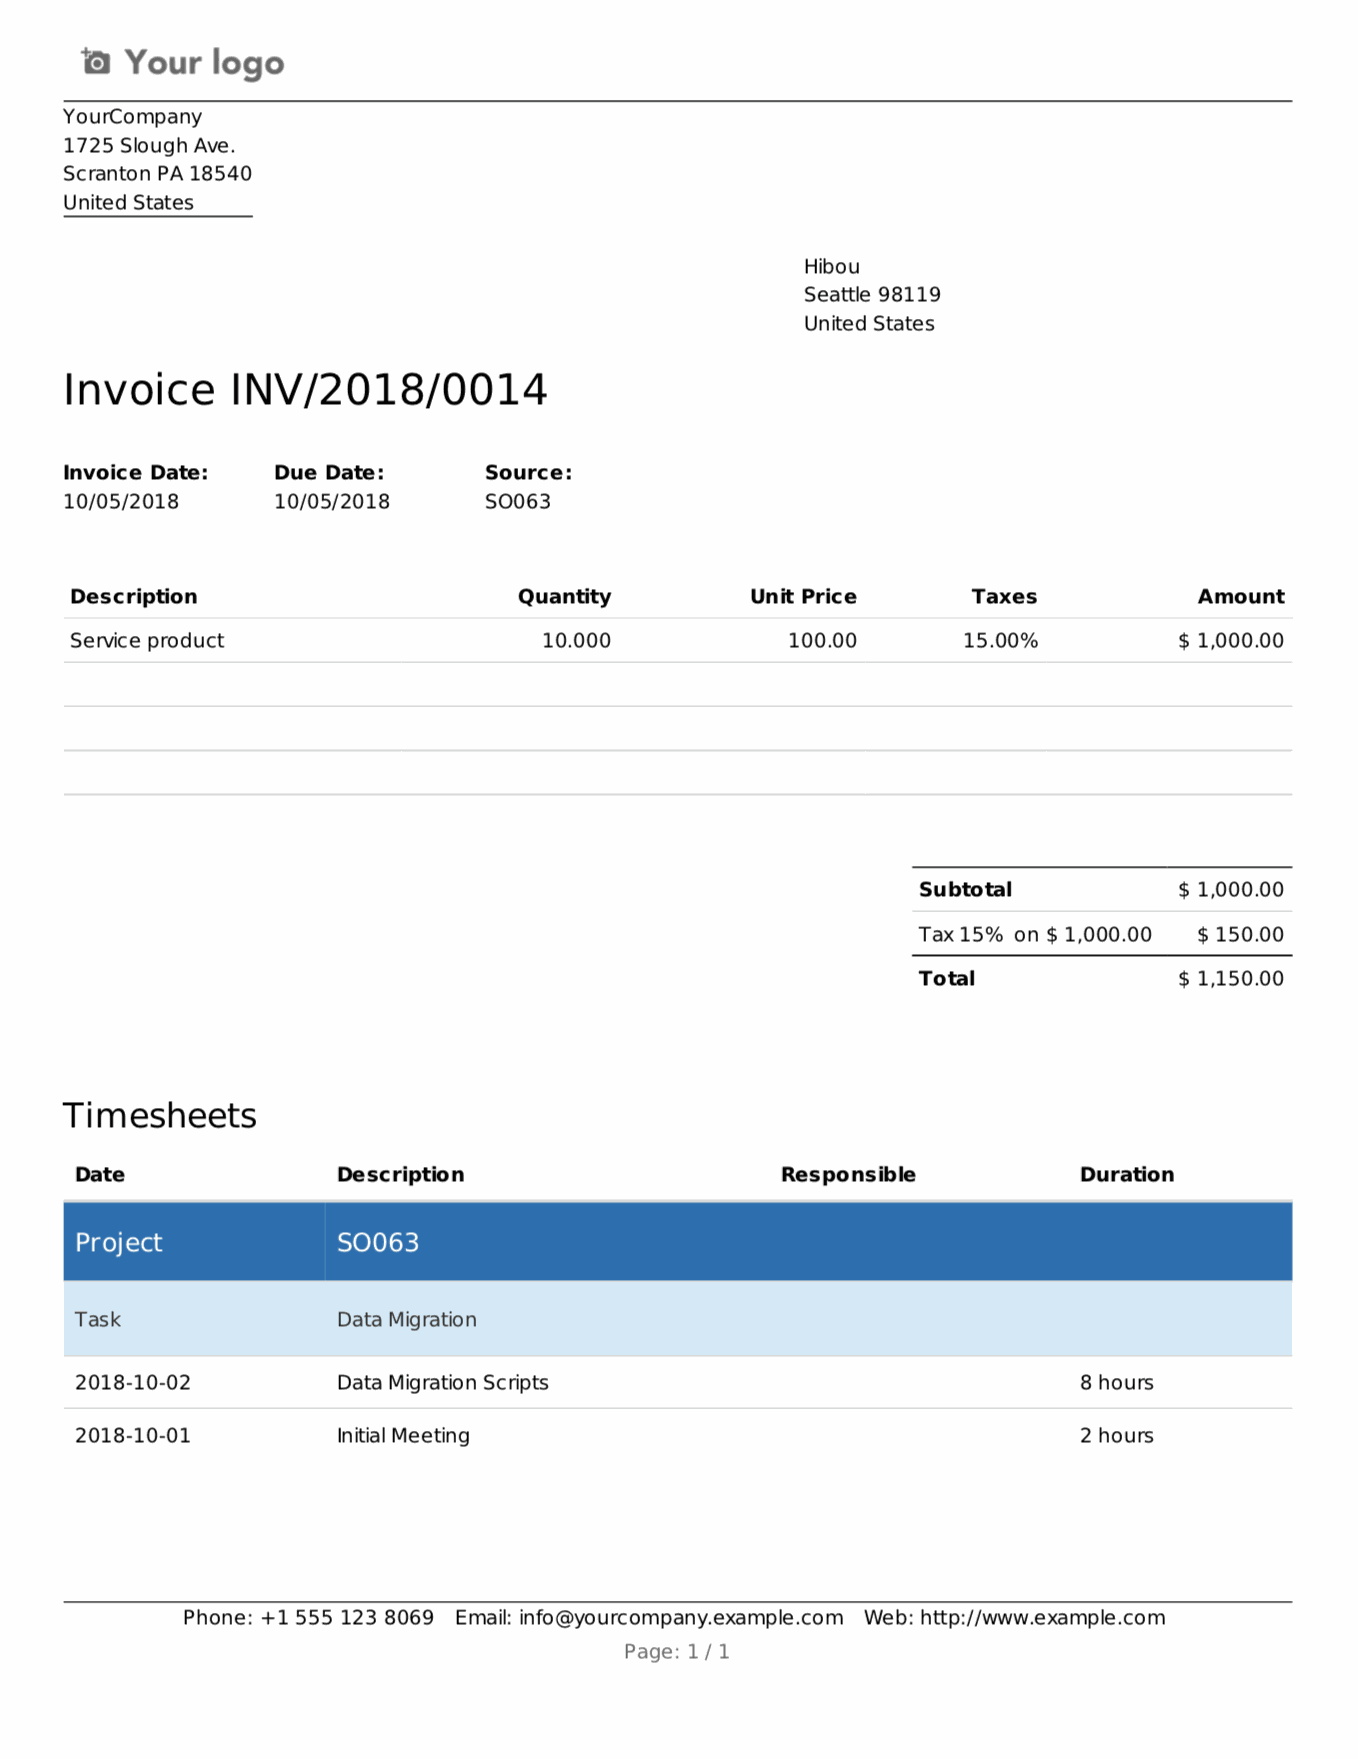
The Timesheet Invoice module adds timesheet descriptions to the reports/PDFs of invoices.
Getting Started
First things first, we want to install the module! Navigate to the Apps application and search for 'Timesheet Invoice'. When ready, click the Install button.

Good to Know!
This module requires the Sales Timesheet module. However, if you do not already have this module installed, Odoo will install it for you during this modules installation!
Processes
Navigate to the Accounting application.

Accounting Configuration
Once there, select Configuration followed by Settings. In the Analytics section, ensure the box is checked for Analytic accounting. When finished, hit the Save button.

Product Configuration
Navigate to the Inventory application.

Once there, select Master Data followed by products. Select an existing product from the list or make a new one by hitting the Create button.
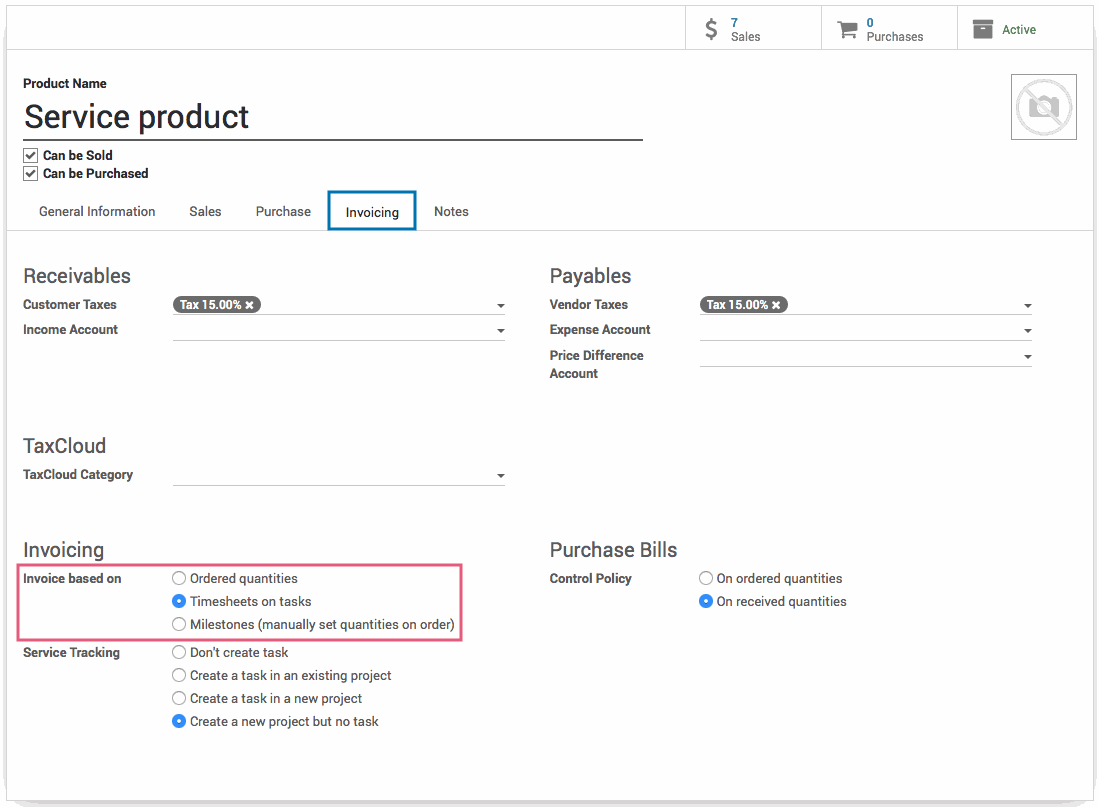
In the General Information tab there is the Product Type field, which should be set to Service. In the Invoicing tab in the Invoicing section Invoicing based on should be set to Timesheets on tasks. When finished, hit the save button.

Timesheets Configuration
Navigate to the Timesheets application.

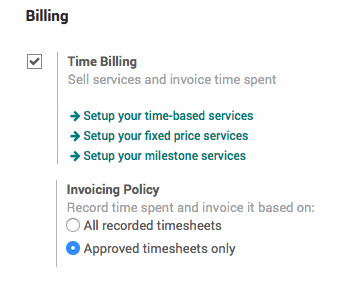
Once there, select Configuration > Settings. In the Billing section make sure that Time Billing option is checked.
Additionally you can change the invoicing policy to 'Approved Timesheets Only' so that only timesheets that have been approved by the appropriate user will be used when invoicing. When finished, hit the Save button.

Timesheets on Invoices
Navigate to the Accounting Application. Once there select SALES > CUSTOMER INVOICES. Select the invoice with timesheet entries from the list of invoices. Assure that the information in the various fields is correct and and hit the VALIDATE button.
After the invoice has been validated, print the invoice. You will notice a new 'Timesheets' with the Date, Description, Responsible, and Duration of each timesheet entry.

Technical
This modules adds a new section to the report invoice document QWeb view that displays all timesheet entries for the Invoice's associated project.