- Stock Delivery Planner
- ShipBox
- PrintBox
- Boxes
- US ZIP Code to City/State
- Point of Sale Modules
- Purchase by Sale History MRP
- Payroll Batch Work Entry Error SKIP
- Web Auto Paginate
- Website Modules
- Hibou Fedex Shipping
- Hibou Commissions
- Sale Section Subtotal
- Forte Payment Acquirer
- Helpdesk Modules
- Account Payment Electronic
- Tools + Settings Modules
- Sales Modules
- Inventory Modules
- Accounting Modules
- Manufacturing Modules
- Purchase Modules
- Project Modules
- Payment Analytic
- Payroll Modules
- Human Resources (HR) Modules
- HR Holidays Partial
- Payroll Input Name Report
- HR Payroll Input Report
- HR Holidays Accrual
- Maintenance Modules
- HR Employee Activity
Hibou Odoo Suite: Tools + Settings Modules: Boxes: ShipBox
Purpose
This documentation covers the installation, configuration, and functionality of Hibou's ShipBox module for Odoo. This module offers the ability to incorporate a USB shipping scale for more accurate shipping rates. When Odoo creates a ZPL label on an outgoing transfer, it will immediately print to the default label printer, for the current profile, upon validation.
Important!
PrintBox requires a preconfigured Raspberry Pi. Please contact us for further details.
If you have already received the Raspberry Pi and need help connecting to it, please refer to our Boxes page for more information.
Process
The first step is to install the module. To do so, navigate to the Apps application.
Once there, remove the 'Apps' filter, then search for 'Box - ShipBox'. When you're ready, click ACTIVATE.

Good to Know!
The ShipBox module requires the Deliveries module, the Hibou Box - PrintBox module, and the Inventory application. However, if you do not already have these installed, Odoo will do so during this module's installation.
To get started, navigate to the Boxes app.
![]()
Important!
Since this module installed PrintBox, you'll need to be familiar with the configuration and usage of that module. Please review the PrintBox documentation before proceeding as this will cover the setup process around locations, boxes, and user profiles
Scale
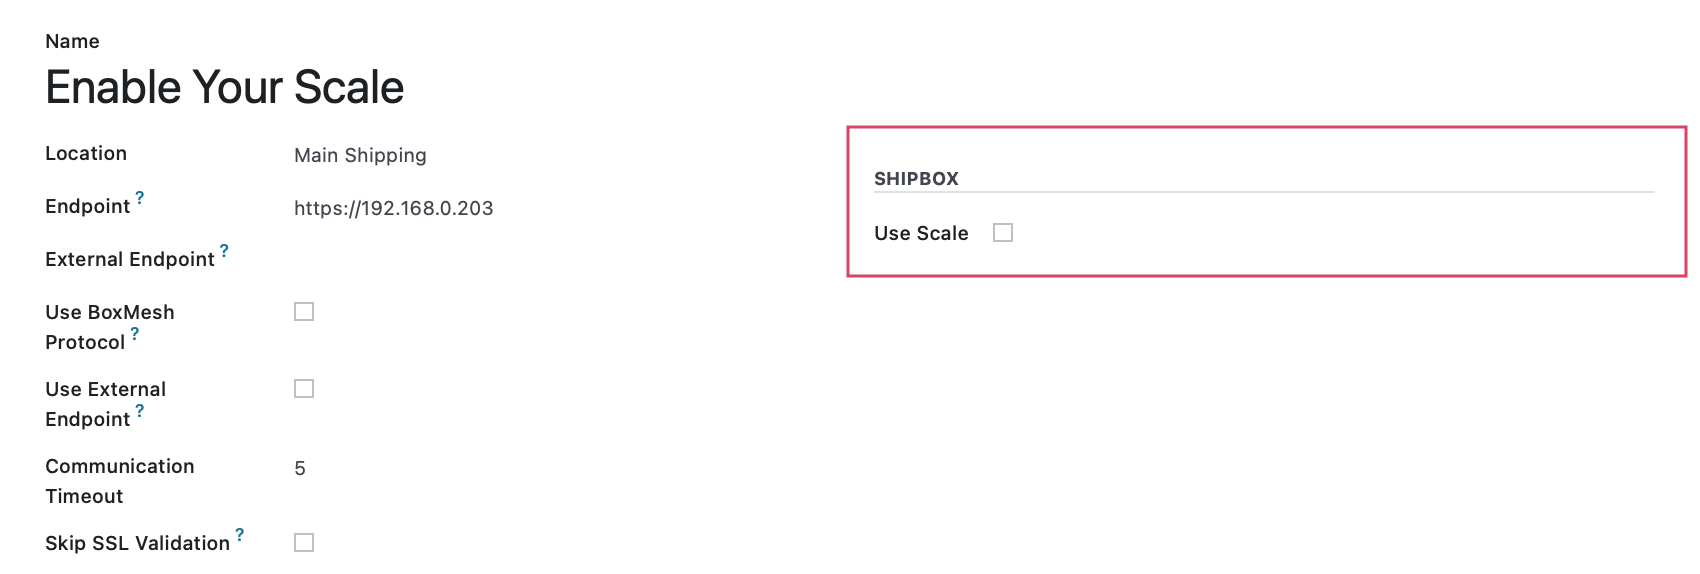
To enable a scale, make sure this is plugged into the raspberry pi via USB cable, first and foremost. Then open up a configured box and enable the following:
- Use Scale: Enable this option to allow the box to use a scale.
Important!
One box can only ever be connected to one scale. But a box can be connected to multiple printers, and a location can have multiple boxes with multiple user profiles.
Label Printer
Navigate over to Printer menu and click New.
Then fill out the following:
- Name: Name you printer
- Queue: This queue name is obtained from CUPS, the printer server software on the raspberry pi.
- Box: Select a box to associate the printer with.
- Location: This is a read only field, and will show you which location the box you selected is associated with.

Test Your Printer
You will notice that right above, you have a couple buttons. These are used to test your printers depending on how you configured your box.
- PRINT TEST LETTER to print to the local letter printer.
- SERVER TEST LETTER to print to the network letter printer, use when the box is configured to use BoxMesh
- PRINT TEST LABEL to print to the local label printer.
- PRINT TEST LABEL OVER BUS:
- SERVER TEST LABEL to print to the network label printer, use when the box is configured to use BoxMesh

User Profile with Scale and Add Label Printer
Then navigate over to the User Profile.
Printbox
- Label Printer: Add in your label printer.
Shipbox
- Database Weight Unit: This is a readonly field that shows you the databases current unit of weight. This can be changed if needed to pounds.
- Scale: Select the box with the scale enabled.

Activate Profile w/ Scale and Label Printer
Users may have multiple profiles depending on which location they need to print to. To activate a profile, click the icon on the top-right of the screen, then click on the profile to activate it.

Once this is activated, you will see the scale appear. Place an item on the scale to see how you can capture the weight in real time.

Important!
In order for User to be able to print in Odoo, they will need to visit the Main Endpoint in their browser to accept the SSL.
This can be done by entering Debug mode, clicking on the Boxes icon in the menu bar, and then clicking the endpoint/IP link.

Shipbox Scale and Automatic Label Printing in Action!
Once everything has been configured, its time to show off just how neat this app is.
Let's start by navigating to the Inventory app.
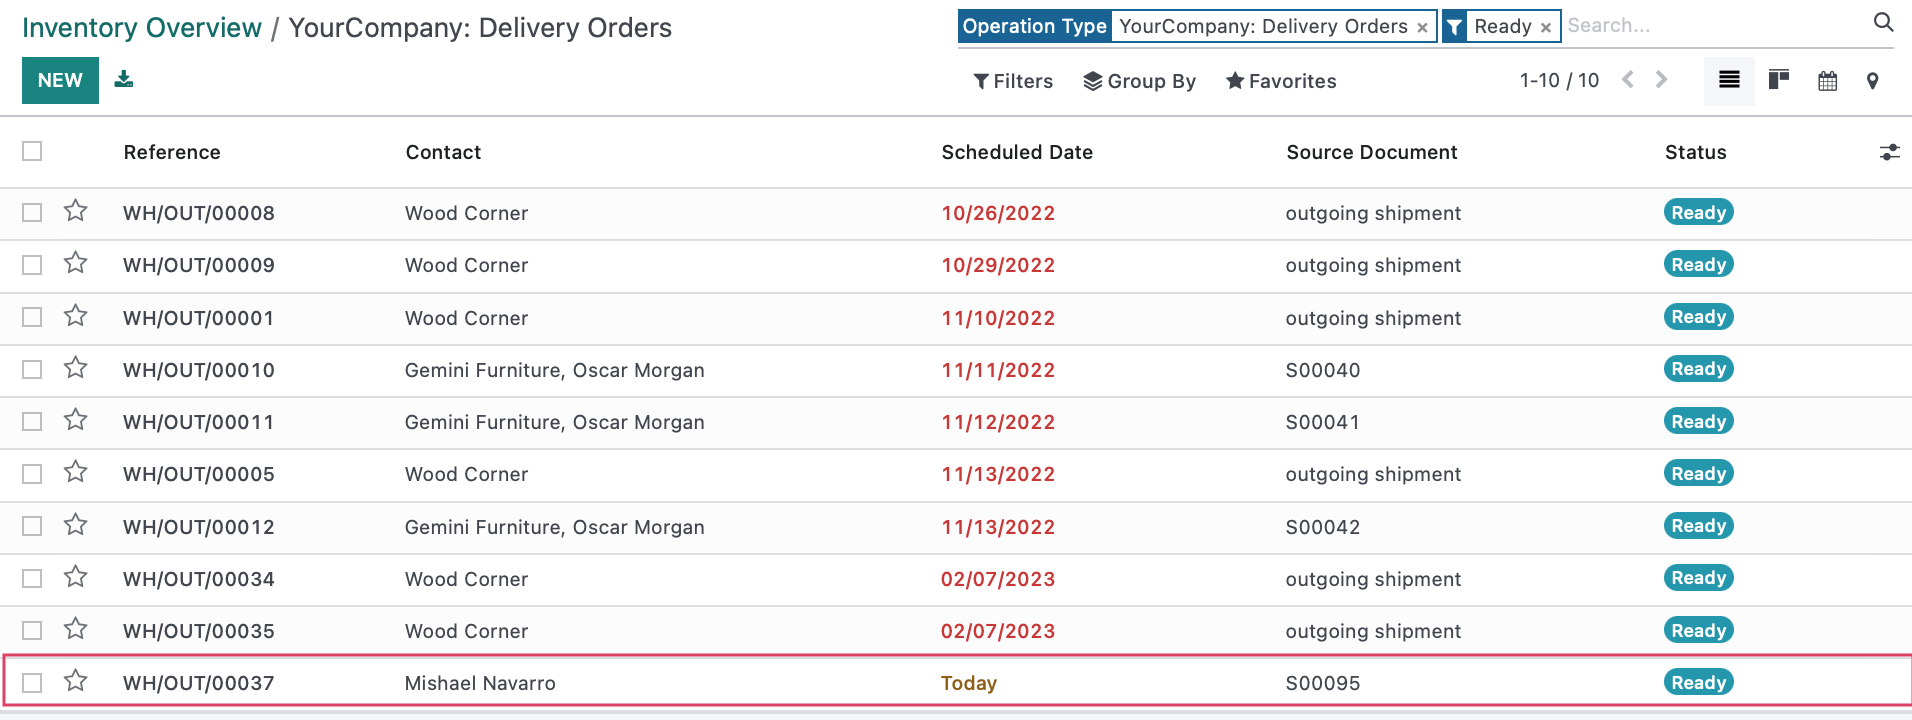
Then open up the filtered view for Delivery Orders from the Inventory overview.

Select a delivery order from the list that you are looking to ship.
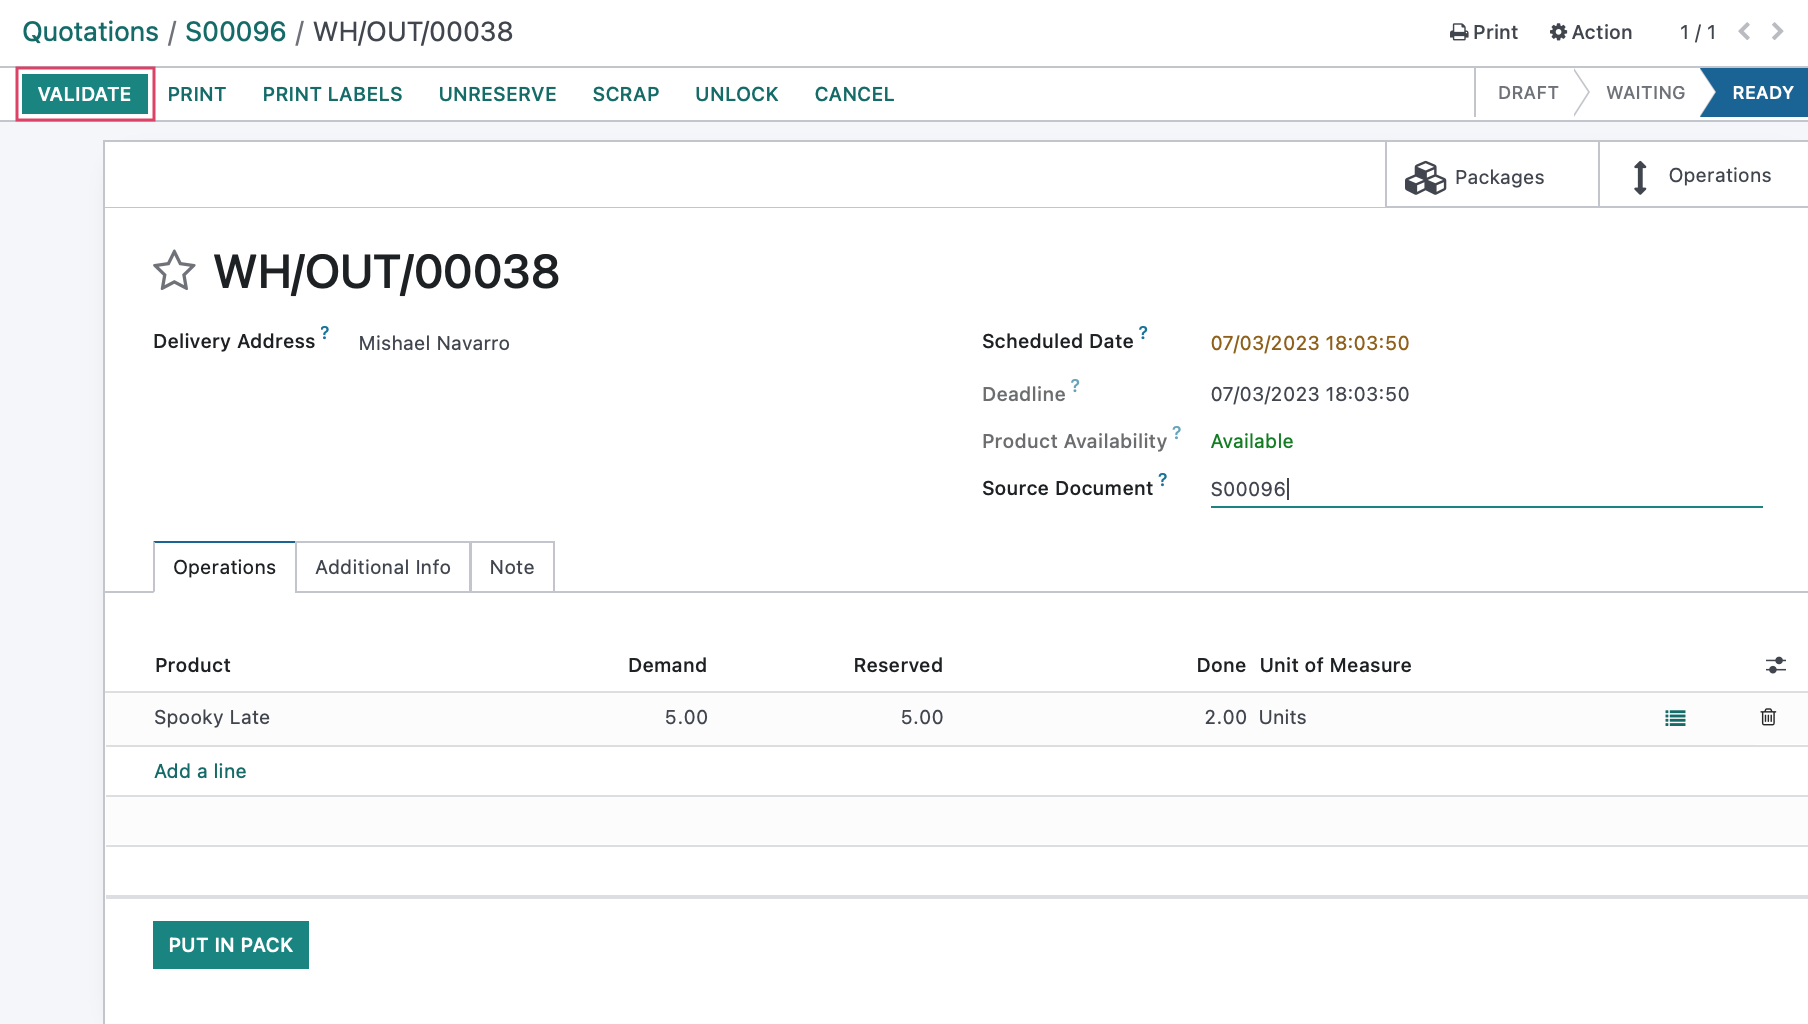
On the transfer, indicate your done quantity, then click Put in Pack.
To learn more about Packages, please review our Packages documentation.
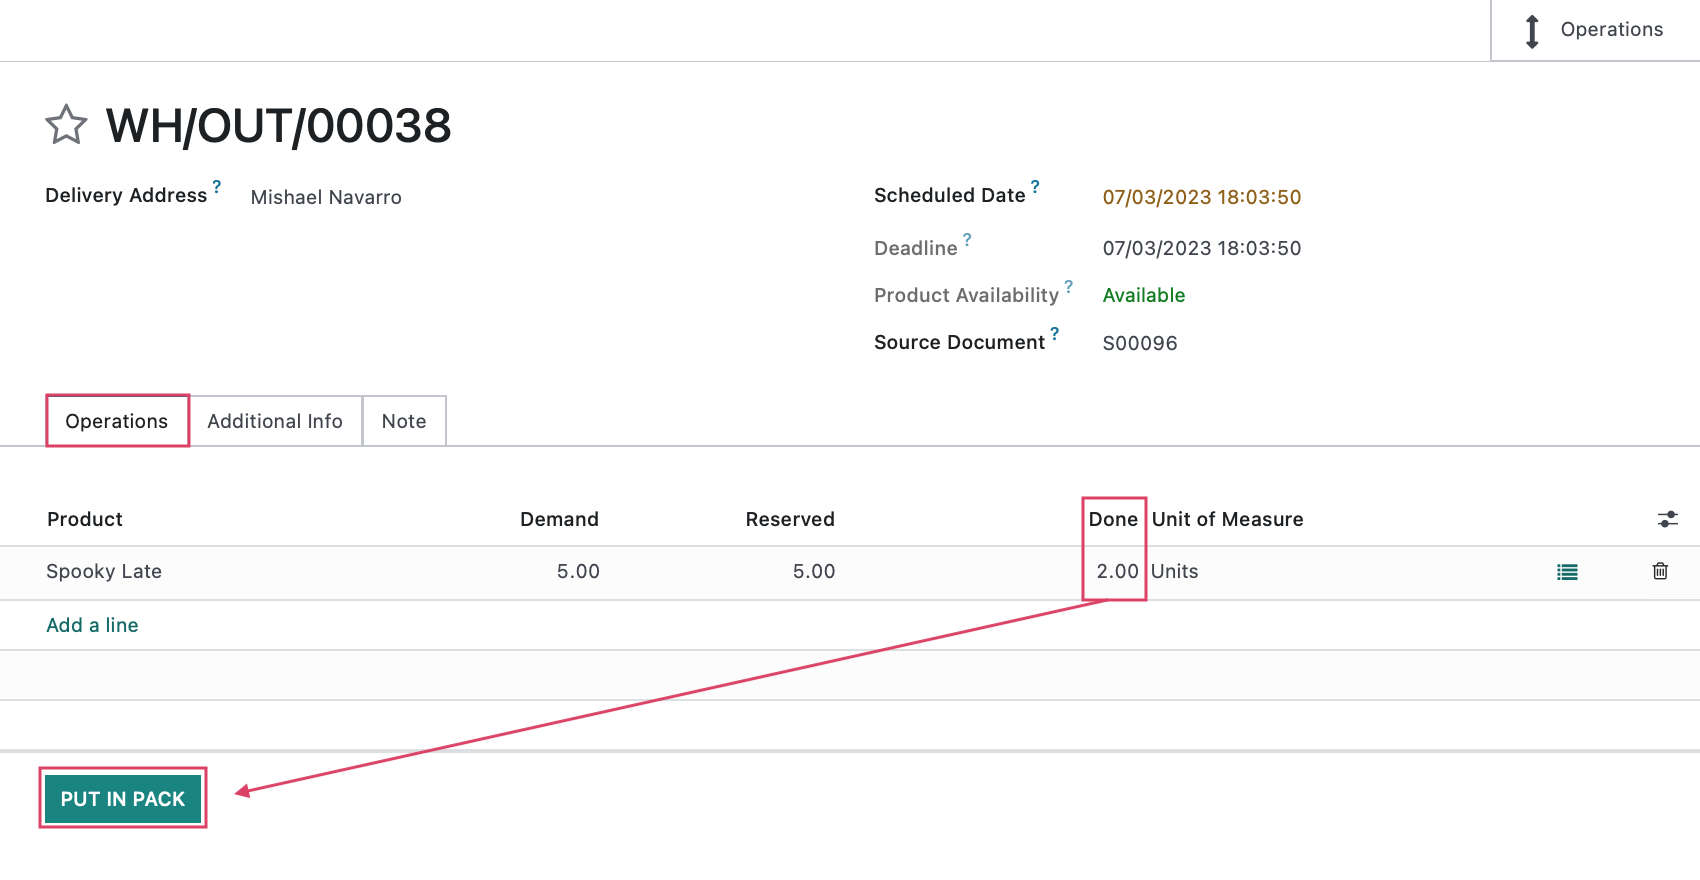
This will open up a window, where you will be able to select your package and use the FROM SCALE button to pull in the weight directly from the scale and onto the Shipping Weight field.
Once you have finished, click Save.

Then VALIDATE your transfer. When the label generates in the chatter below, Shipbox will also have it automatically print to your label printer for you to put onto your package.
