Accounting: Accounting: Actions: Reconciliation
Purpose
The purpose of this documentation is to go over the reconciliation process in Odoo's Accounting application.
Reconciliation is an accounting process that links corresponding journal items together so that you have clear records as to why money was credited or debited on an account.
Reconciliation also refers to the process of ensuring that the items on your business's bank statement are reconciled (linked) to activities in your business.
Processes
To get started, navigate to the Accounting app.

Items to Reconcile
To locate the items that you need to reconcile, it is best to start with a bank statement as this will give you the easiest access to the lines that you need to reconcile.
You can access your bank statements by clicking the icon on the top right of the bank journal card on the Accounting Overview page and then selecting Statements from the panel that appears.
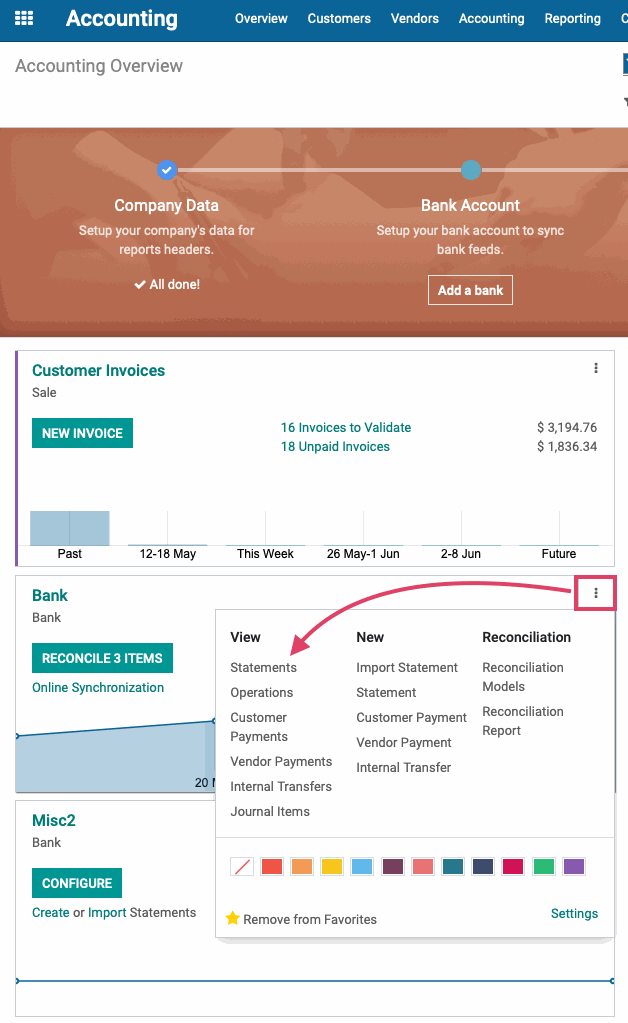
Once you're on the bank statement page, you'll see all of the bank statements that have been imported into Odoo either manually or through any automatic bank synchronization that you have set up. For more information on setting up your bank statements, please see the Setting up a Bank Account document.
Select the bank statement that you would like to reconcile.

You'll see all of your bank statement lines in a form view. Click the reconcile button to begin the reconciliation process.
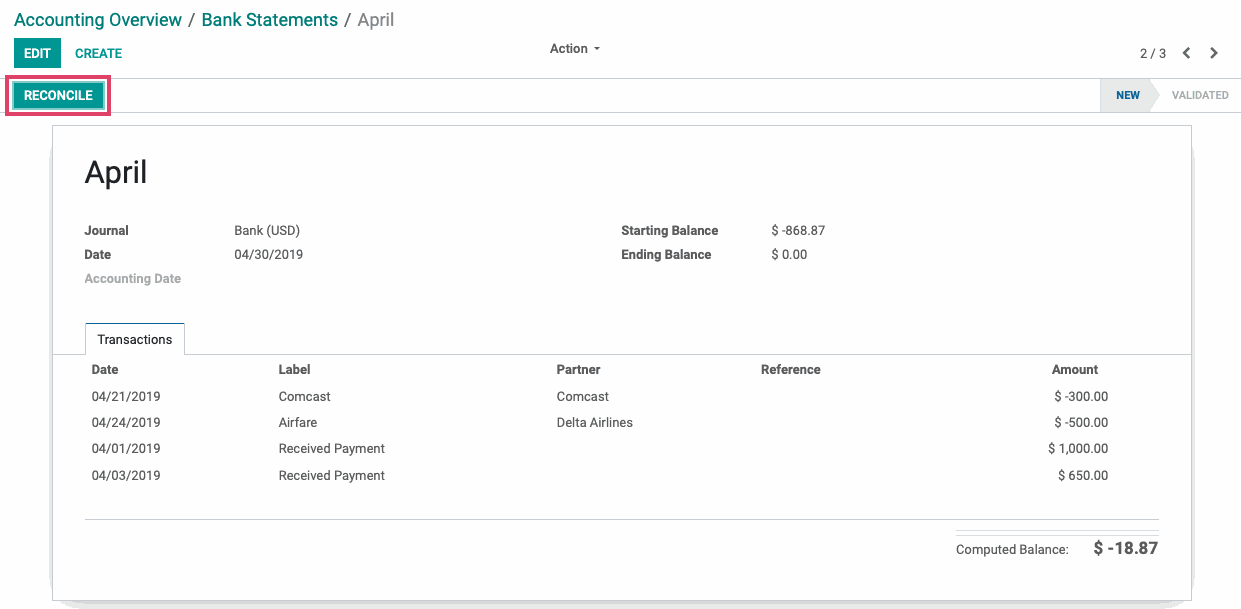
Each of the lines on your bank statement needs to be reconciled. When you select the entry that you are ready to reconcile, you will see that you have the ability to select a journal item to reconcile that bank statement line to.
You can filter your available journal lines by the partner name associated with the journal item, the invoice number, vendor bill number, or any other identifier for the journal item that you need to select.
In the below example, we filtered by the name of the partner and we can see the invoice that we sent the customer that accounts for the payment we have on our bank statement.

Once we select that invoice, it will be added onto our T sheet on the Credit side of the transaction and we will now be given the reconcile button to reconcile this entry.

If we click the Reconcile button, that entry will disappear from the page that we are on. If we go back to the bank statement, we will now see that bank statement line is reconciled as it is greyed out.
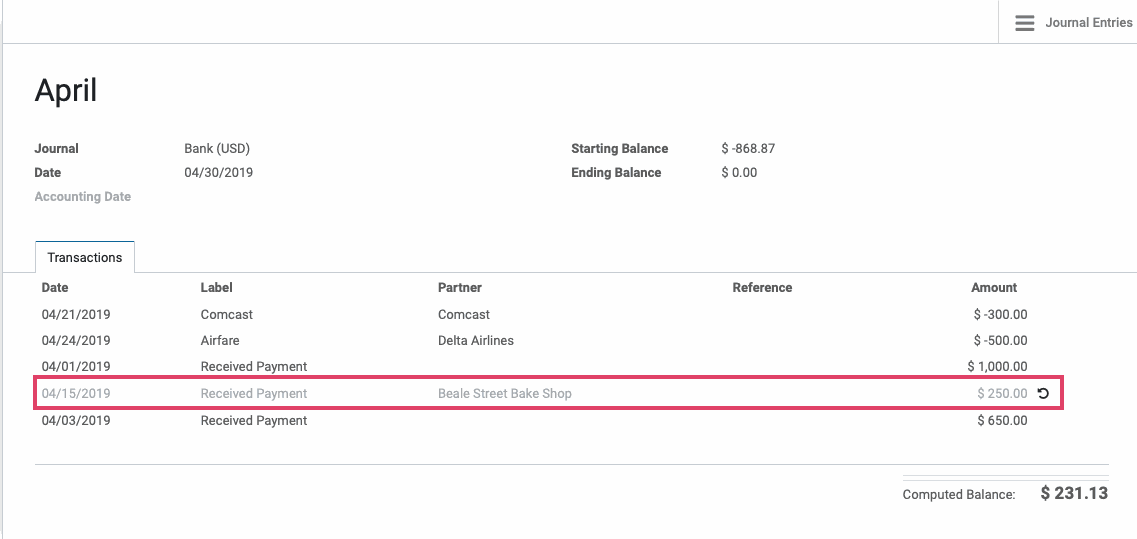
To unreconcile any reconciled bank statement line, you can do so by clicking the icon next to the reconciled line. This will unreconcile the line from the bank statement and allow you to re-reconcile that line to the appropriate journal item.
Good to Know!
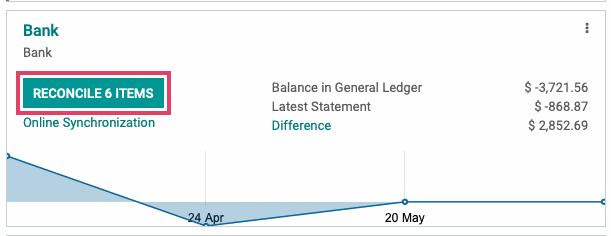
You can also access your reconcilable bank statement lines by clicking the Reconcile # Items button on the front of your bank's card from the Accounting Overview page.
Reconciling Via Payment Matching
This is similar to the bank statement reconciliation above, except in this example we are not reconciling a bank statement line to an invoice, we are matching an invoice to a payment that we have registered in Odoo. This gives us a record of what that payment was for, but doesn't have anything to do with a bank statement line.
To begin payment matching, we already have our customer invoice and payment created.
To get to your payments, navigate to Customer > Payments and select the payment that you want to payment match.
From the payment screen, we can see our Payment Matching smart button.
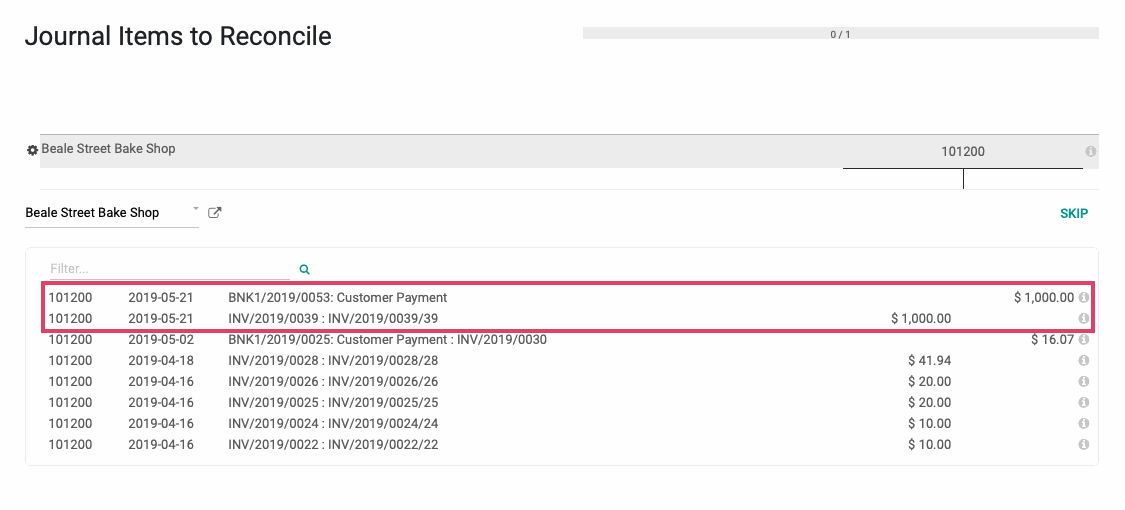
Once we select the Payment Matching button, we will see all of the reconcilable lines for this partner and a blank T Sheet. We just need to select the invoice and the payment that we are matching to one another and then click the Reconcile button that appears.

Manual Reconciliation
From your reconcilable bank lines view, locate the entry that you want to reconcile to an account. In the below example, we will reconcile a payment to a Utility provider from our bank statement to our Utilities Expenses account.
Once we have our entry located, we just need to select the drop down arrow which will show us the menu we need to choose our desired account and modify the entry details that we are preparing to reconcile the payment to.

Once we see the above menu, we can choose our account from the Account dropdown menu. Once we choose the account, the opposite side of the entry will automatically be entered into the T Sheet and we can select the reconcile button to reconcile this payment to our selected account.

Good to Know!
You can use a reconciliation model to manually reconcile bank statement lines to the correct account without needing to select it from the Accounts drop down menu.
See our documentation on Reconciliation Models for more information and details.
Partial Reconciliation
In the below example, we will be reconciling a partial payment to a vendor bill from Delta Airlines for airfare that we bought. On this bank statement, we have a $500 payment to Delta that we will be reconciling to the Vendor Bill for $1,000. This will leave a remaining balance of $500 on the Vendor Bill for us to rectify later.

Once we select the Vendor bill to reconcile the payment to we will see an exclamation point icon that will notify us that the payment we are reconciling the vendor bill to is less than the total amount.
If we want to close this invoice out for the full amount even though we've only paid a partial amount, we can reconcile this as usual by using the VALIDATE button that will appear.
We want to keep the vendor bill open and leave the remaining balance, so we will click the Exclamation point icon and then choose the reconcile button that appears.
Good to Know!
If you do not see the exclamation point icon on the line item you are trying to reconcile, remove the line item from the T Sheet and then re-add it for the exclamation point to appear.
Once you click the exclamation point, the amount on the line will change to match the counterpart that you are reconciling the entry to.


Once the amounts match, click the Reconcile button to reconcile the entries.
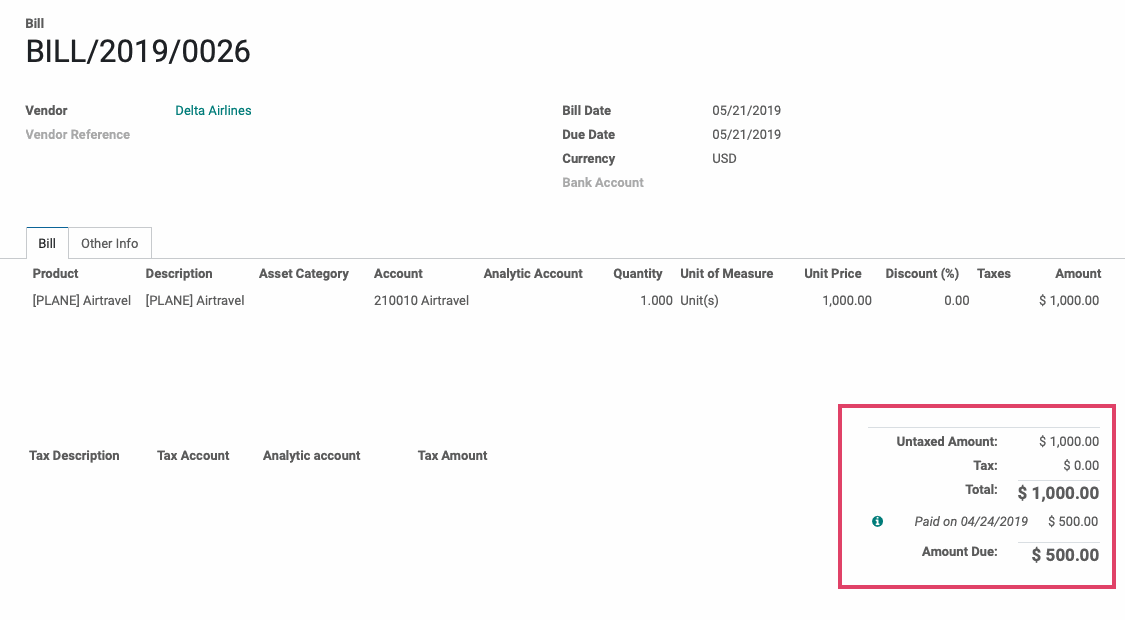
Now, if we go to the vendor bill that this reconciliation has taken place on, we will see that we have a $500 payment that's been applied and a $500 remaining balance.
Reconciling Multiple Lines
There will be instances where you will need to reconcile multiple journal items to a single bank statement line. These reconciliations work the same the way as when you are only reconciling one line to another.
You simply locate the journal items that you want to reconcile the bank statement line to, add them all to the T Sheet, and then
click Reconcile once they are all selected.

Cancelling Reconciled Payments
If you have reconciled a payment and need it unreconciled for any reason, you can do so with just a few steps.
Start by locating and selecting the payment that you want to unreconcile. Once you have that payment selected, click on the Journal Items smart button at the top right of the payment.

This will show you all of the journal items associated with that payment. Click the checkbox at the top left of the journal items; this will select all of the items. Once they are all selected, click the Action menu that will appear and choose Unreconcile Entries from the dropdown menu.

This will unreconcile all of the journal items associated with the payment. Use your breadcrumbs at the top left of the page to go back to your payment.

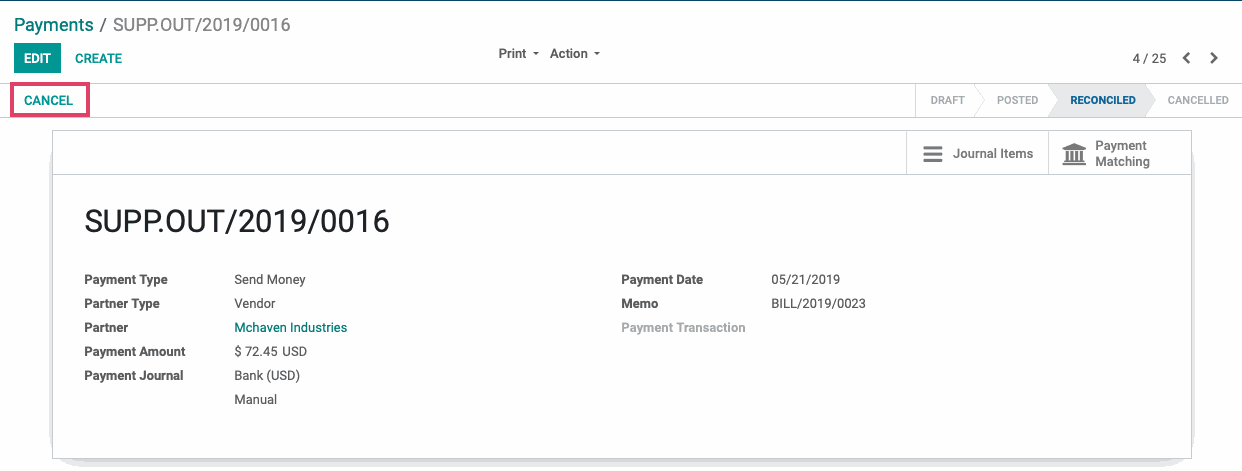
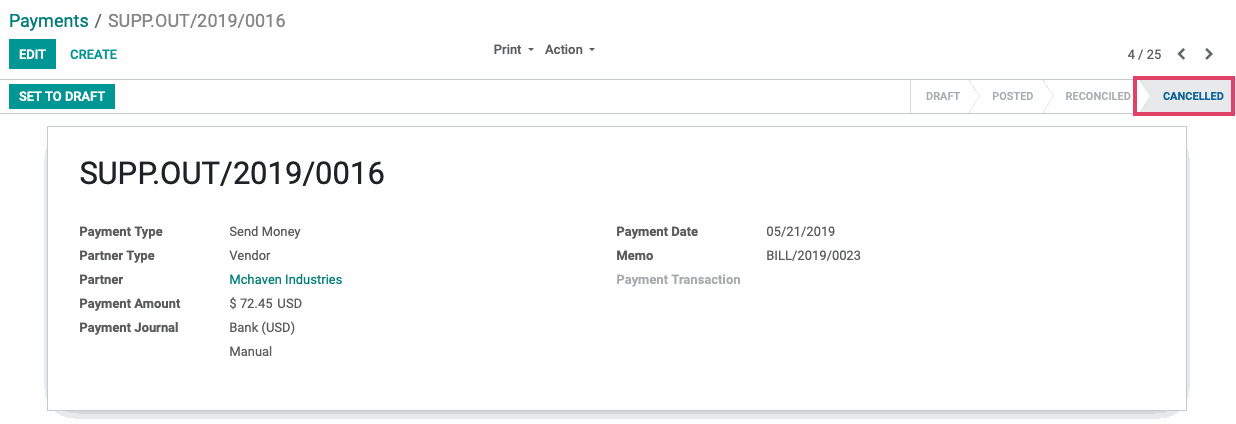
Once on your payment, you will now see a cancel button at the top left of the screen. Click the cancel button and your payment's status will be set to Cancelled.
Good to Know!
Once you cancel a payment you also have the option to Set to Draft. Clicking this button will allow you to set the payment back to a draft state so that you can make any needed changes to the payment before re-posting and re-reconciling it.